Creating a campaign is easy with Robly’s campaign builder. You have the flexibility to select what type of campaign you want to send out, choose who you ‘re going to send it to, and pick either a pre-designed template, an empty layout, or upload your own template to edit content in our one-of-a-kind Drag-and-Drop Editor.
All of our templates are mobile responsive!
Create a Campaign
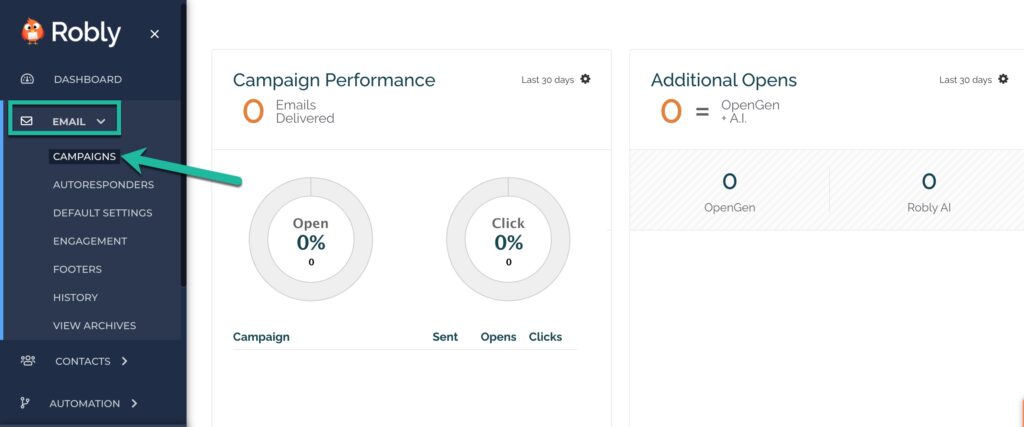
1. From your Robly Dashboard, click Email > Campaigns.
2. Click New Campaign +.
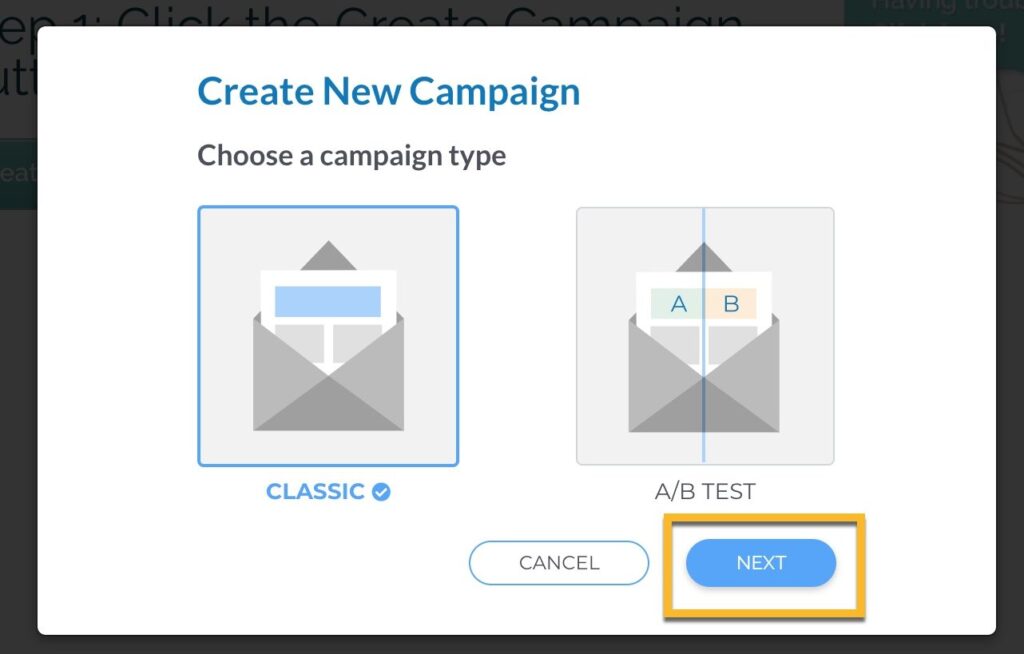
3. Choose between Classic and A/B Test for your campaign type. A/B Test is for when you want to test different versions of the campaign. Then, click Next.
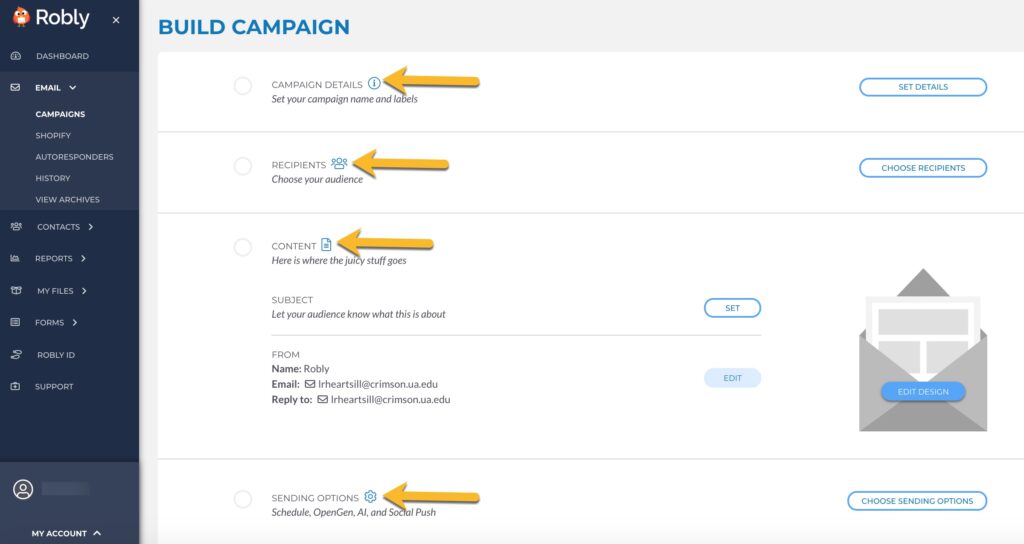
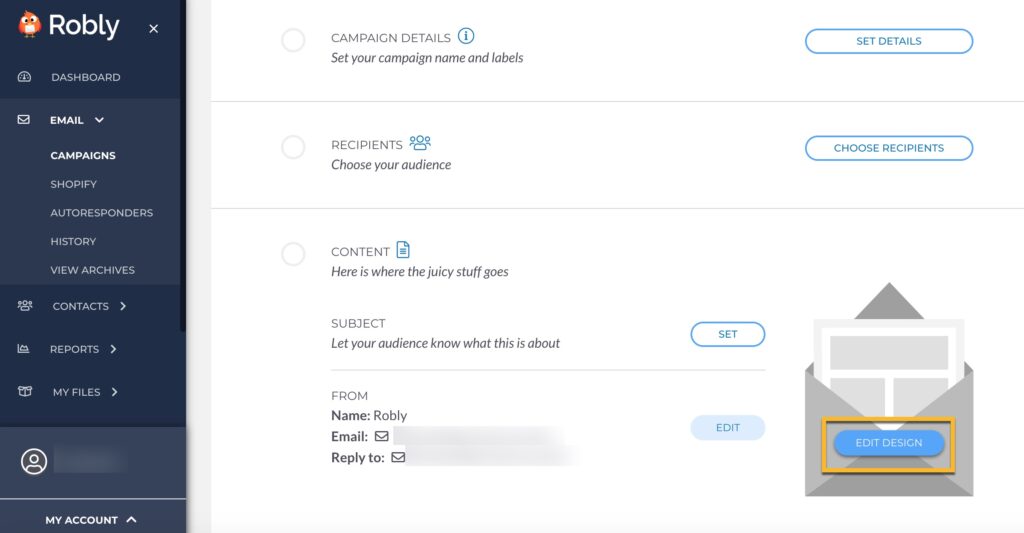
4. You will be taken to the Campaign Builder. This is where you can set your Campaign Details, Recipients, Content (subject line, preview text, and From information), and Sending Options (Schedule, OpenGen, AI, and Social Push).
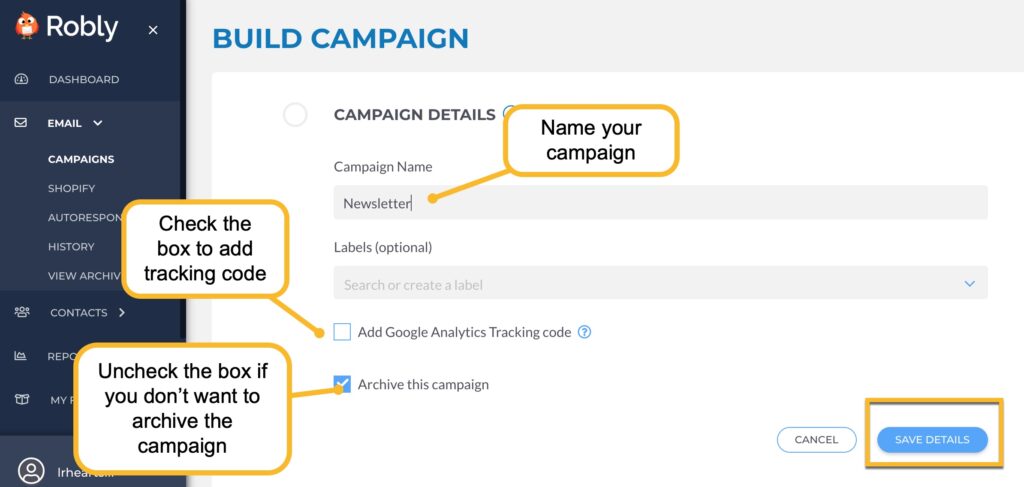
CAMPAIGN DETAILS. Give your campaign a name (only you will see the Campaign Name) by clicking Set Details. You can also create a Label or use an existing one in the Labels box. If you want to add a Google Analytics Tracking code, this is where you would do that, as well. You can also choose to Archive this campaign. Click Save Details when you’re finished.
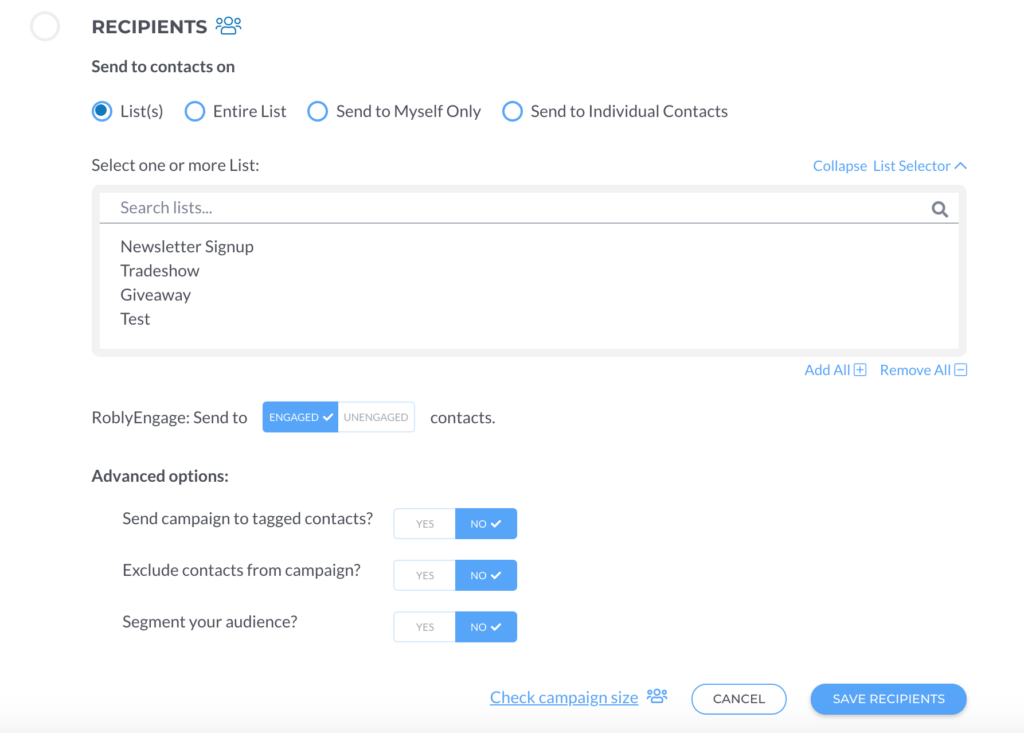
RECIPIENTS. Click Choose Recipients to set who the campaign will be sent to. Under Send to contacts on, you can choose to send to a List(s), Entire List, Send to Myself Only, or Send to Individual Contacts. To select a list(s), type the list name in the search box and then click the name to add it. This is also where you can use RoblyEngage to Send to engaged/unengaged contacts.
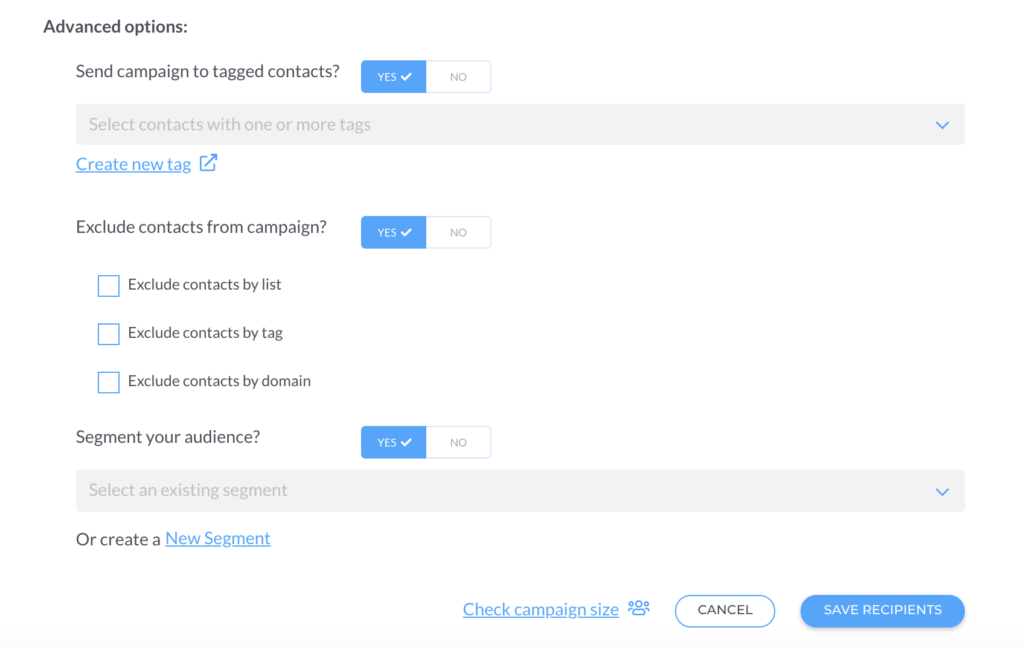
You can use the Advanced options to Send campaign to tagged contacts, Exclude contacts from campaign, and/or Segment your audience. Toggle the Options to Yes to pull up more information. When you’re finished, click Save Recipients.
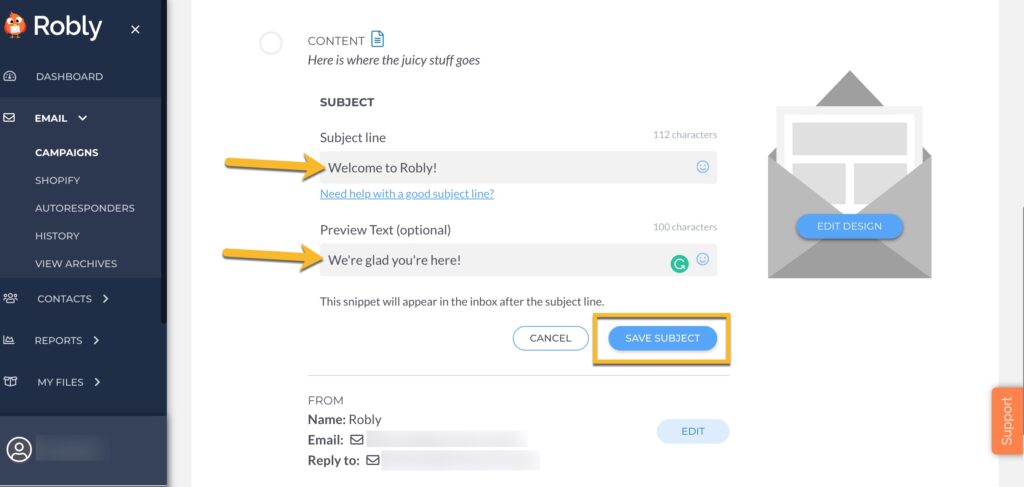
CONTENT. Click Set next to the Subject Line. Then, add the Subject Line and optional Preview Text, which will appear in the inbox after the subject line. Click Save Subject.
You’ll also need to add the From Name, and set your From and Reply-to email addresses (if the Reply-to address is different). You can choose whether or not to use Branding. If you Create a New Brand, it will save your work and take you to a new screen. Once you’re finished, click Save From.
Tip: Make sure you don’t put an email address in the “From Name:” field because SPAM filters are more likely to snag your campaign. Type in a business name or your real name.
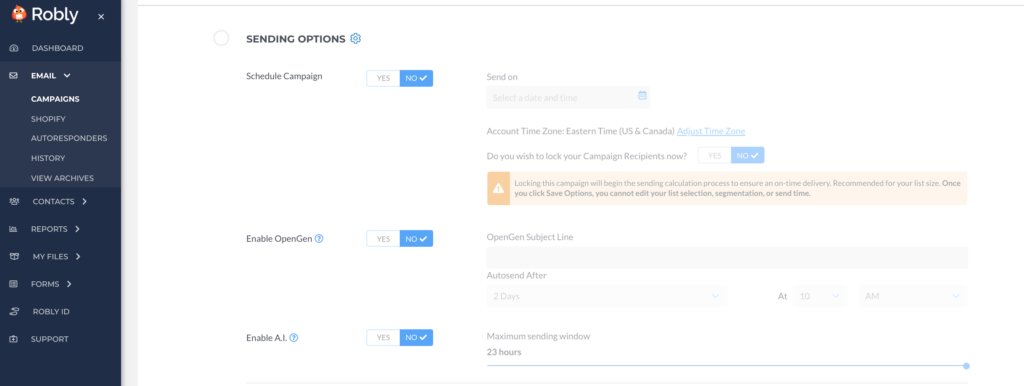
SENDING OPTIONS. Click Choose Sending Options next to Sending Options. Choose if you want to schedule your campaign for a later date/time and also if you want to Enable OpenGen and/or Robly AI.
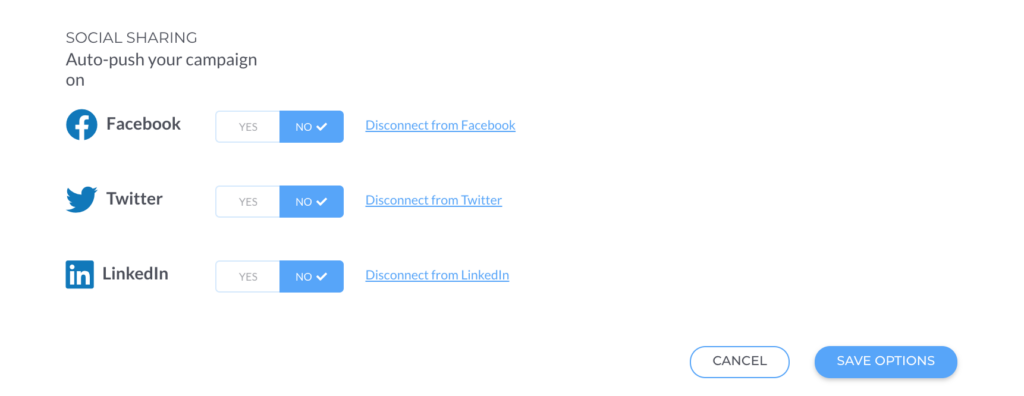
You can also choose to autopush your campaign to Facebook, Twitter, and/or LinkedIn with Social Sharing. To connect to Facebook, you *will* have to log in via your personal page. This will then pull up your personal page as well as any pages you are Admin of. You will then have the option to post or not post to any of those pages. Click Save Options when you’re finished with the Sending Options.
You can come back to all of these sections after you edit/create your design.
5. When you’re ready to work on the email design, click Edit Design.
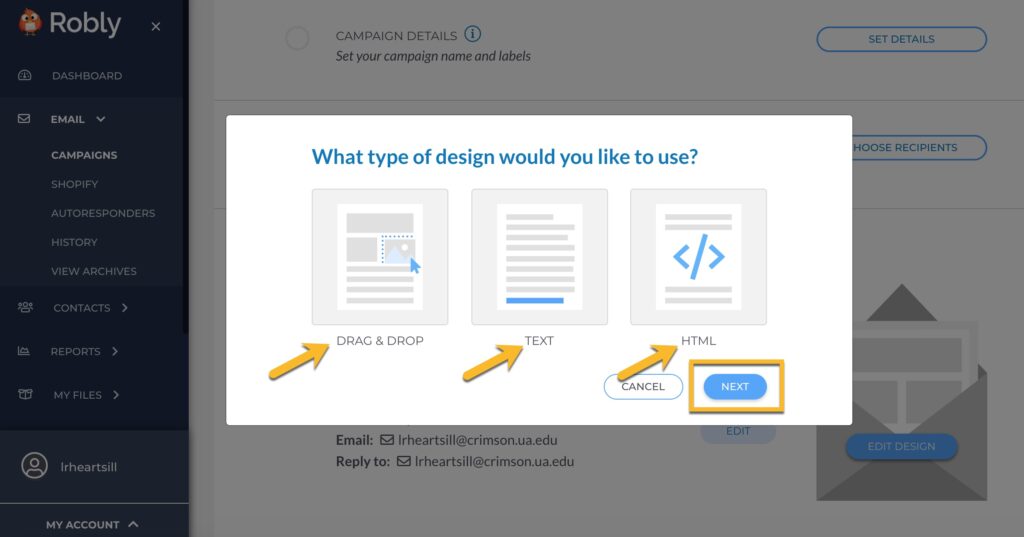
6. You’ll then be asked what type of design you’d like to use. Drag & Drop is where you’ll find all of our pre-designed templates, Text is for a plain text-only campaign, and HTML is if you have your own, custom HTML to import. Choose an option and click Next.
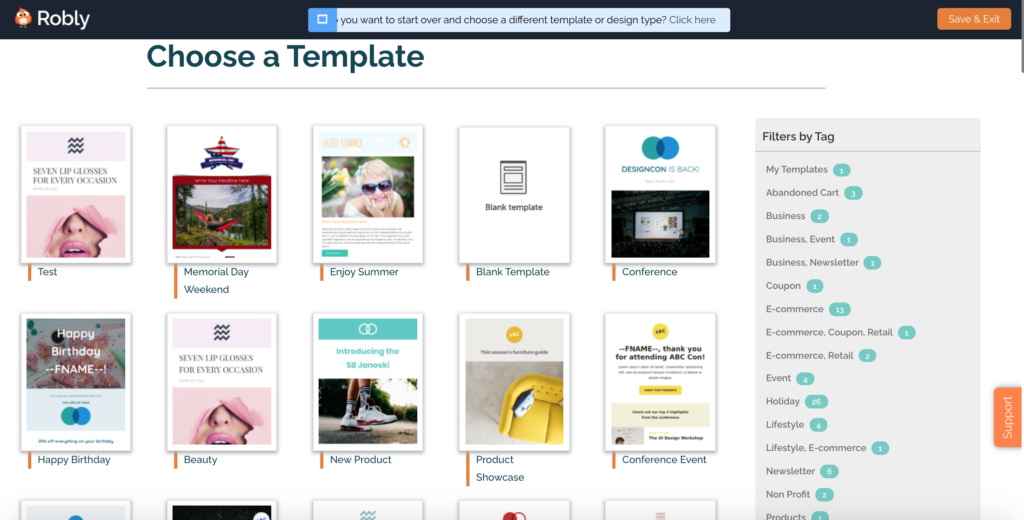
DRAG & DROP. If you choose Drag & Drop, you will be asked to Choose a Template. Scroll through the options, or click Filters by Tag on the right to narrow your search. After you’ve chosen a template, you will be taken to the Drag & Drop design page. Find more information on the design page below.
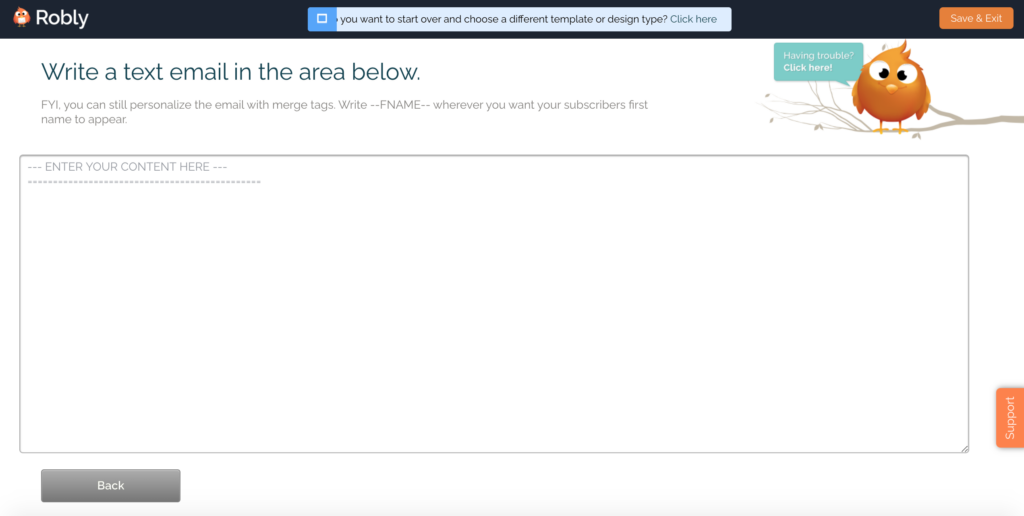
TEXT. With the Text option, you will be given a box to type your email text in. Click Back when you’re finished.
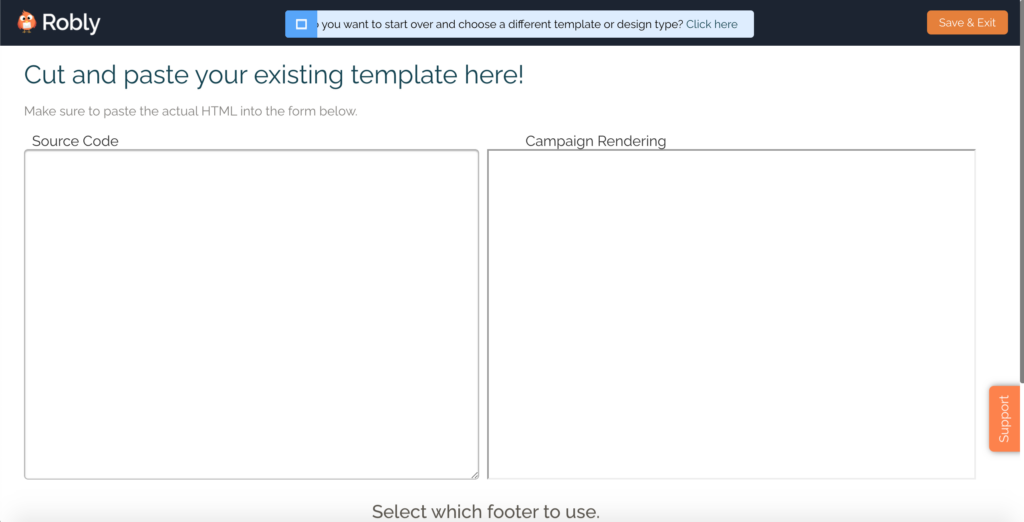
HTML. Paste your HTML code into the Source Code box, and you will see how it appears in the Campaign Rendering box. You can also choose which footer to use at the bottom. Click Save & Exit when you’re finished.
Remember: You can start over and choose a different template or design type by clicking the Click here text in the blue box at the top. However, if you change templates, you may lose some or all of your content.
How to design in Drag & Drop Editor
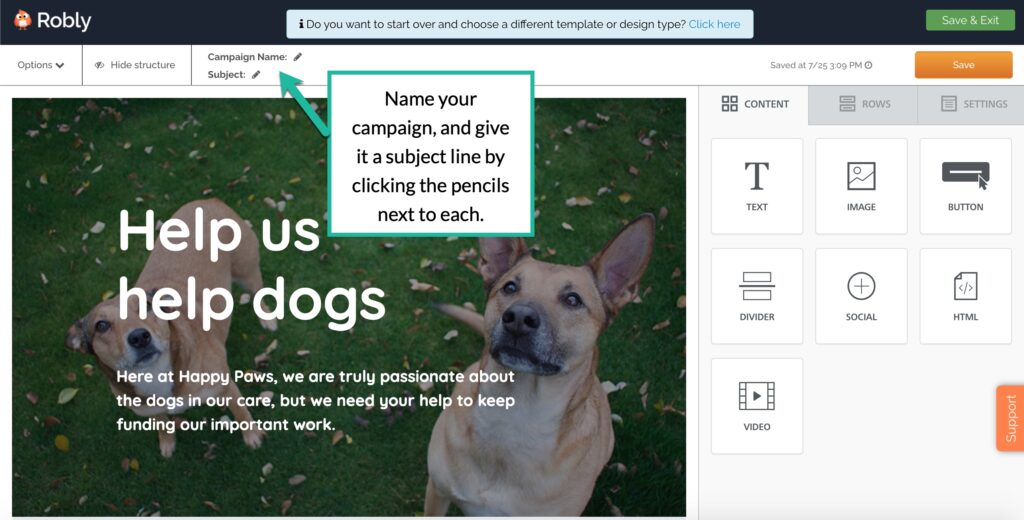
This where the magic happens. If you haven’t already, create a Campaign Name and Subject line by clicking the pencils next to each.
Tip: If at any point you’d like to hop out of your campaign before completing all of the steps, just click the Save & Exit button in the top right-hand corner. Don’t forget to click the Save button as you are working!
Note: There are no longer anchor Tags or a Table option with the Drag & Drop designer.
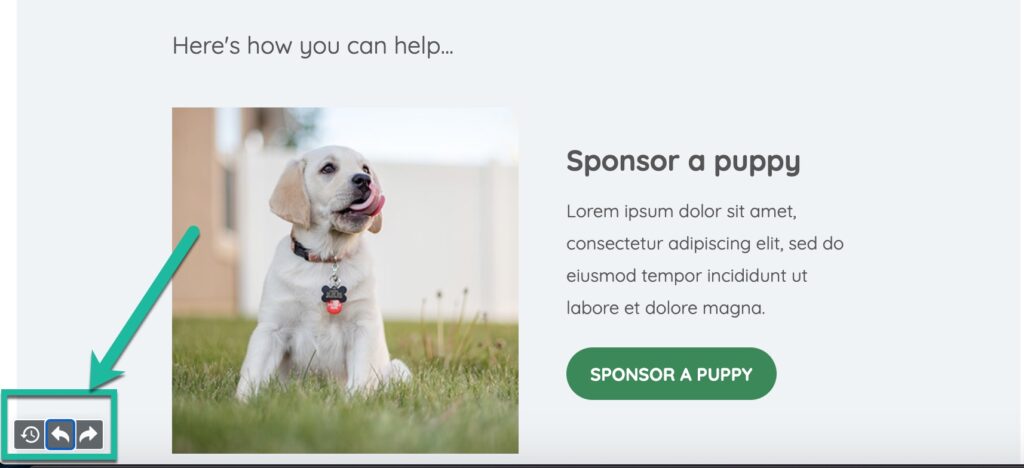
History
To view your edit history or undo/redo an action, click the icons in the bottom left corner for each.
Content
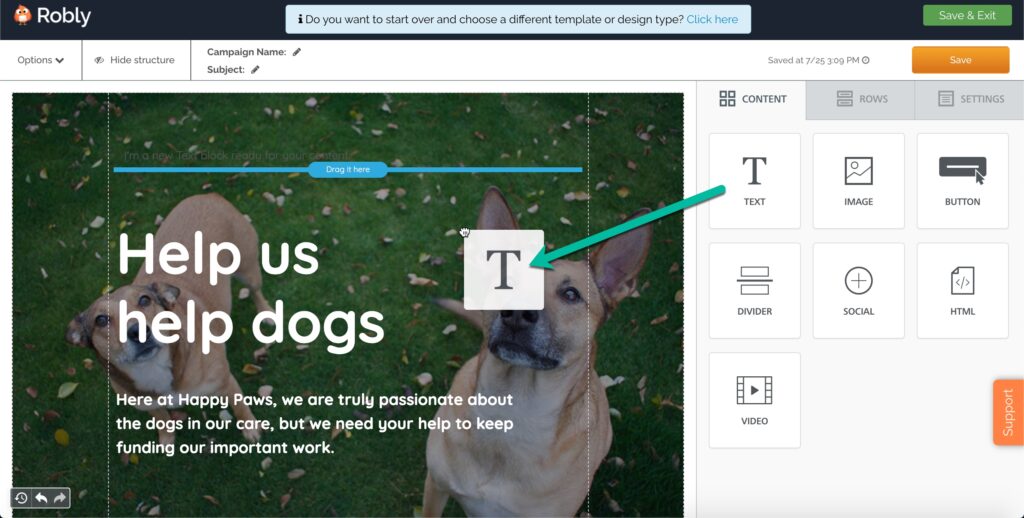
This is where you can add your Text, Image, Button, Divider, Social, HTML, and Video. To add any of these elements, drag and drop them onto the design.
TEXT. After dragging a Text box to your design, you will be able to type your text and change the font, add links, Merge tags, etc. You can also delete a Text box by clicking the Trash can or duplicate it by clicking the Copy icon. One note: Text no longer wraps around images.
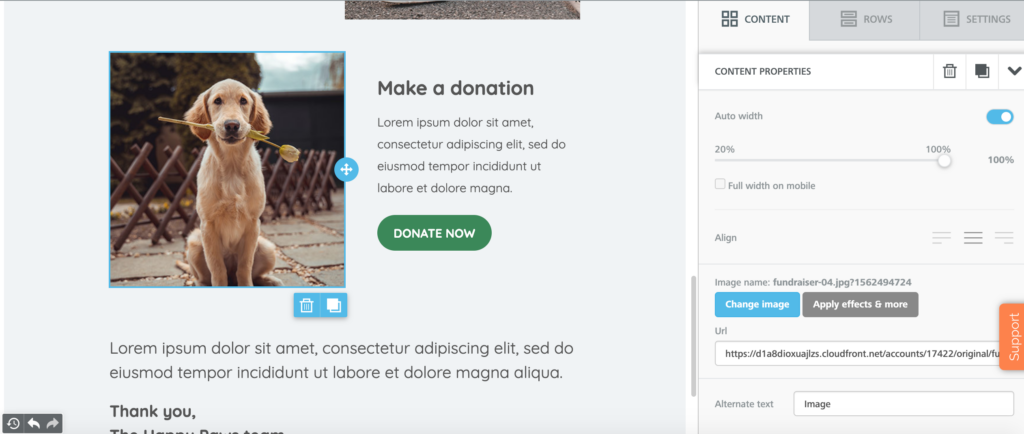
IMAGE. You can upload, import, or browse free images after dragging the Image box to your design. If you click on your Image, you will be shown Content Properties on the right-hand side, including its width, alignment, ability to change the image, add alternate text, include an image URL, and block options.
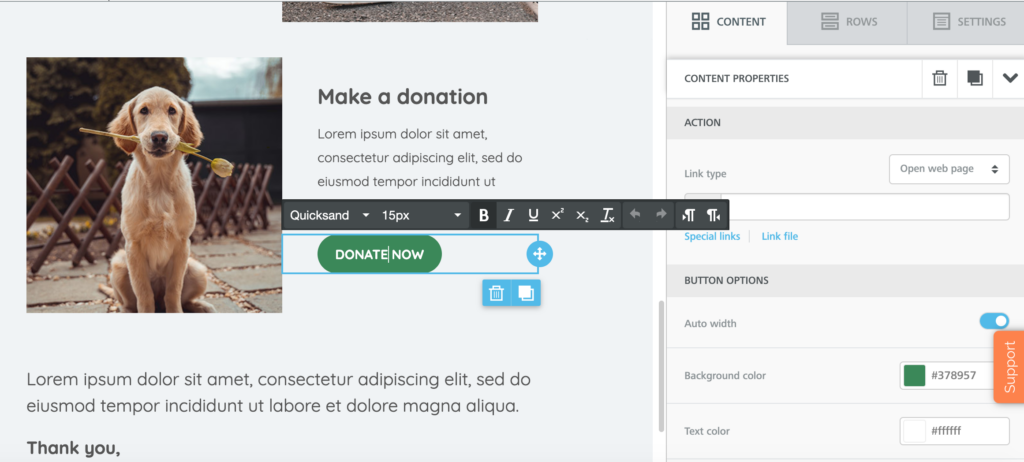
BUTTON. Make your CTA stand out with a Button. In addition to adjust the button’s text and font, you can also set its Content Properties: link type, width, background color, text color, alignment, line height, border radius, content padding, border, and block options.
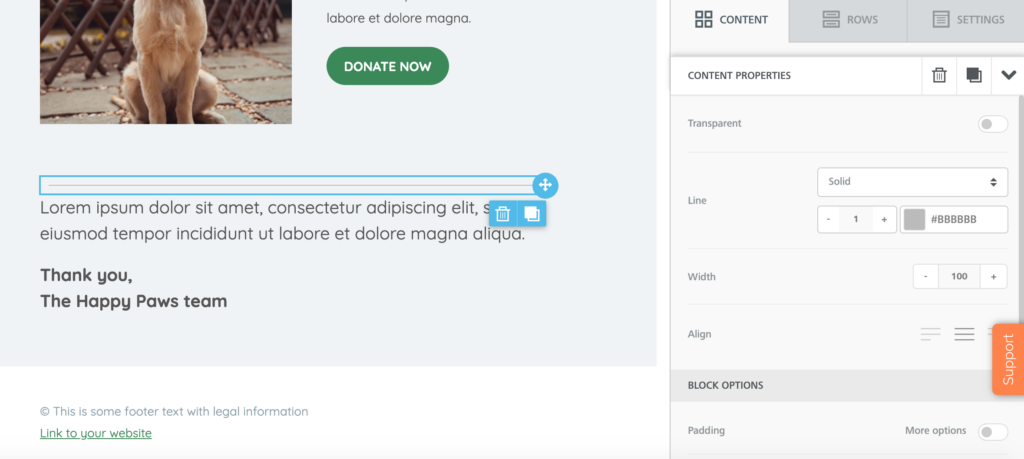
DIVIDER. You can use a Divider if you want to section off parts of your design. Set its transparency, line appearance, width, alignment, and block options under Content Properties.
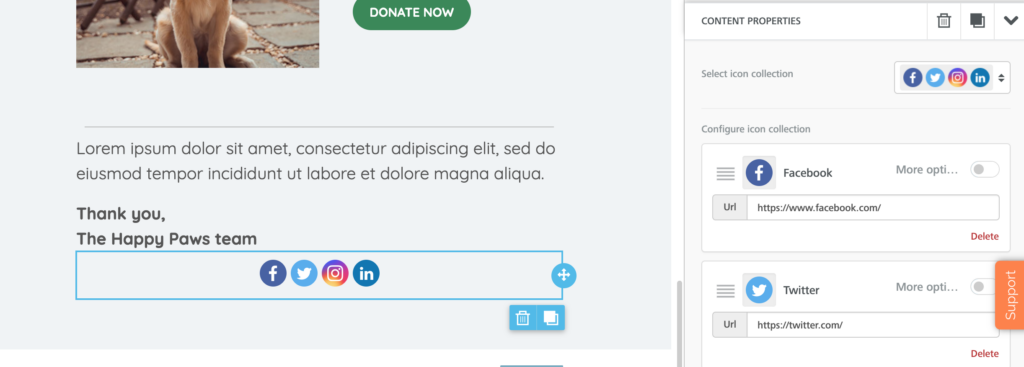
SOCIAL. Place your social icons in the design. Click the social icons you dragged to pull up the Content Properties. You can select which icons you want to use, add your social URLs, adjust the alignment, icon spacing, and block options.
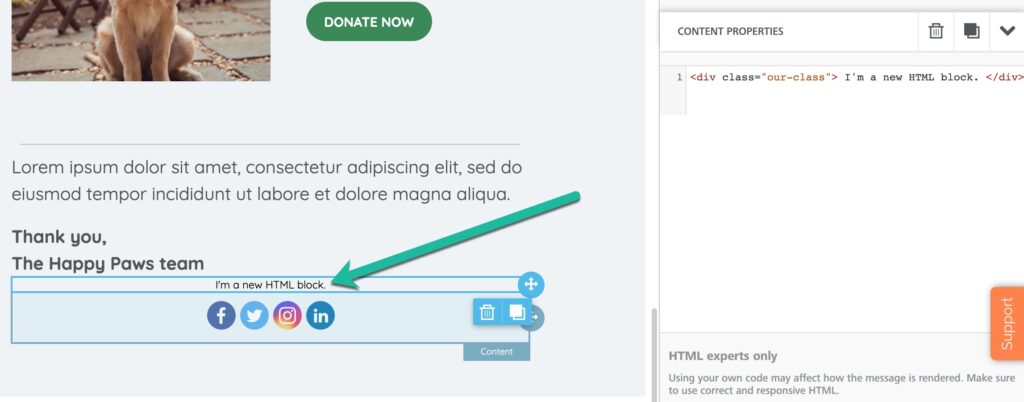
HTML. If you’re an HTML expert, you can add in code in the Content Properties box. You can also control if it will appear on desktop/mobile.
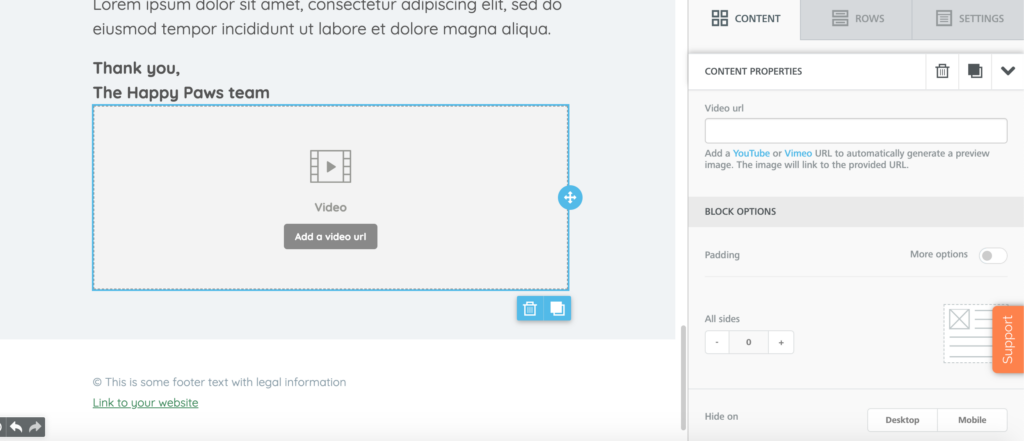
VIDEO. Add your video URL and set block options. For more help on adding a video, click here.
Rows
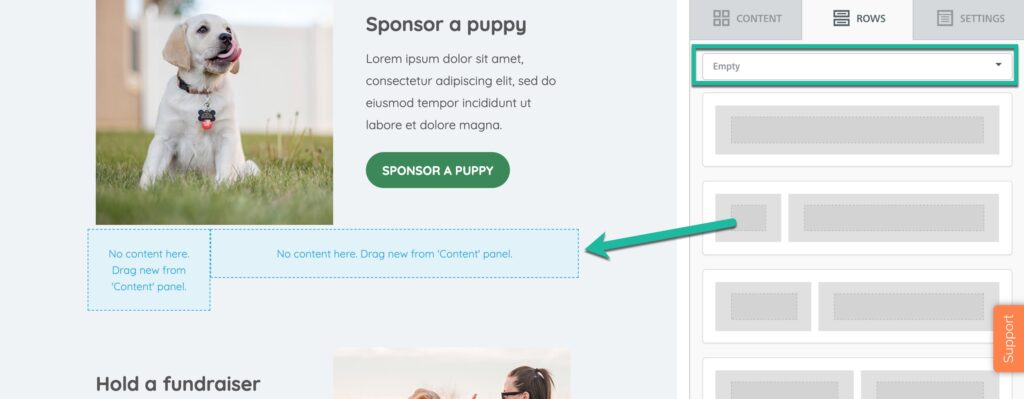
For Rows, you can choose Empty, Default, Headers, Body, Footers, Animated Blocks, or Create an Animated Block.
Drag the row layout you want onto your design. Then, toggle back to the Content tab, and drag an element into the row, such as Text, Image, Button, etc. Note: You can’t add a row inside of another row.
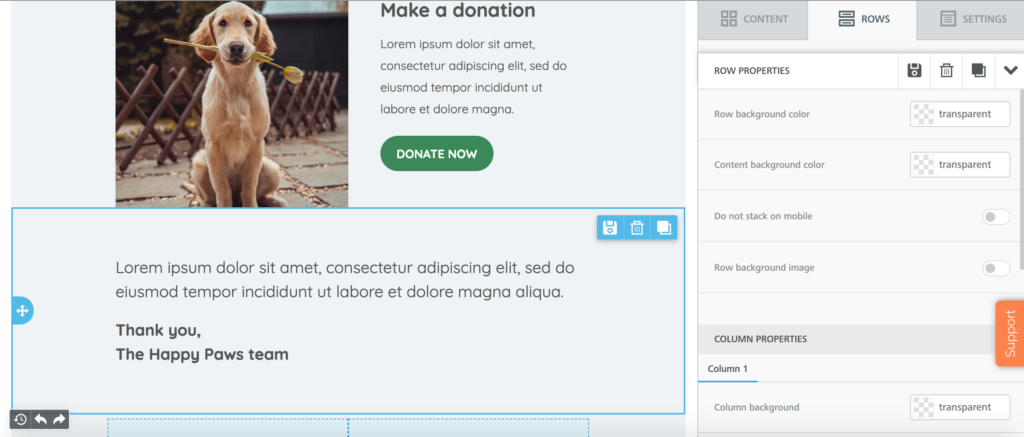
You can adjust the Row Properties by clicking into a Row. This will allow you to control the Row background color, content background color, whether or not it stacks on mobile devices, Row background image, and column properties.
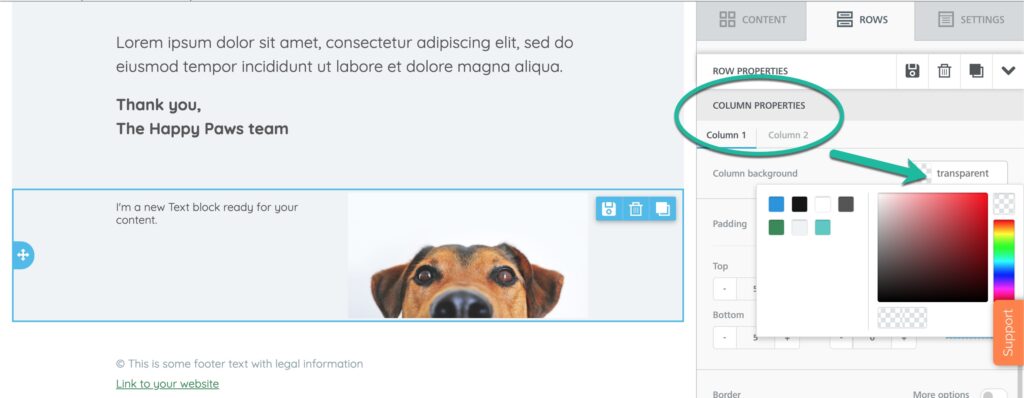
If you want to change the background color of the columns in your Rows, click the Row you want to edit. Then under Column Properties, click the column (Column 1 or Column 2) you want to change the background color on. Click the color box next to Column background to pull up the color palette options. Selecting a color will change the background for the selected column.
You can also adjust the Padding and Border for each column under Column Properties.
Settings
Use the Settings section to update things like background color, global font choice, background colors, and link colors of different elements.
Options
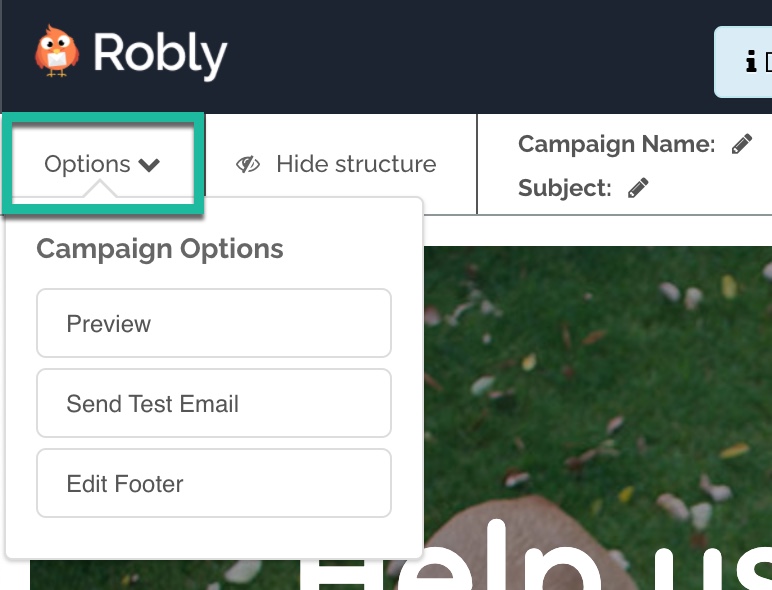
Click Options in the top left to Preview the campaign, Send Test Email, and Edit Footer.
Hide/Show Structure
Click this icon to hide or show the structure lines in the design.
Done with your design?
When you’re finished designing, click Save & Exit in the top right corner. This will take you back to the Build Campaign screen. Fill in any section that was left blank. You’ll see green check marks next to each section when it’s complete. When you’re ready to send or schedule the campaign, click Send/Schedule Now. Or, Send Test.
Have questions? Message us on chat, or email support@robly.com!
