Tags are when you add labels to your contacts so you can provide them with more targeted information. Think about them as sub-categories to lists.
Some Tag options include the contact’s interests, birthday month, location, VIPs, unengaged or where you met them. A Tag can be anything that helps you better identify your subscriber.
Once you’ve added Tags to your contacts, you can choose which Tag categories you want to reach with your next email campaign or automation.
How to create a Tag
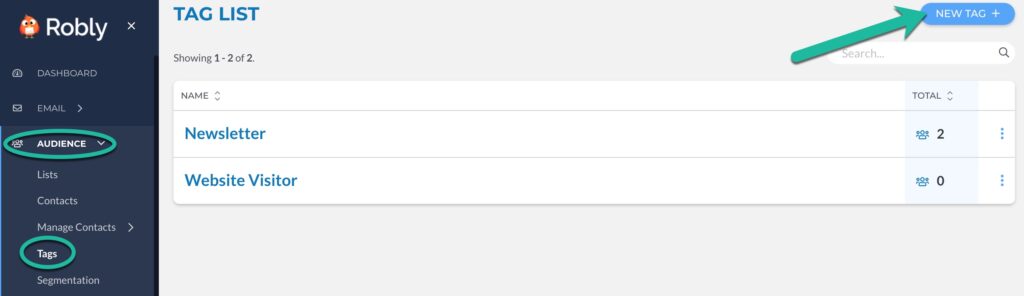
1. Click Audience > Tags from the left navigation. Then, click New Tag.
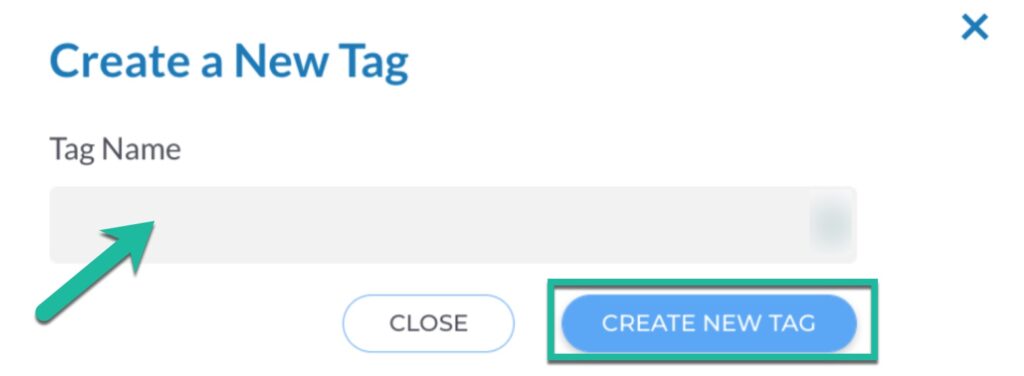
2. Give the Tag a name, and click Create New Tag.
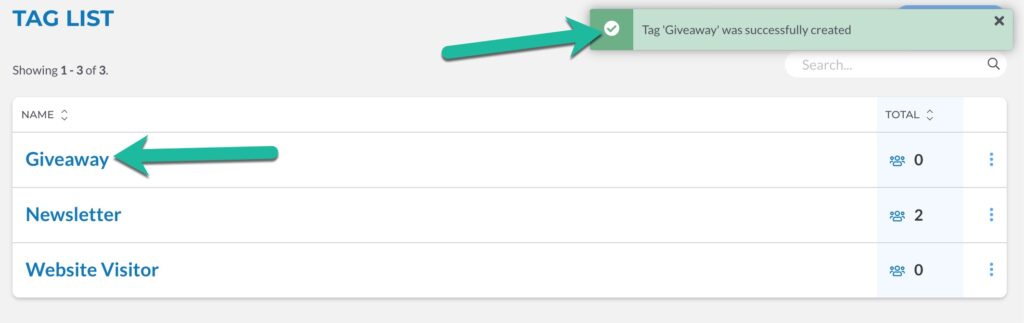
3. You will see a confirmation message that the Tag was successfully created. Click the name of the Tag to view it.
How to add Tags to contacts
You can Tag your contacts in bulk when you import them into Robly.
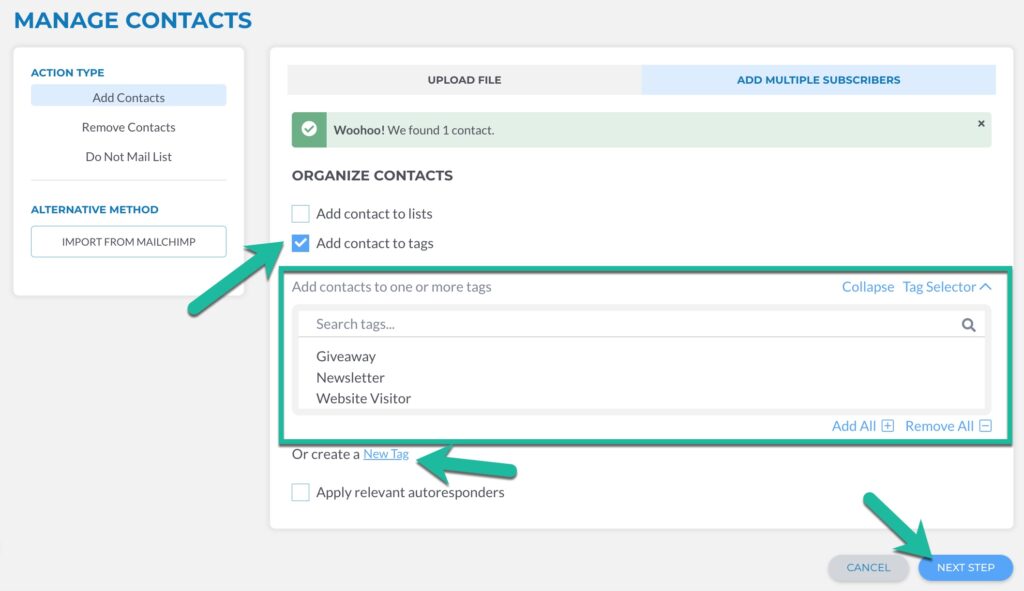
1. Click Audience > Manage Contacts > Import Contacts from the left navigation. Then, upload either a CSV file or Add Multiple Subscribers. When you’re finished, click Next Step.

2. Click Add contact to tags. Either choose a current Tag(s) to add to the imported contacts, or click New Tag. Once you’ve chosen your Tag(s), click Next Step.
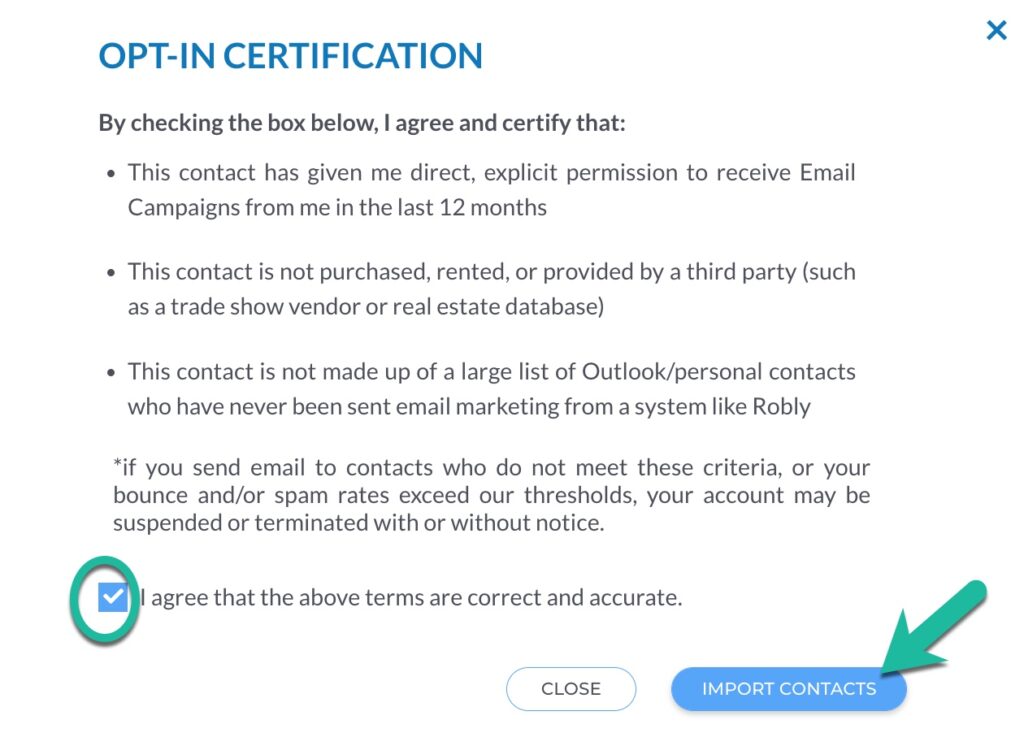
3. After you read the opt-in certification, check the box that you agree to the terms and click Import Contacts.
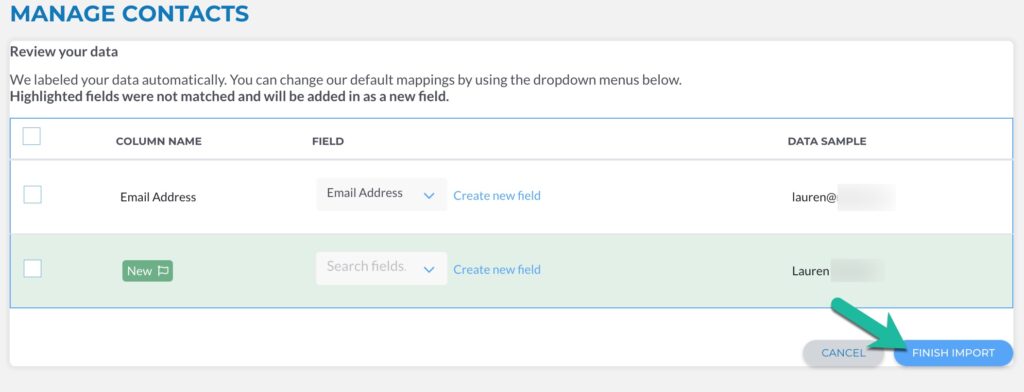
4. If you want to adjust the default mapping, this is where you can do so. Once it’s correct, click Finish Import.
5. This screen will appear to show you the import is in the queue.

How to add a Tag to one contact
There are two ways to add a Tag to a single contact.
OPTION ONE
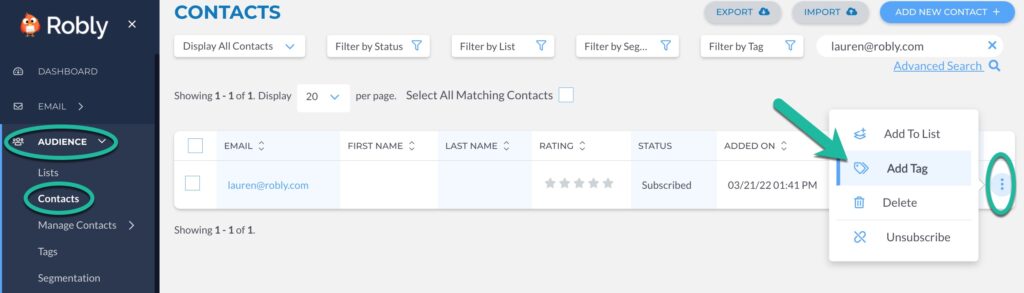
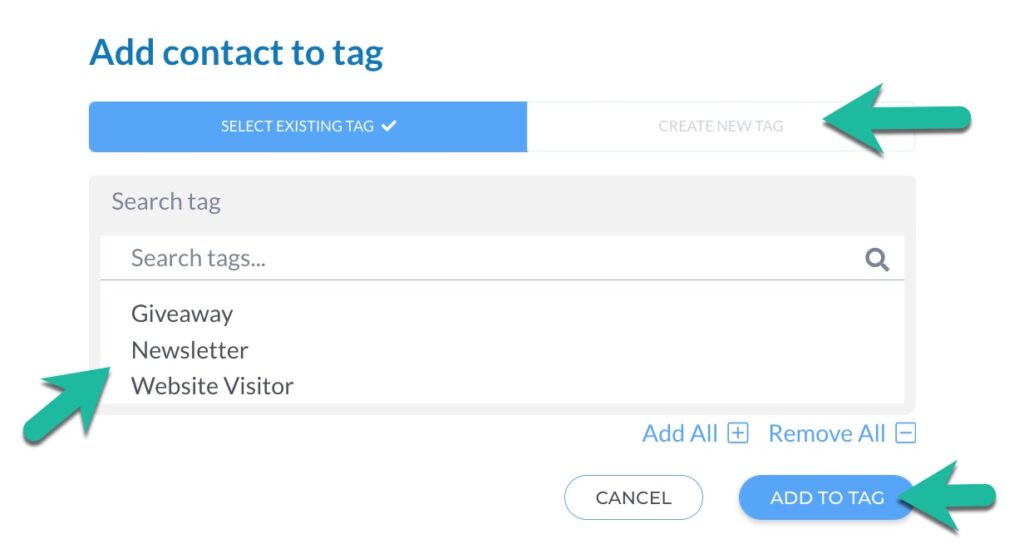
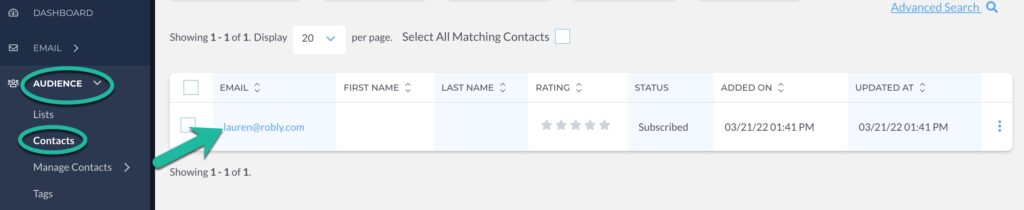
1. Click Audience > Contacts from the left navigation. (You can also locate the contacts by going to Lists and choosing the contacts there.) Search for the contact you want to add a Tag to. Click the options dots next to the contact, and click Add Tag.
2. Choose from an existing Tag, or Create New Tag. Click Add to Tag.
OPTION 2
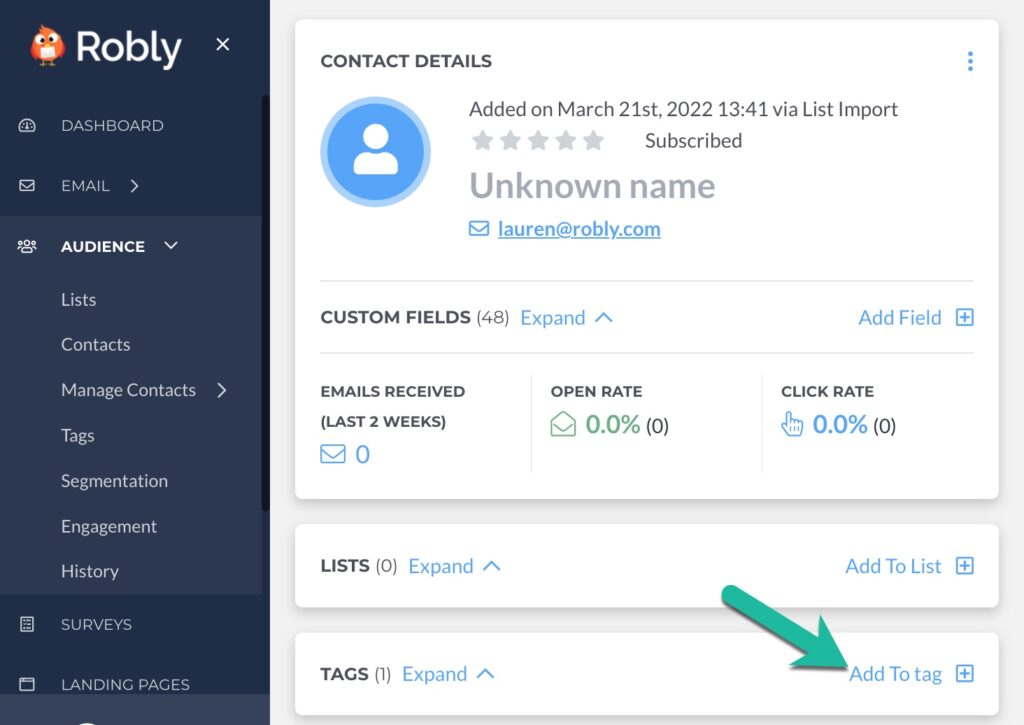
1. You can also add a Tag to an individual contact by clicking on the contact’s name/email address.
2. Click Add To Tag.
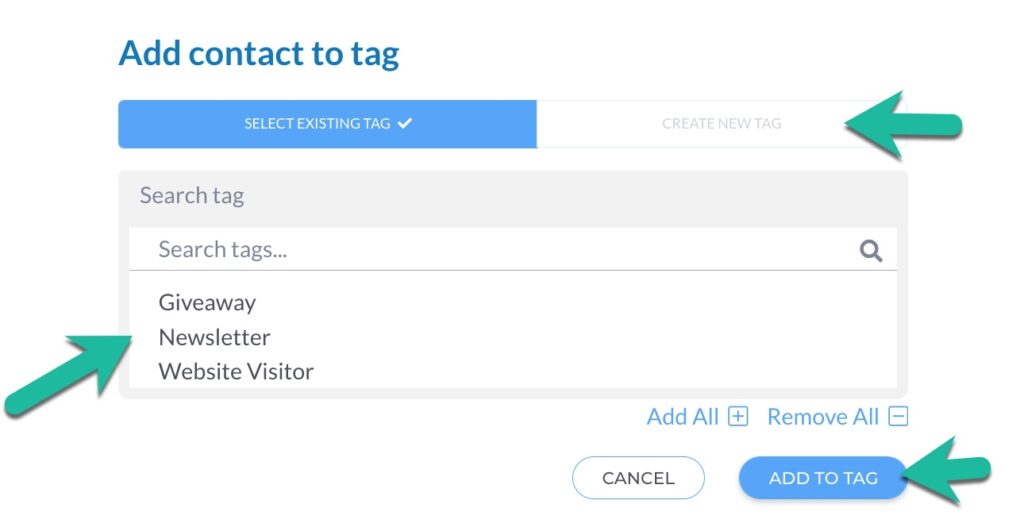
3. Choose the Tag (or click Create New Tag), and click Add to Tag.
How to clear Tags
To remove a specific Tag from your contacts without deleting the Tag from your account, you can clear the Tag.
1. Click Options > Clear.
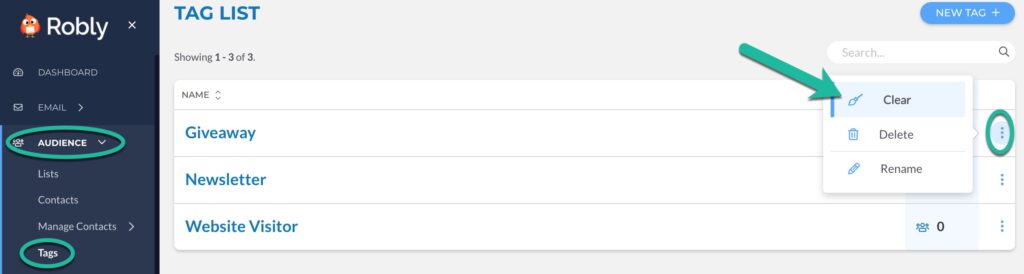
2. Click Clear Tag.
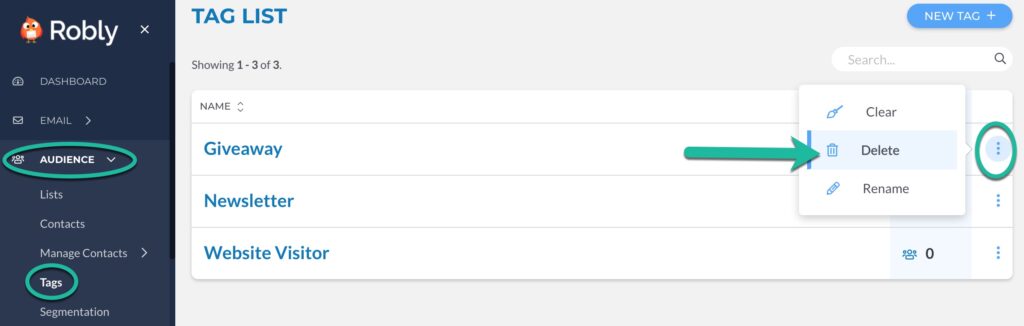
How to delete Tags
To remove a Tag from contacts and from your Tag list, you can delete it.
1. Click Options > Delete.
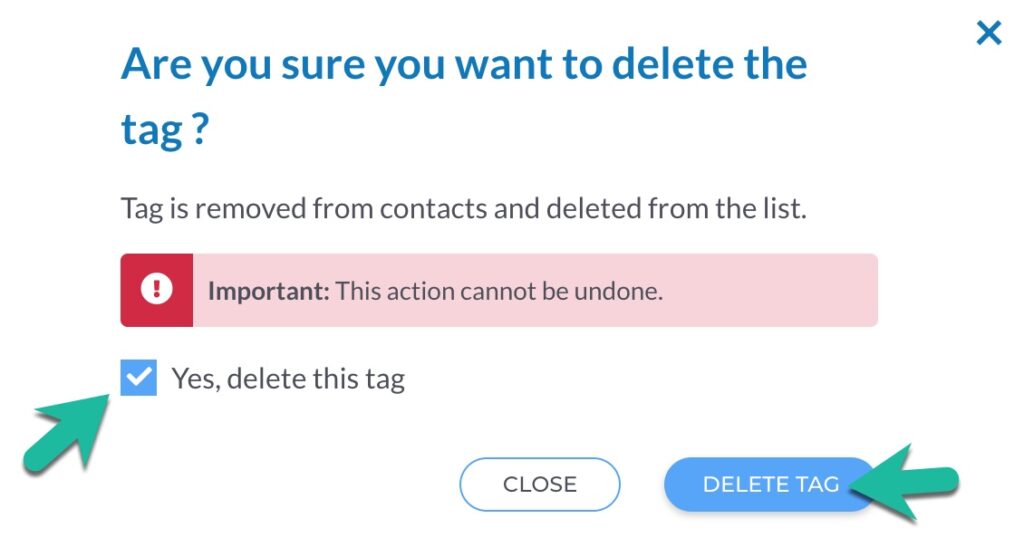
2. If you’re sure you want to delete the Tag, check the box next to Yes, delete this tag. Then, click Delete Tag. This action can’t be undone.
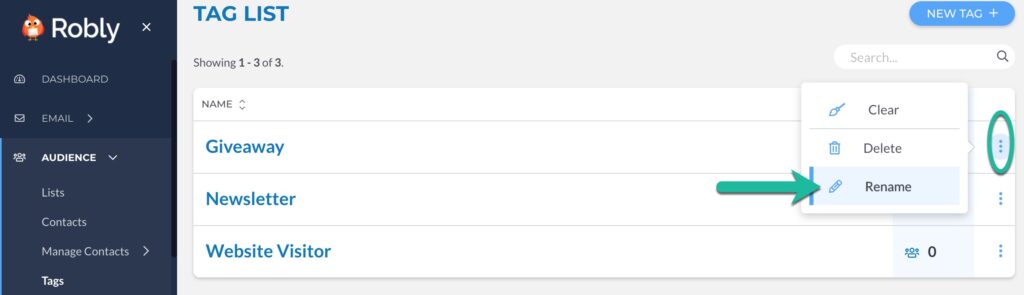
How to rename Tags
You can change the Tag name without affecting your contacts and automations.
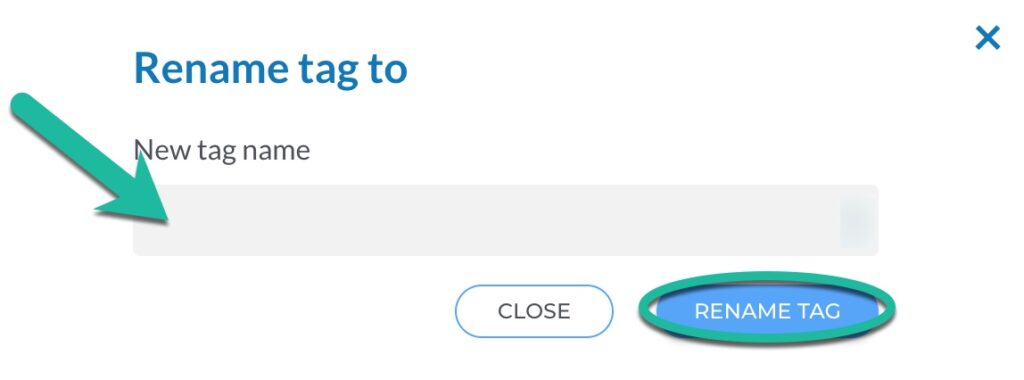
1. Click Options > Rename.
2. Enter the new Tag name and click Rename Tag.
How to send email to Tagged contacts
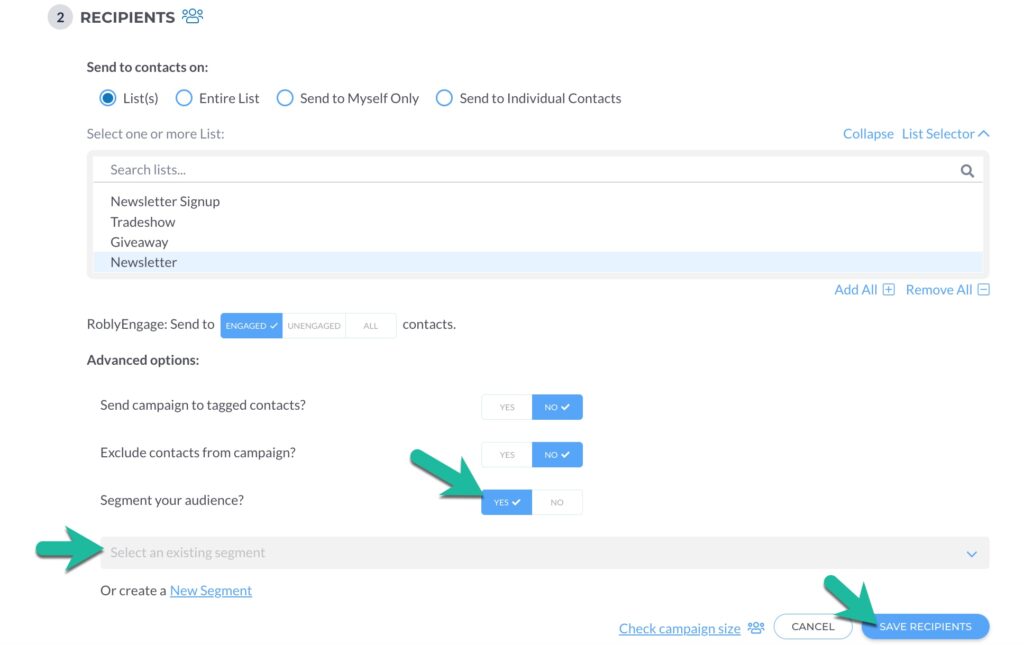
Now that you’ve created your Tag and added them to your contacts, you can start sending emails to those Tagged contacts. If you haven’t already, you’ll need to start by creating a segment for the specific Tag(s) you want to target and then apply that segment to the recipient list in the Campaign Builder.
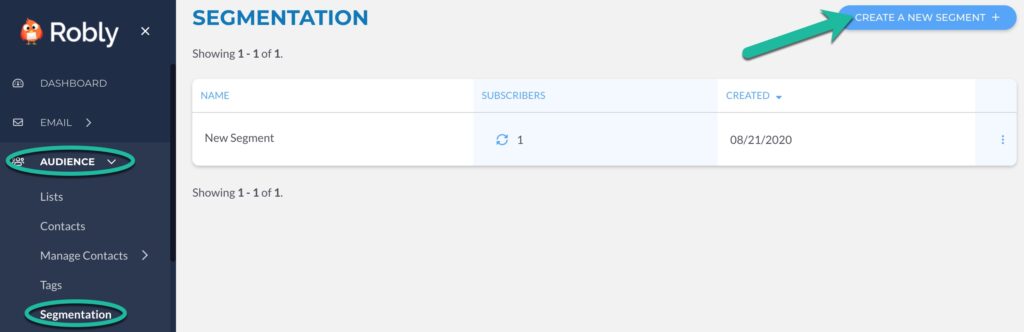
1. Click Audience > Segmentation. Then, click Create a New Segment.
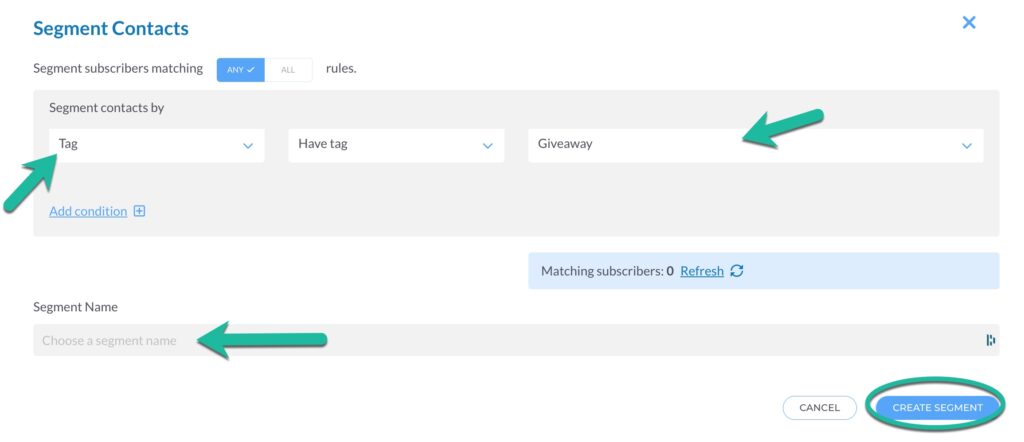
2. Choose Tag from the drop-down menu and then pick the desired Tag name from the menu on the right. Name your segment in the bottom box, and click Create Segment
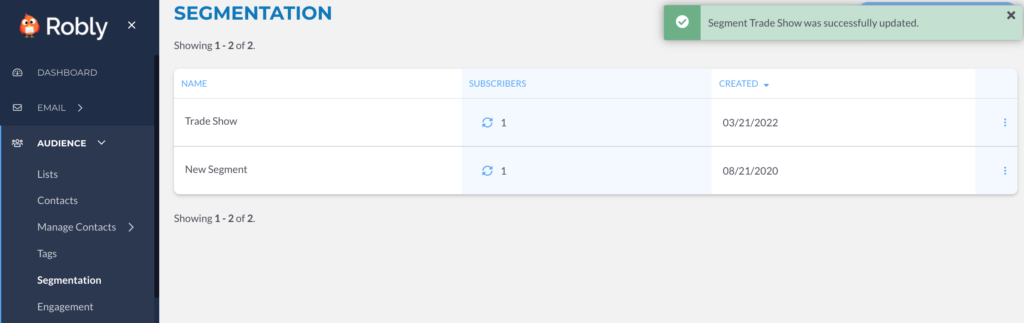
3. Your segmentation name will show up.
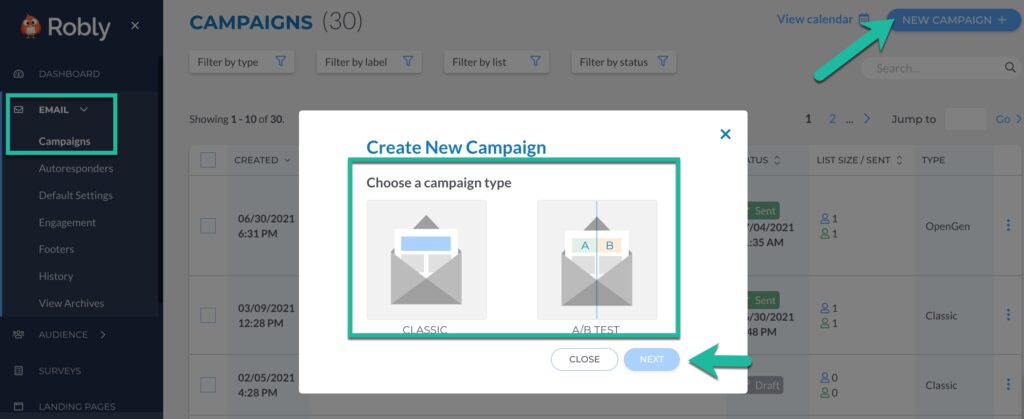
4. Click Email > Campaigns in the left navigation to build your campaign. Then, click New Campaign and choose either Classic or A/B Test from the pop-up box, and click Next.
5. Click Choose Recipients.

6. Click Yes next to Segment your audience and choose the segment you created from the drop-down. Click Save Recipients. That will send your campaign to your targeted Tagged contacts.