If you haven’t read up on the EU General Data Protection Regulation (GDPR), you may want to take some time to ensure that your current and future lists comply with these new laws.
These regulations will be enforced and in effect May 25, 2018.
To answer some Frequently Asked Questions, we are reposting this information directly from their website:
Who does the GDPR affect?
The GDPR not only applies to organisations located within the EU but it will also apply to organisations located outside of the EU if they offer goods or services to, or monitor the behaviour of, EU data subjects. It applies to all companies processing and holding the personal data of data subjects residing in the European Union, regardless of the company’s location.What are the penalties for non-compliance?
Organizations can be fined up to 4% of annual global turnover for breaching GDPR or €20 Million. This is the maximum fine that can be imposed for the most serious infringements e.g.not having sufficient customer consent to process data or violating the core of Privacy by Design concepts. There is a tiered approach to fines e.g. a company can be fined 2% for not having their records in order (article 28), not notifying the supervising authority and data subject about a breach or not conducting impact assessment. It is important to note that these rules apply to both controllers and processors — meaning ‘clouds’ will not be exempt from GDPR enforcement.What constitutes personal data?
Any information related to a natural person or ‘Data Subject’, that can be used to directly or indirectly identify the person. It can be anything from a name, a photo, an email address, bank details, posts on social networking websites, medical information, or a computer IP address.
If you collect and send email to people in the EU, you are required to comply with GDPR, regardless of where you or your company is based.
Essentially what you must do to comply is:
- Proof. Provide trackable, recorded proof that everyone on your existing email list has opted in. In Robly, this is recorded with a contact status of “Subscribed Opted In” as seen here:
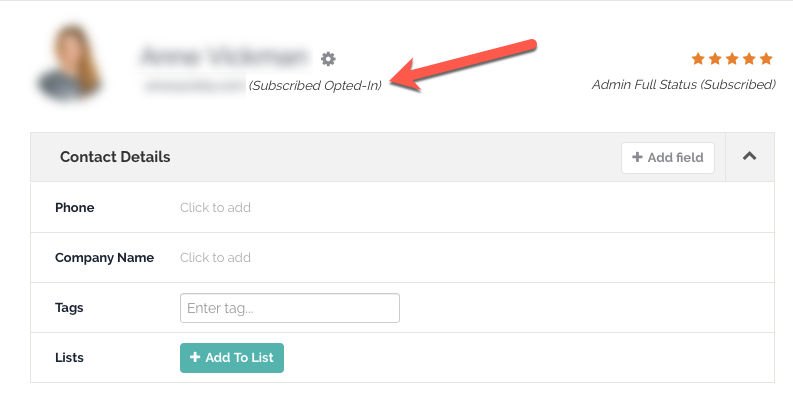
This means that this contact opted in via a signup form or clicked to reconfirm via an email you sent them in Robly (more on how to do that below). The burden of proof for this type of permission lies with the company. This means that should you be challenged at any point, you will need to show reasonable evidence that you have complied with the law by keeping records of opt ins. - Consent and Transparency. For new subscribers, you *must* inform your subscribers about who is collecting consent, as well as the purposes for collecting any personal data. For example, if you intend to collect someone’s email in order to enter them into a contest but intend to send them promotional content or marketing material later, you must disclose this at the time you collect the email, and be able to prove that it was displayed.
- Only Send to Opt Ins. If you didn’t get express, provable permission from any contacts in your list, then you may not send them email under this EU law. If you need to get permission now in order to comply, we recommend you do so immediately by following the instructions below for how to get your existing Robly data in compliance.
Per Litmus’s blog on the subject:
“Marketers who want to send email to EU citizens have no choice but to review their email processes. They have a few options:
- Set up separate signup processes for subscribers coming from different parts of the world. People coming from the EU would have to go through a GDPR-compliant sign-up process, while for prospects from the United States, for example, things remain the same. However, the costs and complexities of running two separate sets of lists present a significant drawback to this approach.
- Bring your entire database up to GDPR standards and adapt all of your opt-in processes to match the EU requirements, which might be the best approach. While changes to opt-in processes and re-permission campaigns will likely slow down list growth in the short term, they’ll help marketers to make sure that they only send email to subscribers who really want to hear from them and thus can improve list quality overall.”
How To Get Your Existing Robly Data in Compliance
For your existing Robly list, you can either reconfirm the entire thing or filter out your European recipients using Segmentation, *if* you have that data. If you do not have any way of noting who on your list is in Europe or not, then you’re safer reconfirming your Entire list.
This means you will have to create and send a campaign asking people to reconfirm before May 1, after which point you can remove anyone who has not reconfirmed.
Step 1: Build Your Reconfirmation Campaign
Create your reconfirmation email campaign. You should be clear and concise, and remind people how you will use their personal information, and that they need to re-opt in in order to comply with GDPR compliance laws.
Step 2: Add the Reconfirm Merge Tag.
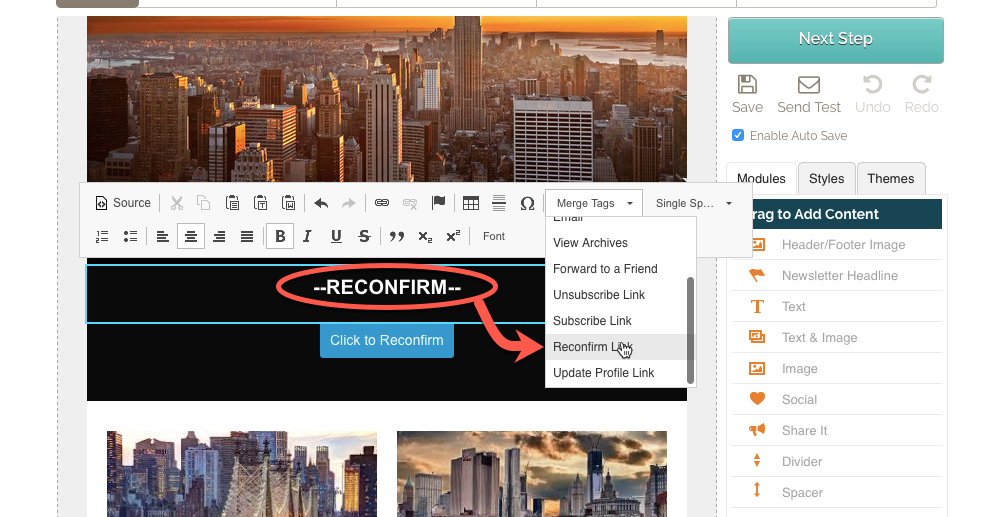
Insert the merge tag called Reconfirm either as text or in a button. Insert a text module into your campaign, then find the Special Links menu in the text editor and select Reconfirm:
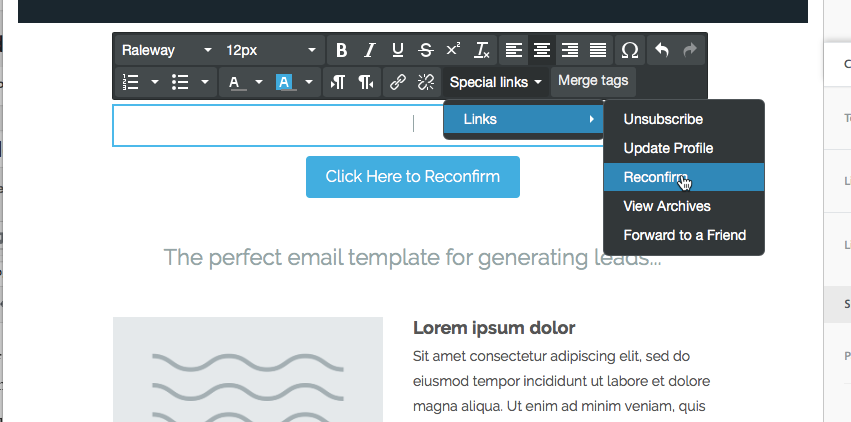
The text will display as a clickable link that says Reconfirm.
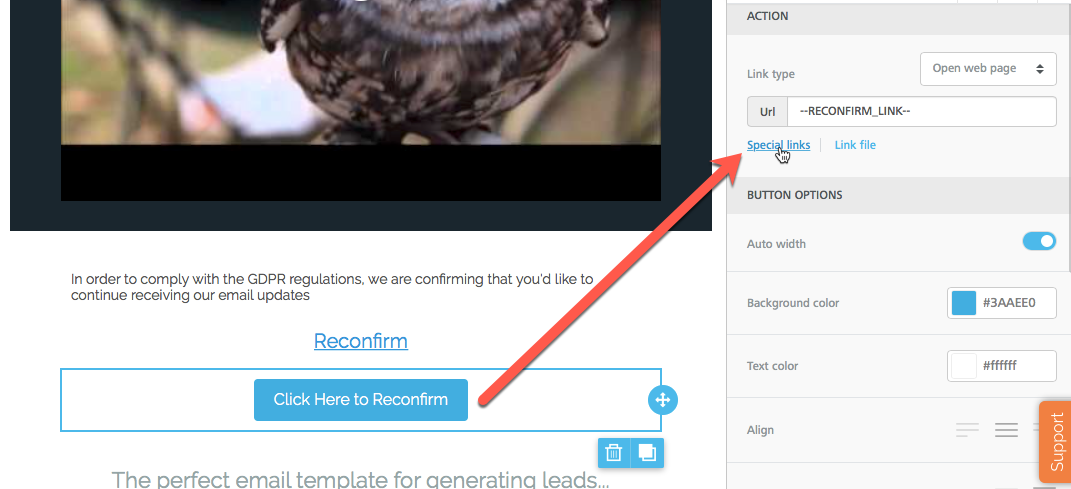
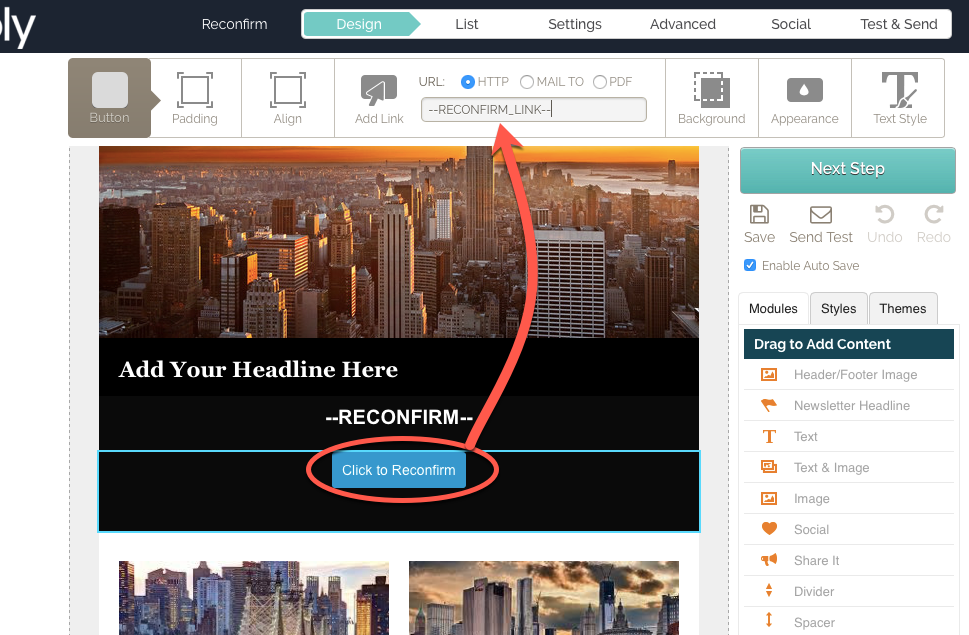
Similarly, you can add a button instead and click to add the Reconfirm tag by clicking the button and using the menu on the right hand side:
If you are using our original editor, you can add the merge tag as a text link by dragging in a text module and picking Reconfirm from the Merge tag menu in the text editor:
If you want a button, drag in a button and type –RECONFIRM_LINK– in the button’s Add a Link field at the top:
Step 3: Send Your Campaign and Await Results.
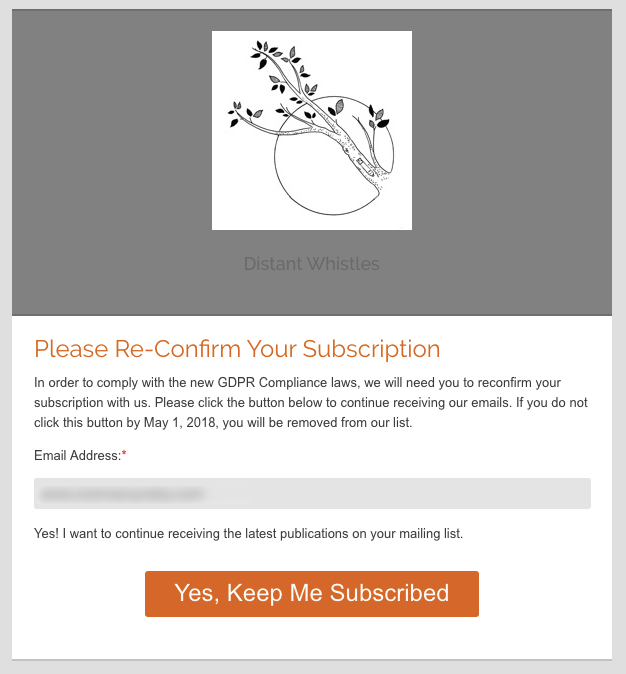
Send your email. Anyone who clicks the link will see this form after clicking, and have to click the Yes, Keep Me Subscribed button to remain on your list:
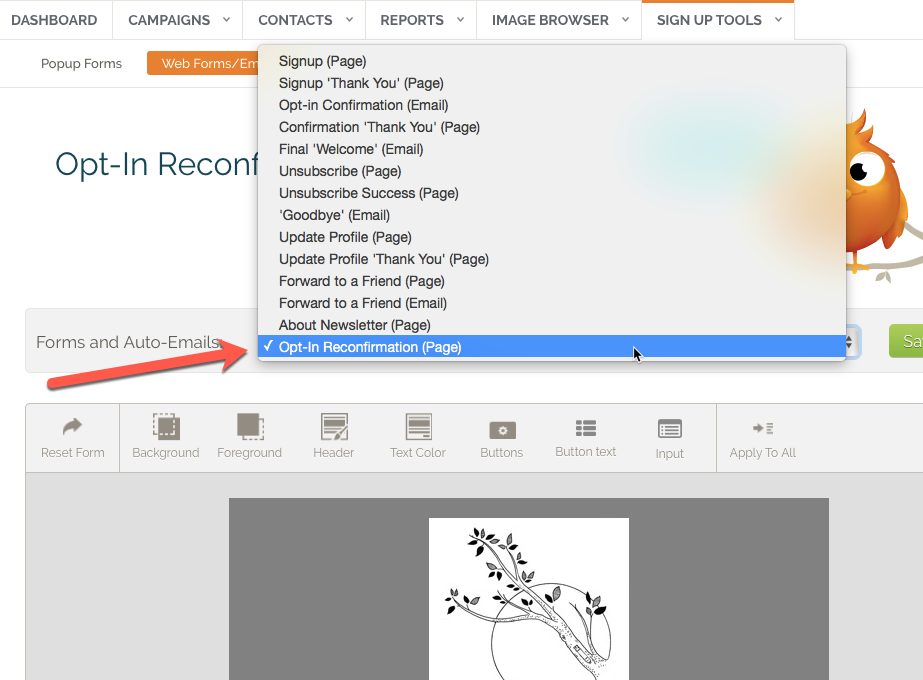
You can edit this form under Sign Up Tools > Link to Your Sign Up Form > Opt In Reconfirmation Page from the drop down menu:
Step 4: Isolate Those Who Did Not Reconfirm.
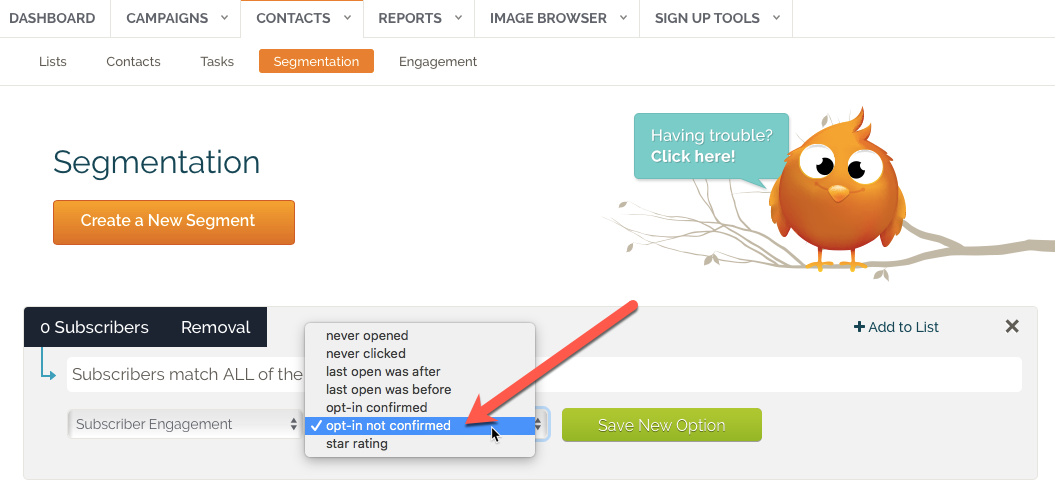
When you are ready to parse out your list to separate out those who did and did not reconfirm, click on Contacts > Segmentation. Create a new segment, and name it. Set it to match all parameters.
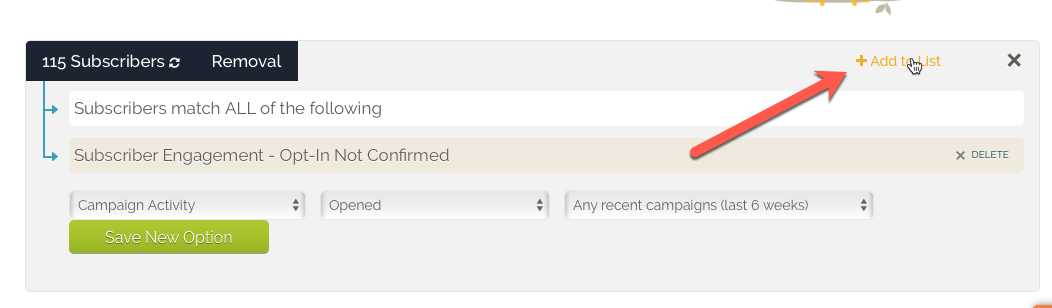
Set your segment to Subscriber Engagement from the first dropdown menu, then choose Opt-in Not Confirmed and Save New Option:
Then, click +Add to List to put those contacts in their own, new list:
Step 5: Remove (Unsubscribe) the Contacts Who Did Not Reconfirm.
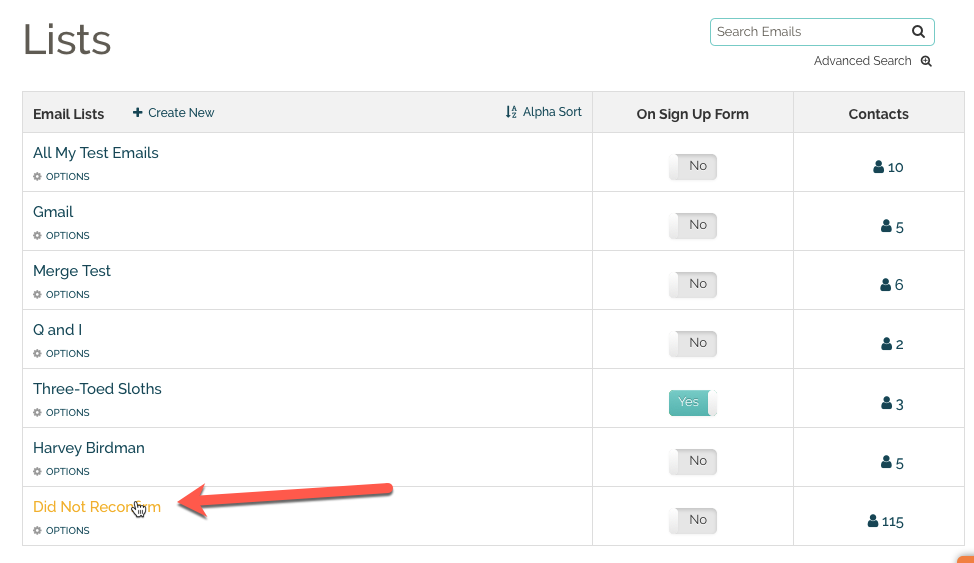
Click on the Contacts tab to access the list you just put those contacts into. Then, click on the list name:
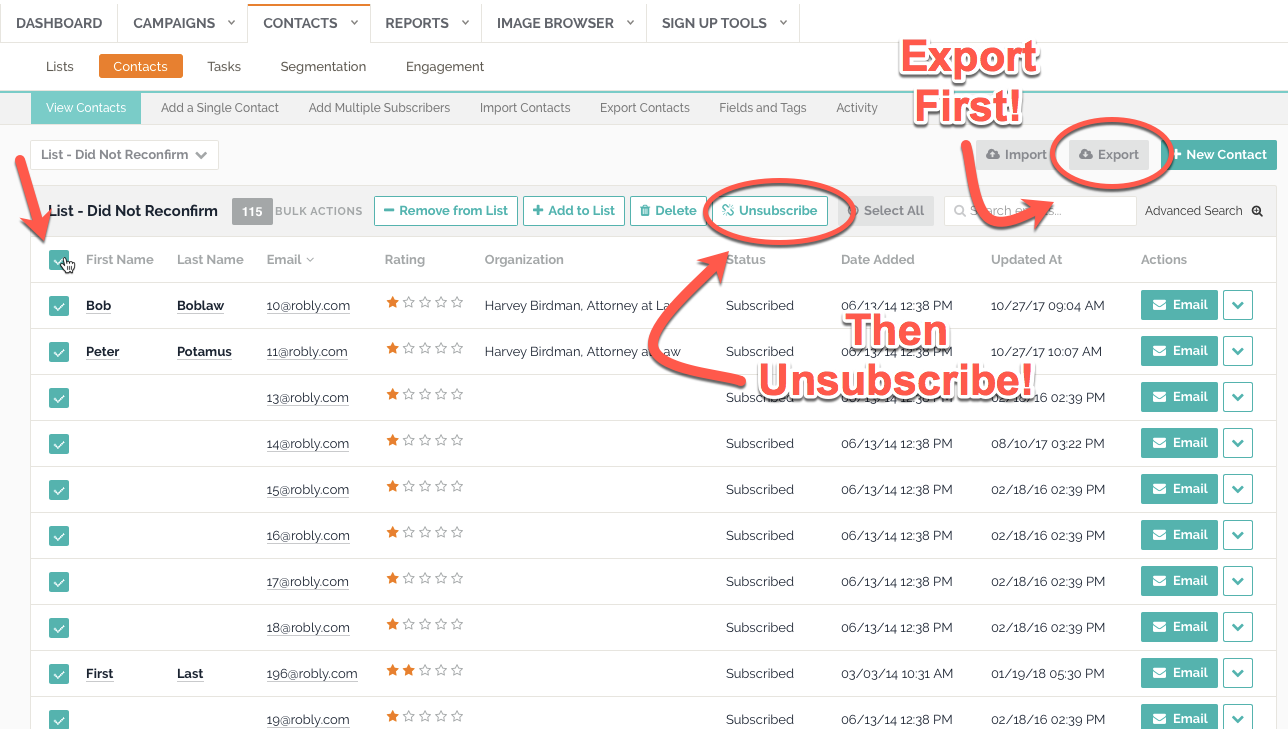
Export a copy of the contacts prior to removal if you want to maintain a record of these contacts by Selecting all and clicking Export. The file will be found under Contacts > Contacts > Activity.
Then, click Select All, then Unsubscribe. This will permanently unsubscribe all these contacts and cannot be undone.
How To Get Your Future Robly Data in Compliance:
We have added GDPR settings that you can toggle on in your account under Sign Up Tools:
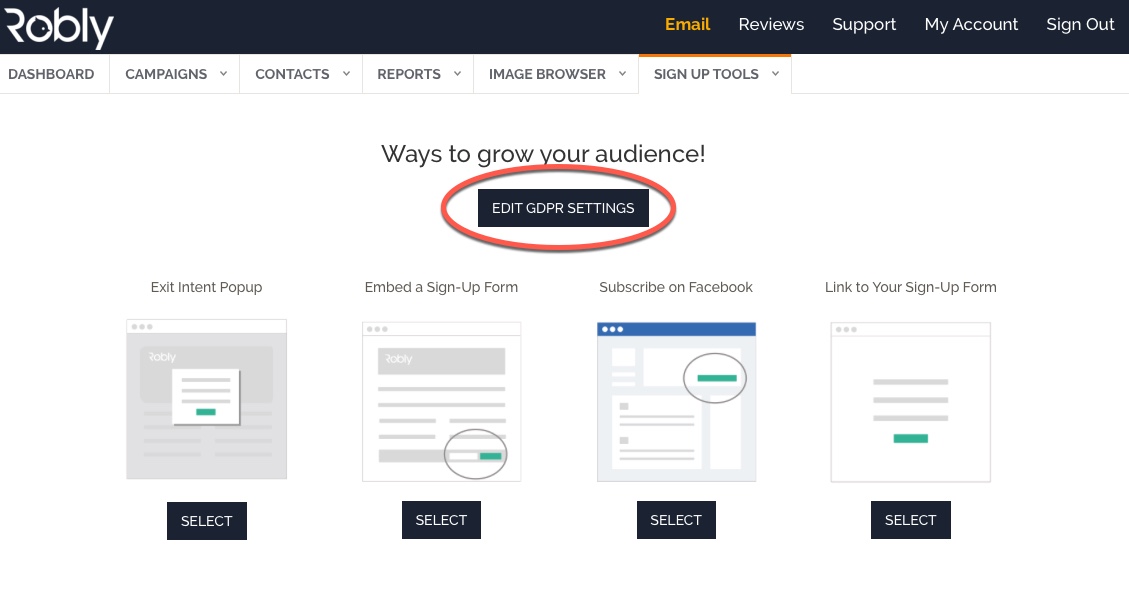
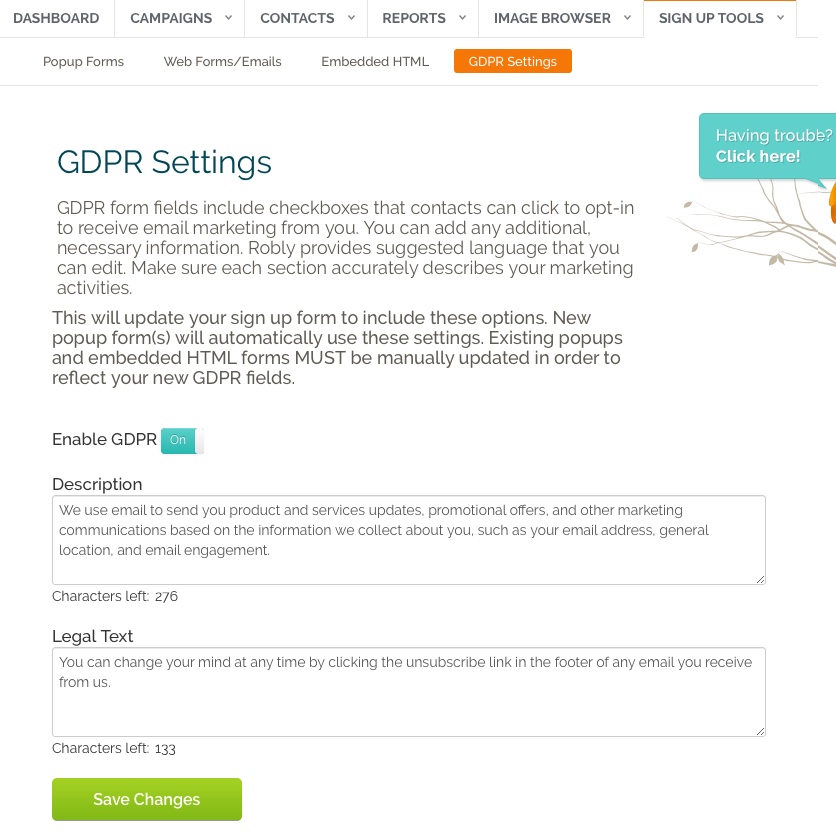
This will take you to a section where you can edit or add to the text we’ve added into each field to more closely match your company’s specific data usage. Make sure each section accurately describes your marketing activities.
Make sure the toggle is turned to ON and click Save Changes:
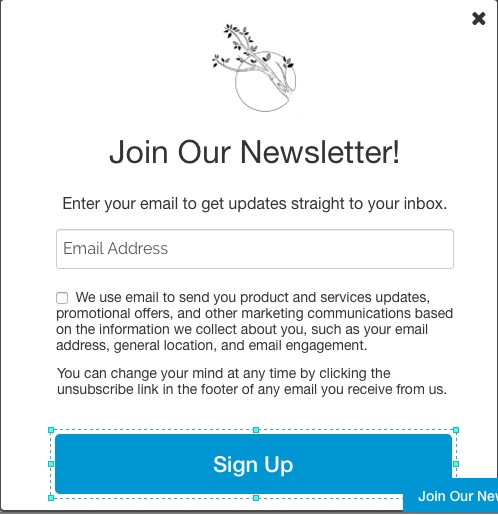
Here is what your sign up form will look like:
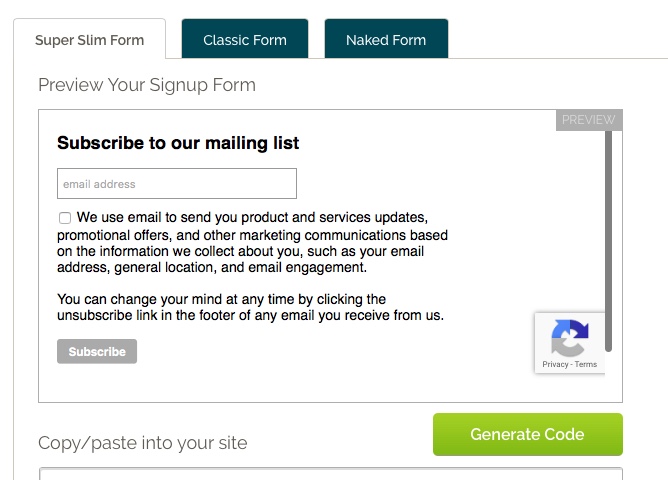
Here is what your embedded HTML form will look like.
Note that you WILL have to generate new HTML code once you’ve enabled these settings and replace what is already on your website if you have a form that needs to be updated:
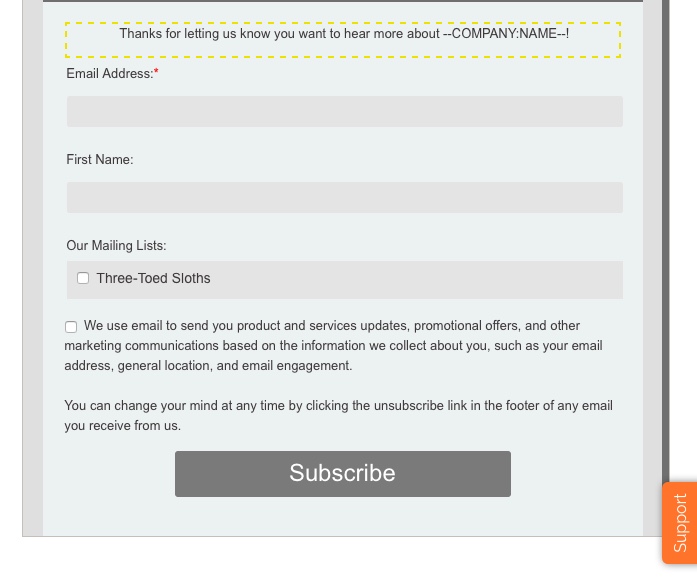
Here’s what the popup looks like. Note that these changes will only apply to newly created popups – existing popups will NOT reflect these changes: