When you set up an integration between Robly and Rock RMS, you can send transactional emails using Robly. Here’s how to get started!
Set up integration
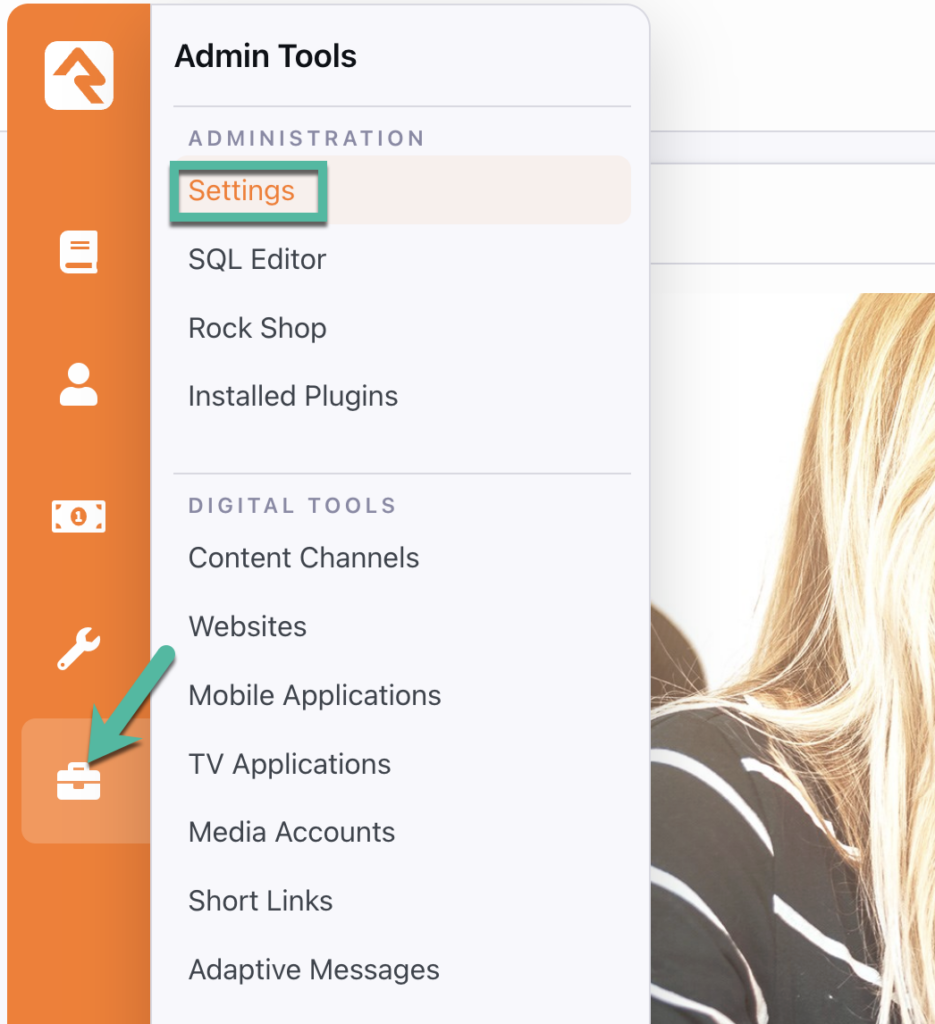
1. Once the Robly plugin is installed from the Rock Shop, go to Admin Tools > Settings in Rock RMS.
2. Then, go to Communications > Communication Transports.
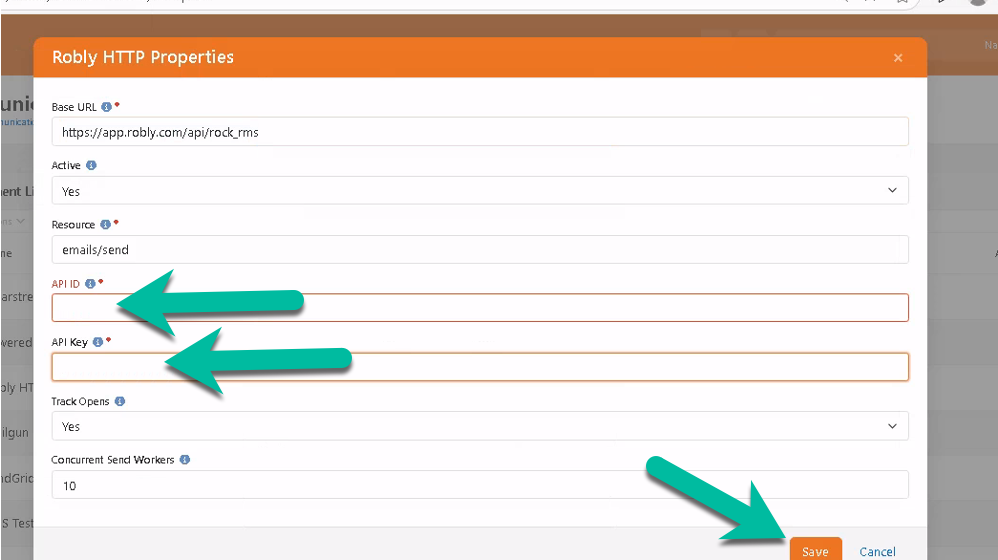
3. Click Robly HTTP, and paste your Robly API ID and API Key. You can find those values in Robly by going to My Account > Settings > API Details. Then, click Save in Rock RMS.
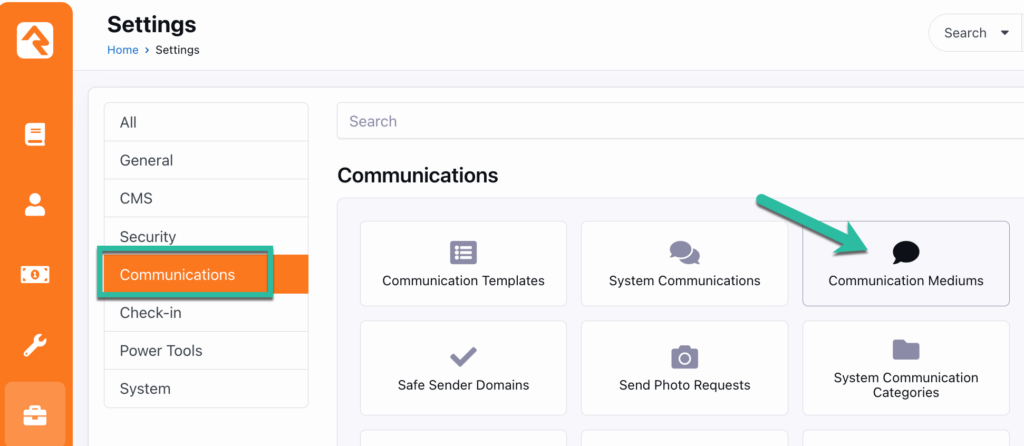
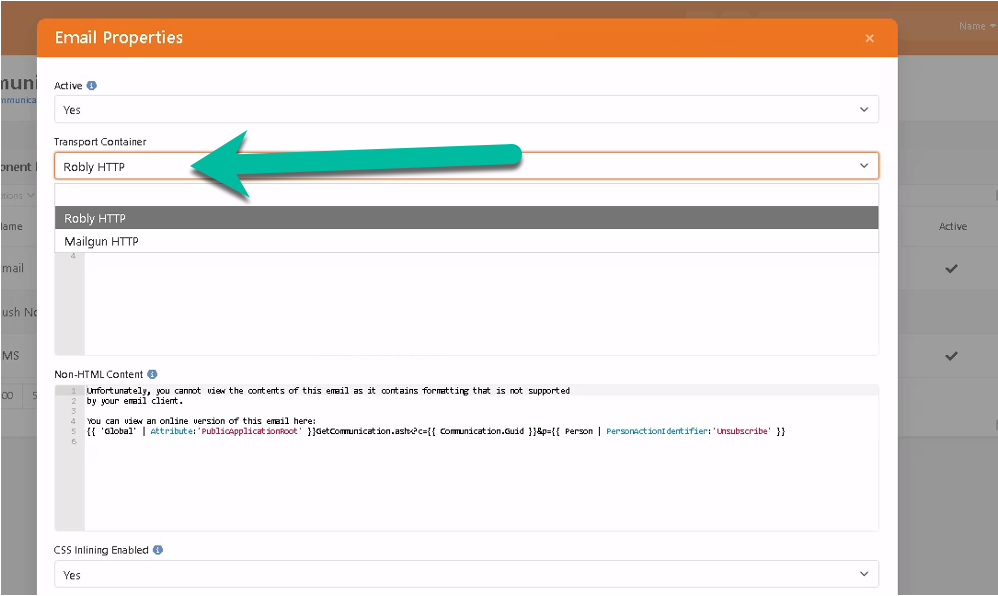
4. Next, go to Admin Tools > Settings > Communications > Communication Mediums.
5. Then, click Email.
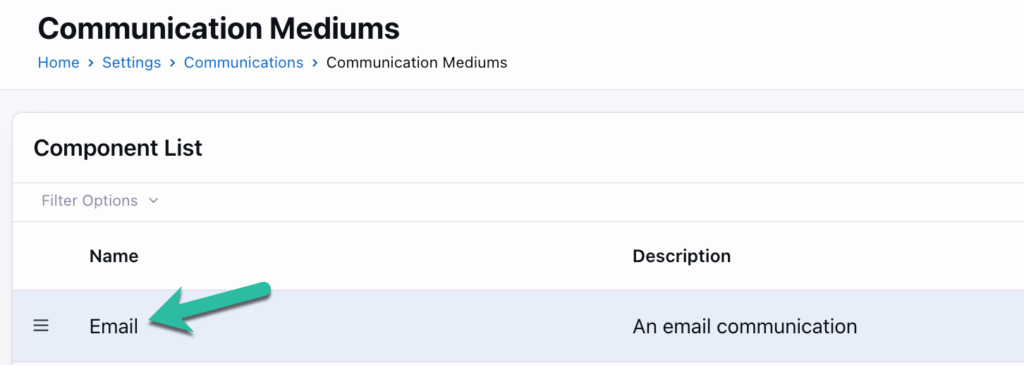
6. Select Robly HTTP as the Transport Container.
Set up RockRMS webhooks
Webhooks are used to send the Delivered, Opens, Clicks, Bounce, Spam, and Unsubscribe events back to RockRMS, so churches can see their campaign stats on that platform. Here’s how to set up webhooks between RockRMS and Robly to collect and view that data.
1. In Robly, go to Webhooks > New Webhook.
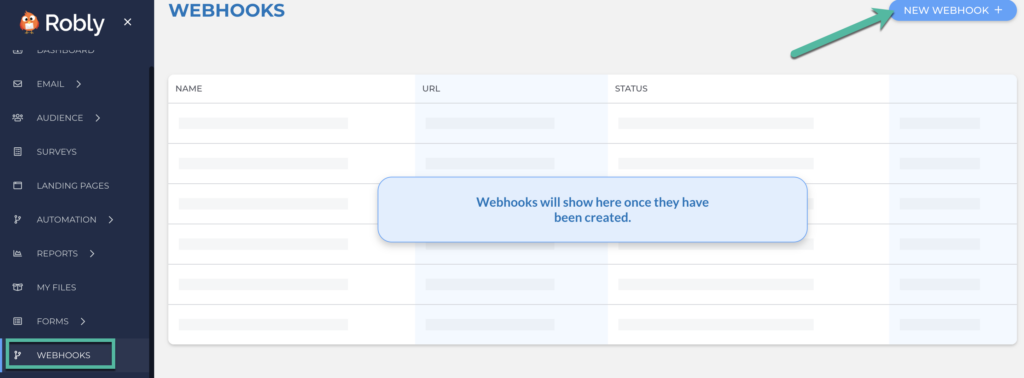
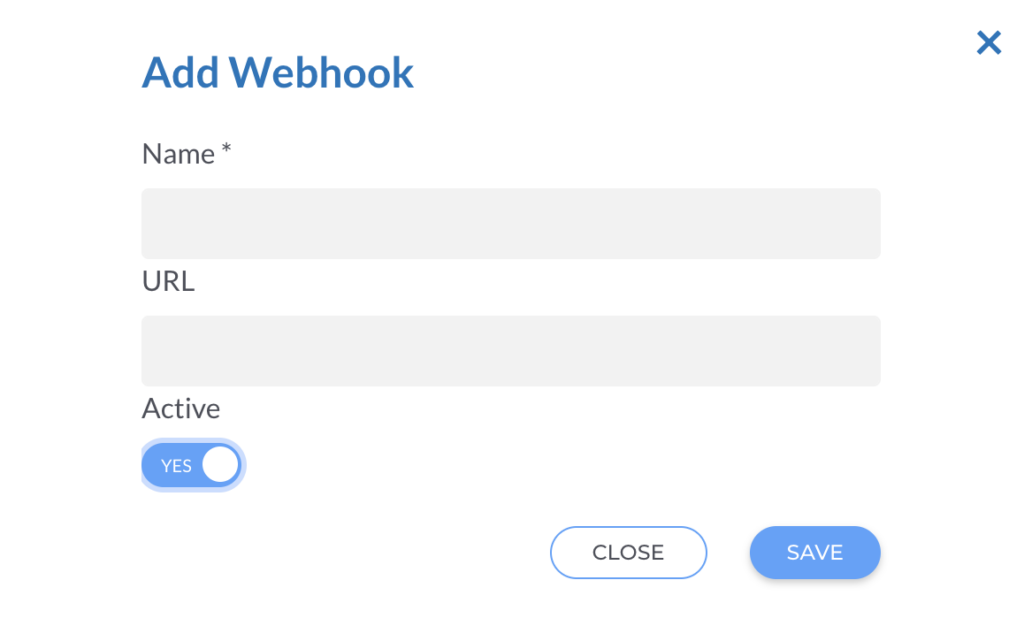
2. Add the webhook by giving it a name and including the webhooks URL. For the URL, use: https://{yourdomain}/Webhooks/Robly.ashx
Remember: Replace ‘yourdomain’ with your actual domain.
3. Make sure it’s Active, and click Save.
4. In RockRMS, go to Admin Tools > Communications > Communication Transports > Robly HTTP to enable the Robly Transport. You’ll need to change the Active setting to “Yes.” Then, provide the Robly API Key and HTTP Webhook Signing Key. Lastly, add the domain that you want your email to come from (this must match the domain that was configured in Robly).
5. Go to Admin Tools > Communications > Communication Mediums > Email and select Robly HTTP under Transport Container.
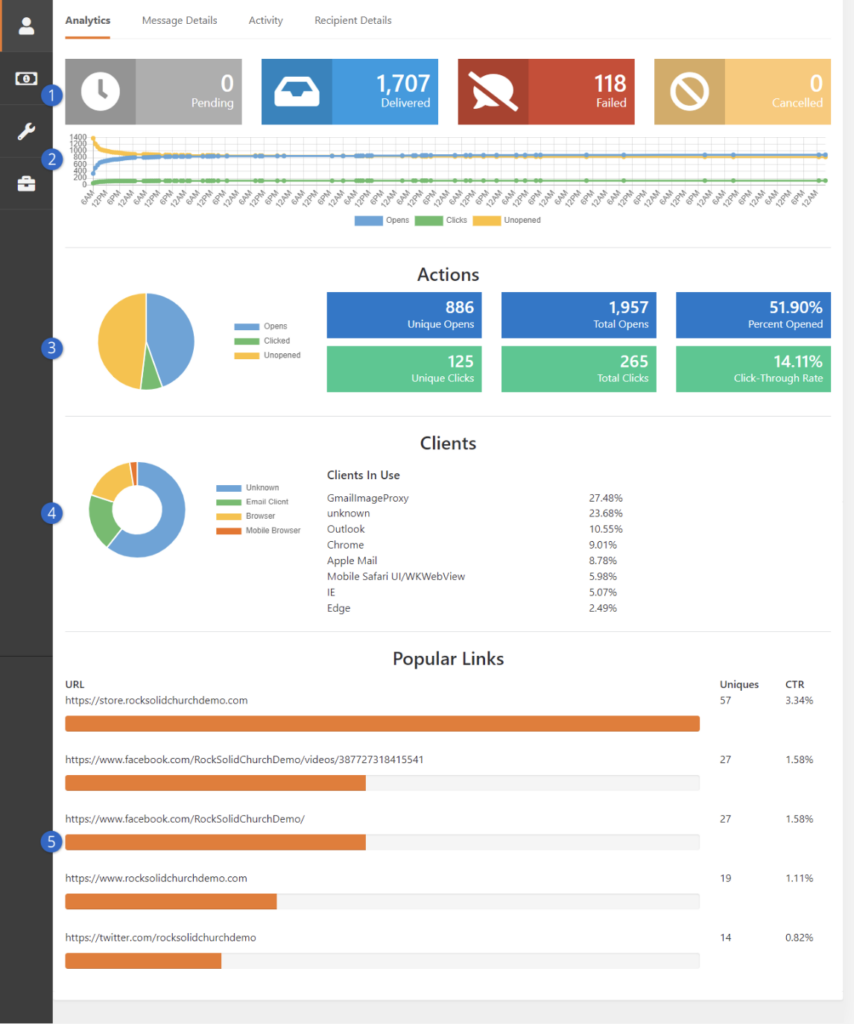
Once the webhooks are set up, here’s an example of how those analytics will appear in RockRMS.
Have questions? Message us on chat, or email support@robly.com!