If you missed clicking the OpenGen button for your campaign send, you can set it up after the fact. It’s just a little more work. 🙂
Step One
Go to Email > Campaign, and find the campaign you want to use for OpenGen. Click the three dots the right of the campaign name, and click Copy.
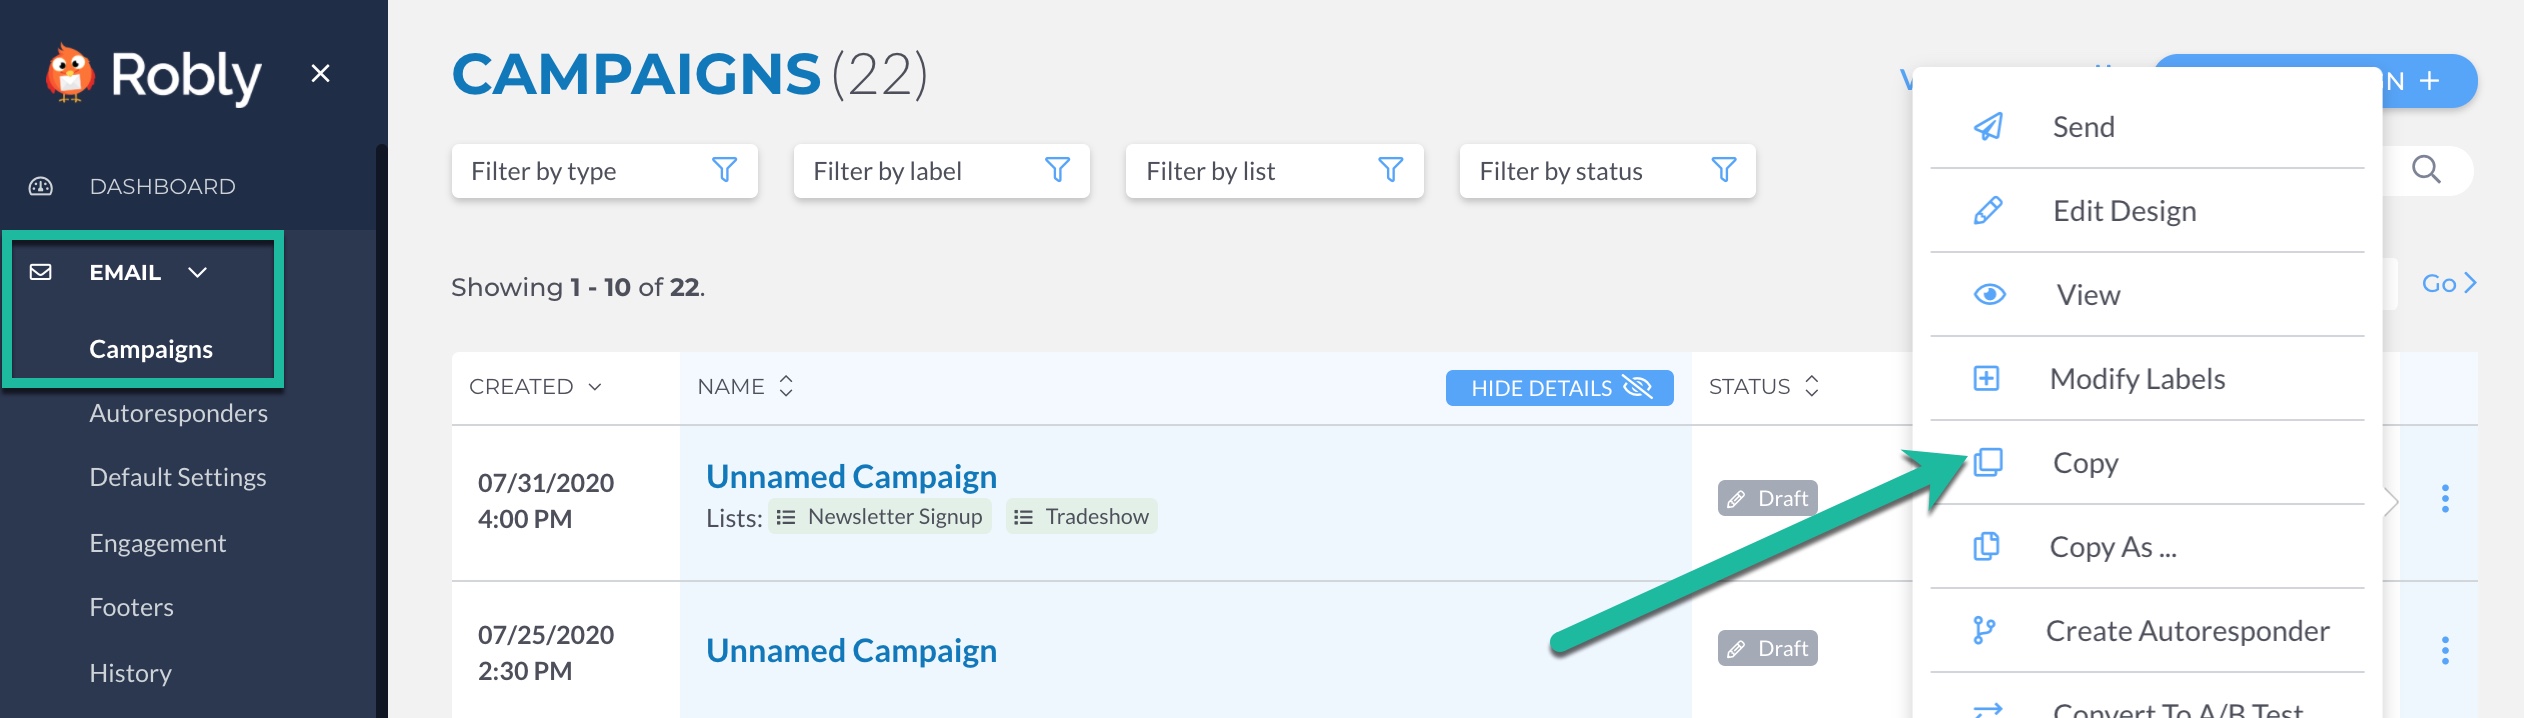
You will then need to give the campaign a name. We recommend adding “OpenGen” to the campaign name after the original title so you know that’s what it is. Then, click Copy.

Step Two
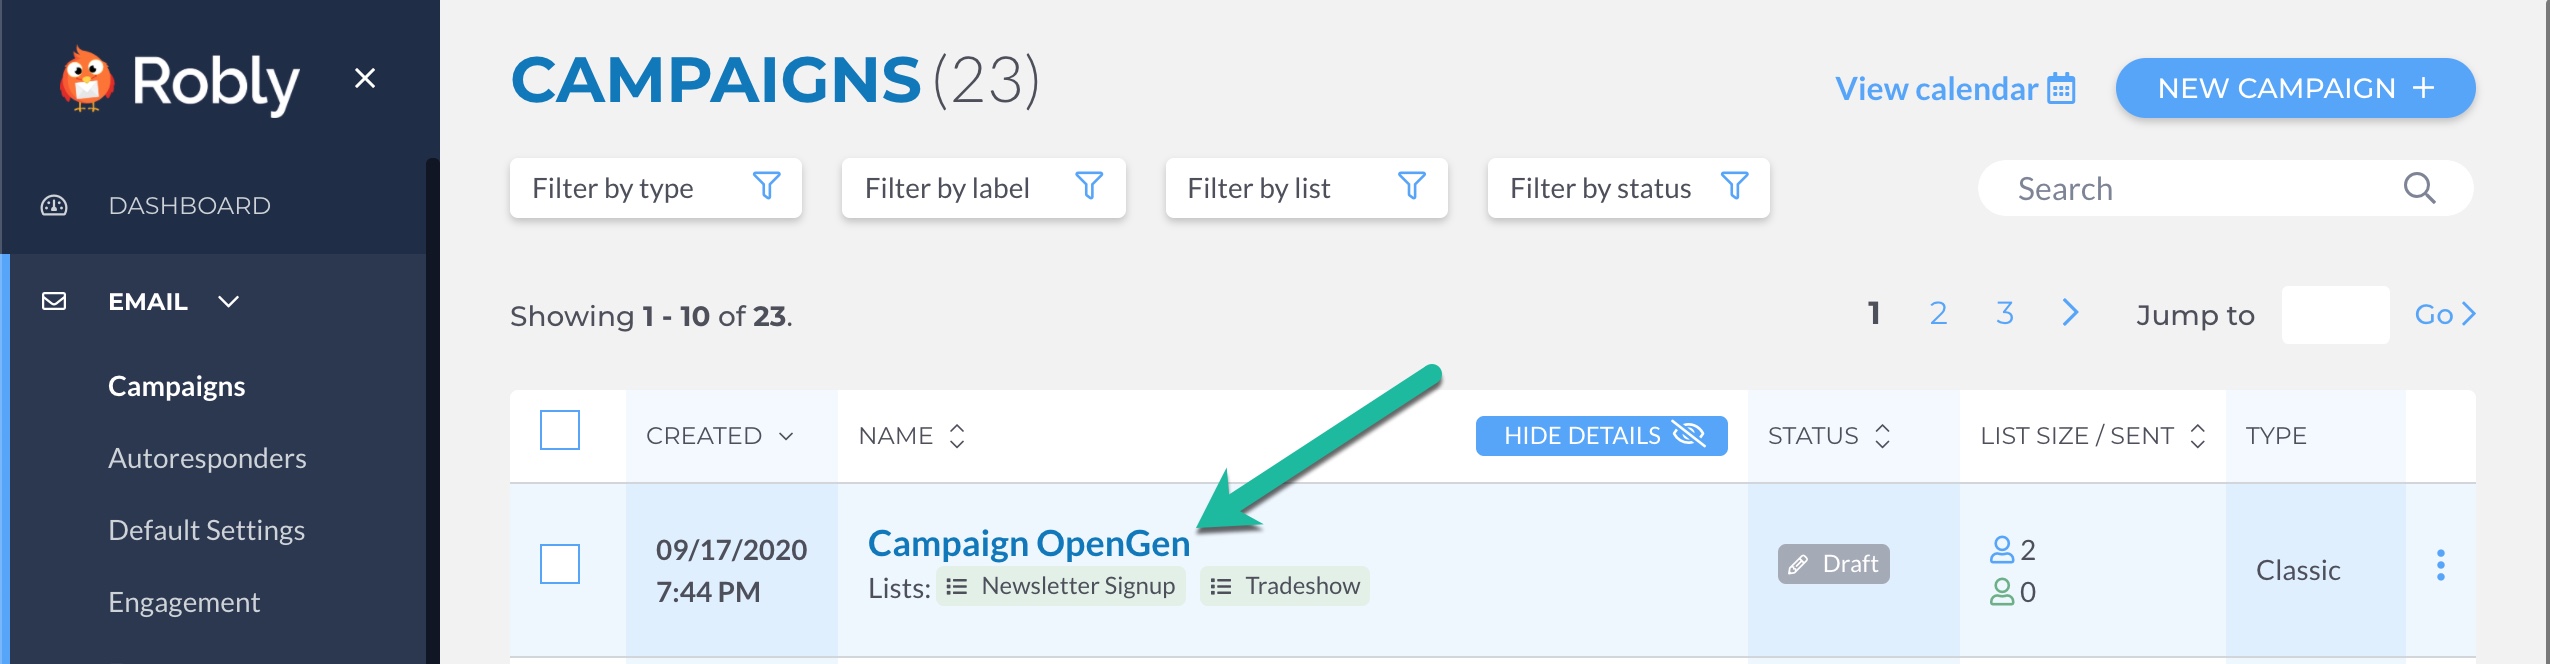
Click the name of the OpenGen copy.
Step Three
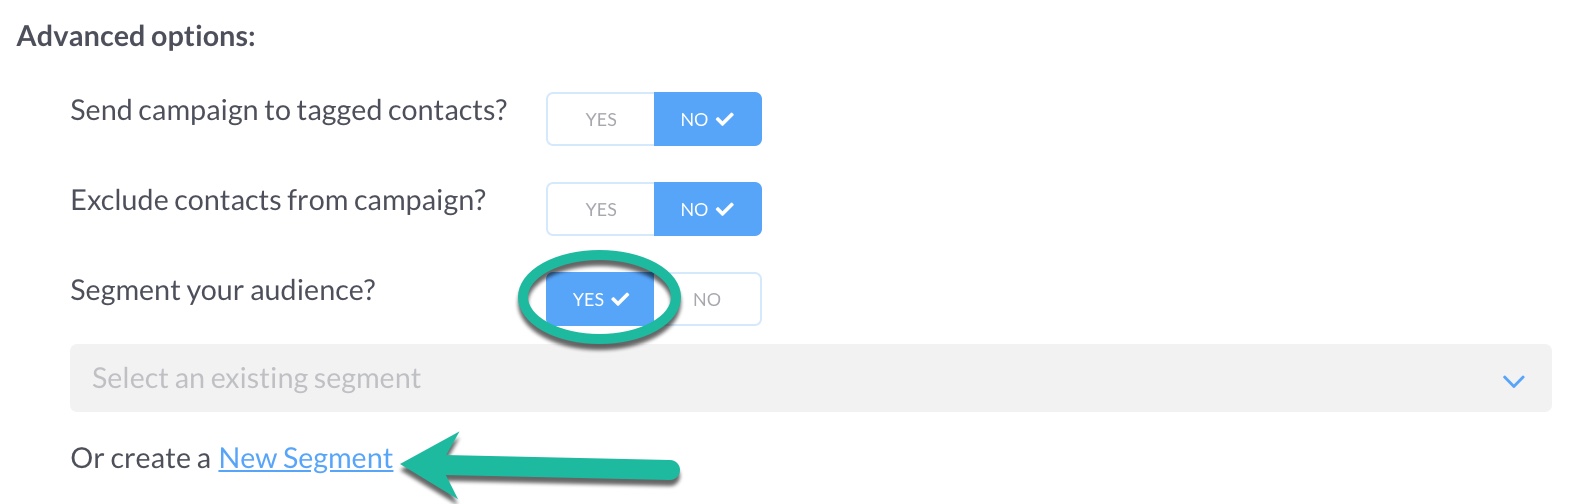
Inside the Campaign Builder, click Edit Recipients next to Recipients.

Step Four
Click Yes next to Segment your audience and then New Segment.
Step Five
A window will pop up. Follow the instructions in the image below:

Step Six
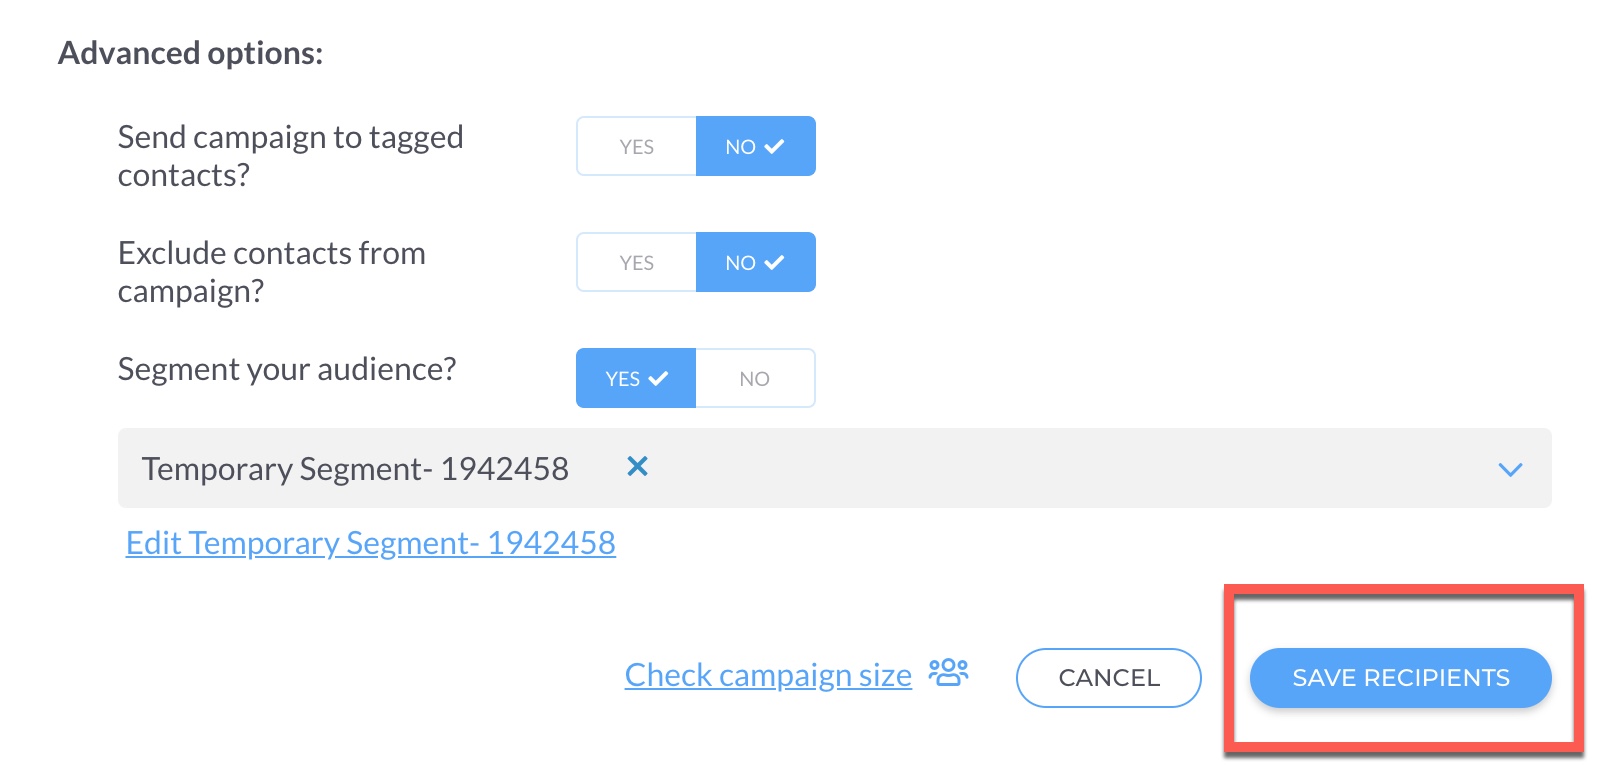
Click Save Recipients.
Step Seven
Consider tweaking your subject line in the Content section. (You can also adjust the subject line before you send/schedule it.) Click Set next to Subject to edit your subject line. Once you’ve edited it, click Save Subject.

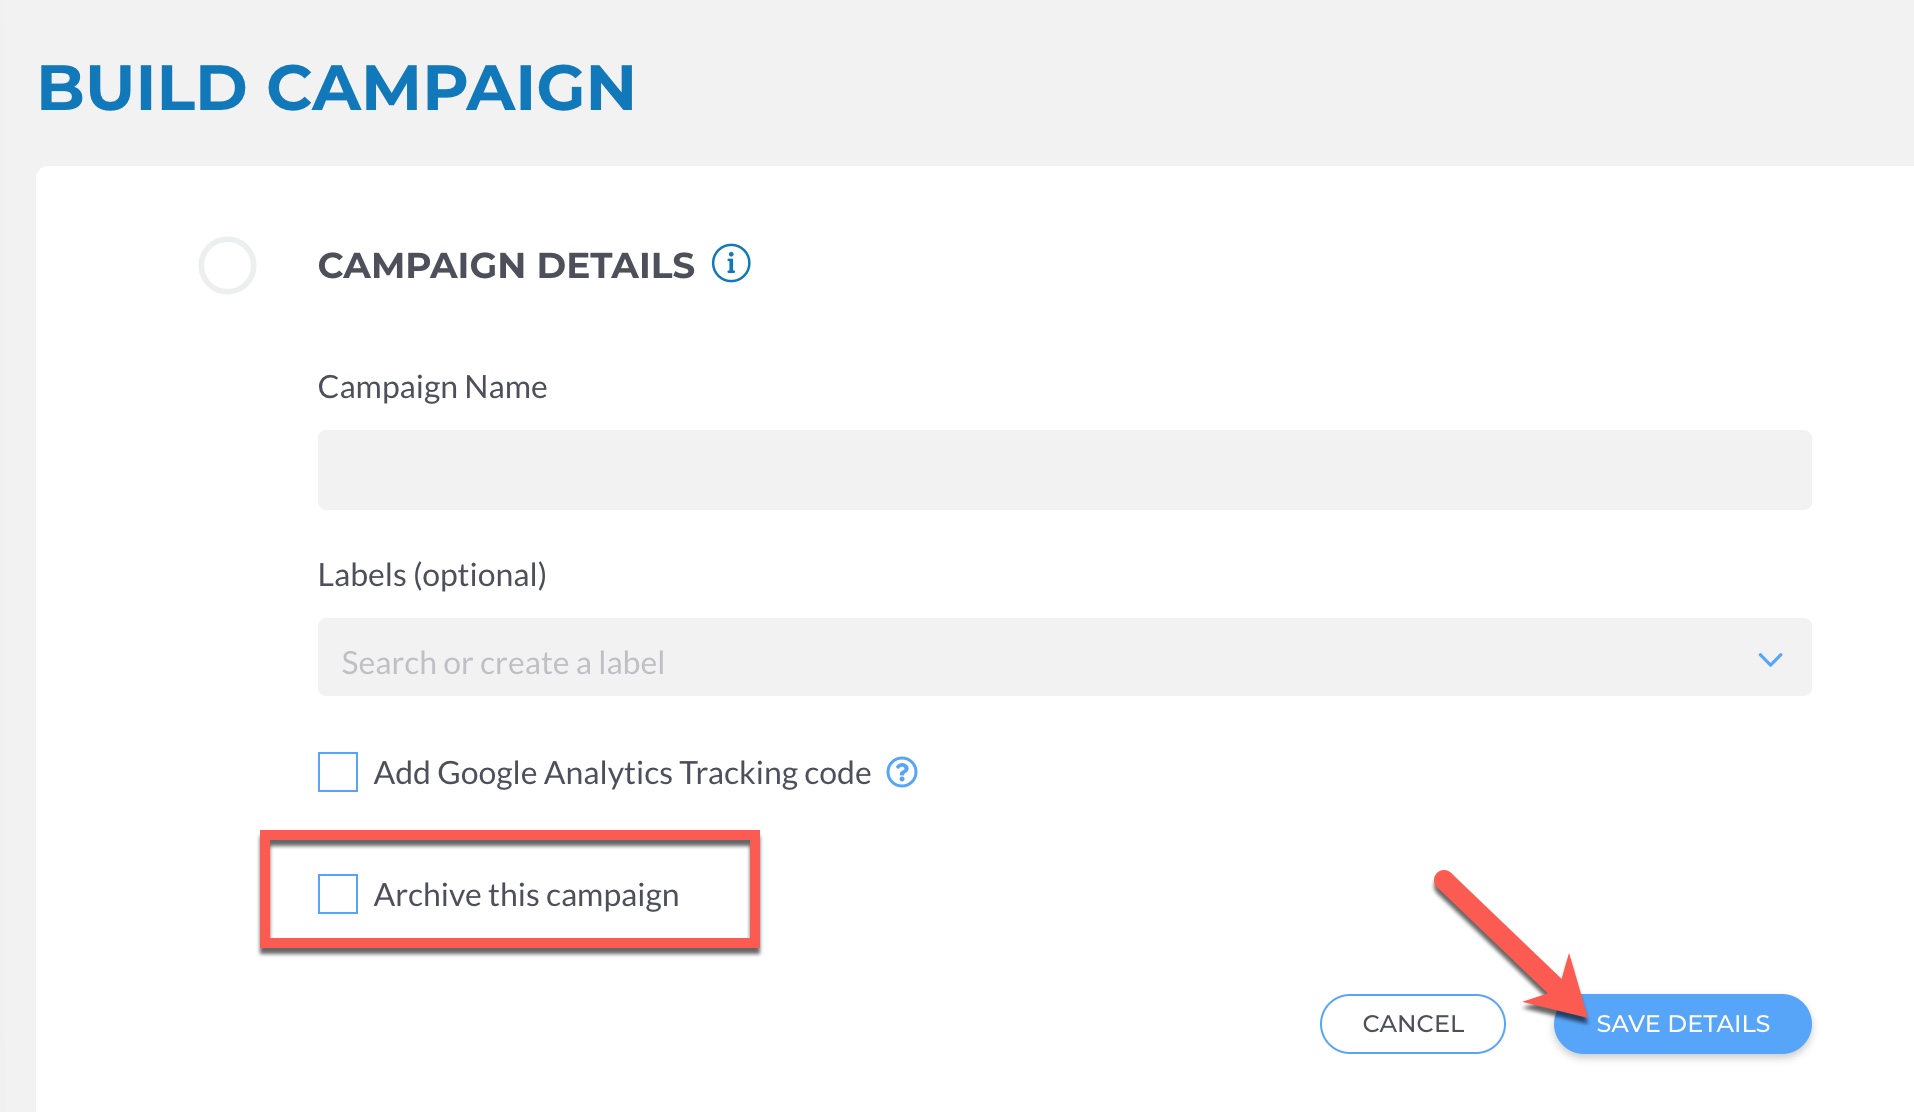
Step Eight
Decide if you want to Archive this campaign – chances are you don’t, since the content is the same as the first send, so make sure the Archive Campaign box is unchecked under Campaign Details. Click Save Details when you’re done.
Step Nine
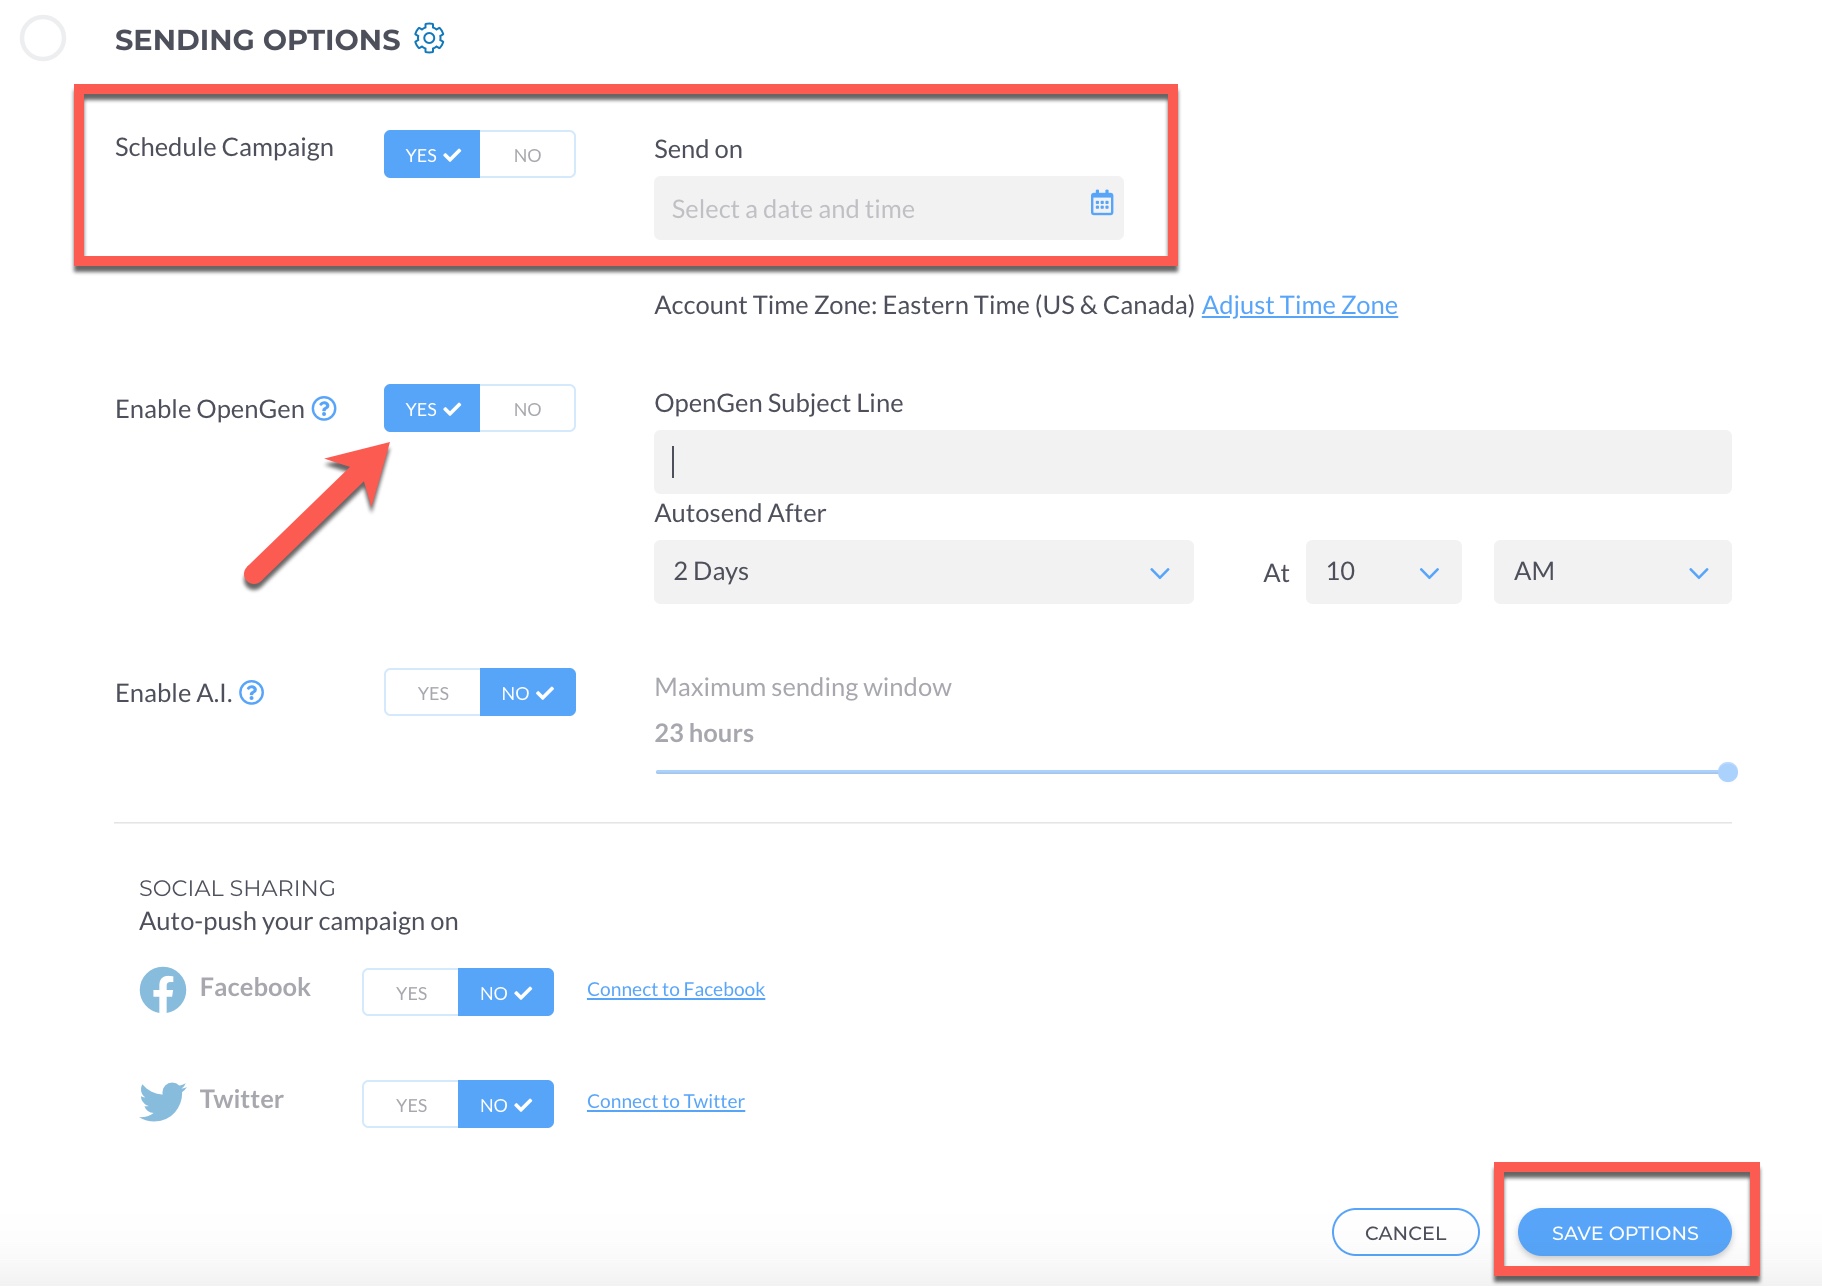
Schedule your campaign in the Sending Options section by clicking Choose Sending Options.

Step Ten
Pick the date and time you want it to go out (or, if it’s already been more than 24 hours and you’re ready to send it now, click the Send Now button!). To schedule it to go out at a later time, click Yes next to Schedule Campaign and choose the date and time. Also, click Yes next to Enable OpenGen and set the subject line and autosend times. When you’re finished, click Save Options.
Click Send Now or Schedule Now, and you’re done!