Scheduling a campaign for a future day or time is easy, and you can do that in the Campaign Builder.
1. Click Email > Campaigns in the left-hand navigation. Then, click the name of the campaign you want to schedule.
2. Click Choose Sending Options next to Sending Options.
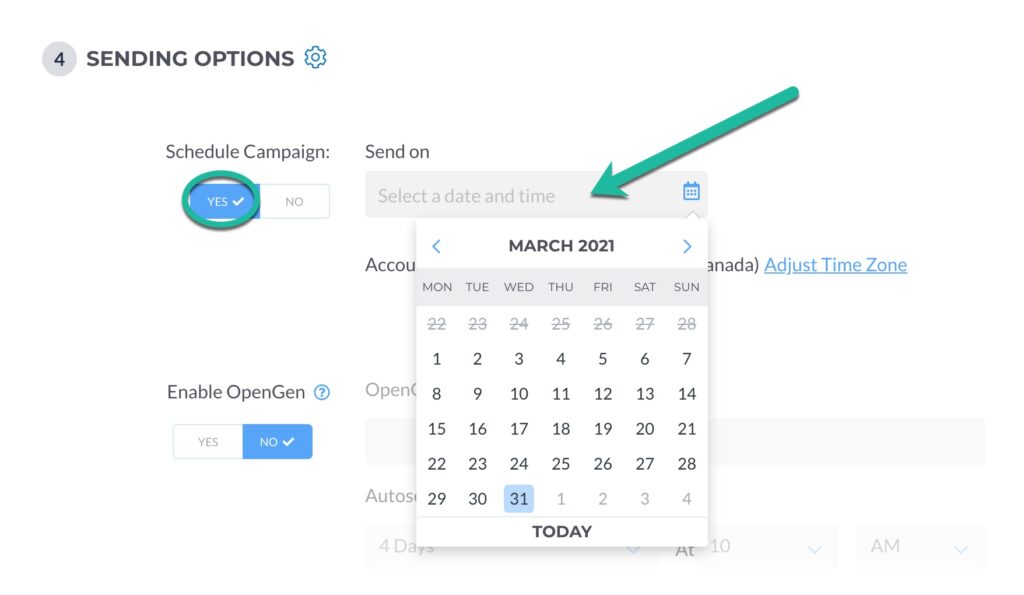
3. Choose Yes next to Schedule Campaign. Then, select a date and time to send your campaign. You will also have the option to set up an OpenGen campaign and Enable A.I. (Your OpenGen will not appear in your Campaigns list until the original campaign finishes sending on its scheduled date and time.)
4. When you’re finished setting your Sending Options, click Save Options at the bottom.
5. After your campaign is complete, click Schedule Now at the bottom to schedule your campaign.
6. You will see a pop-up box letting you know your campaign has been scheduled and when it will be sent. You can also Unschedule the campaign.


