The best way to remove unengaged contacts is by using our RoblyENGAGE tool. This is best used after you’ve been sending in Robly for a few months.
Why Should I Remove Unengaged Contacts?
Sending to contacts (and/or stale email addresses) that don’t engage with your campaigns can negatively impact your sending reputation and cause your emails to land in spam folders. This tool helps you fix this issue by removing contacts who do not engage with your emails.
Ultimately, cutting out the “dead weight” on your list will improve your open and click rates, and can also save you money if you go into a lower price bucket after you remove those contacts.
Okay, I’m sold. How do I do this?
*Removals cannot be undone, so we recommend you export your list prior to using this feature.*
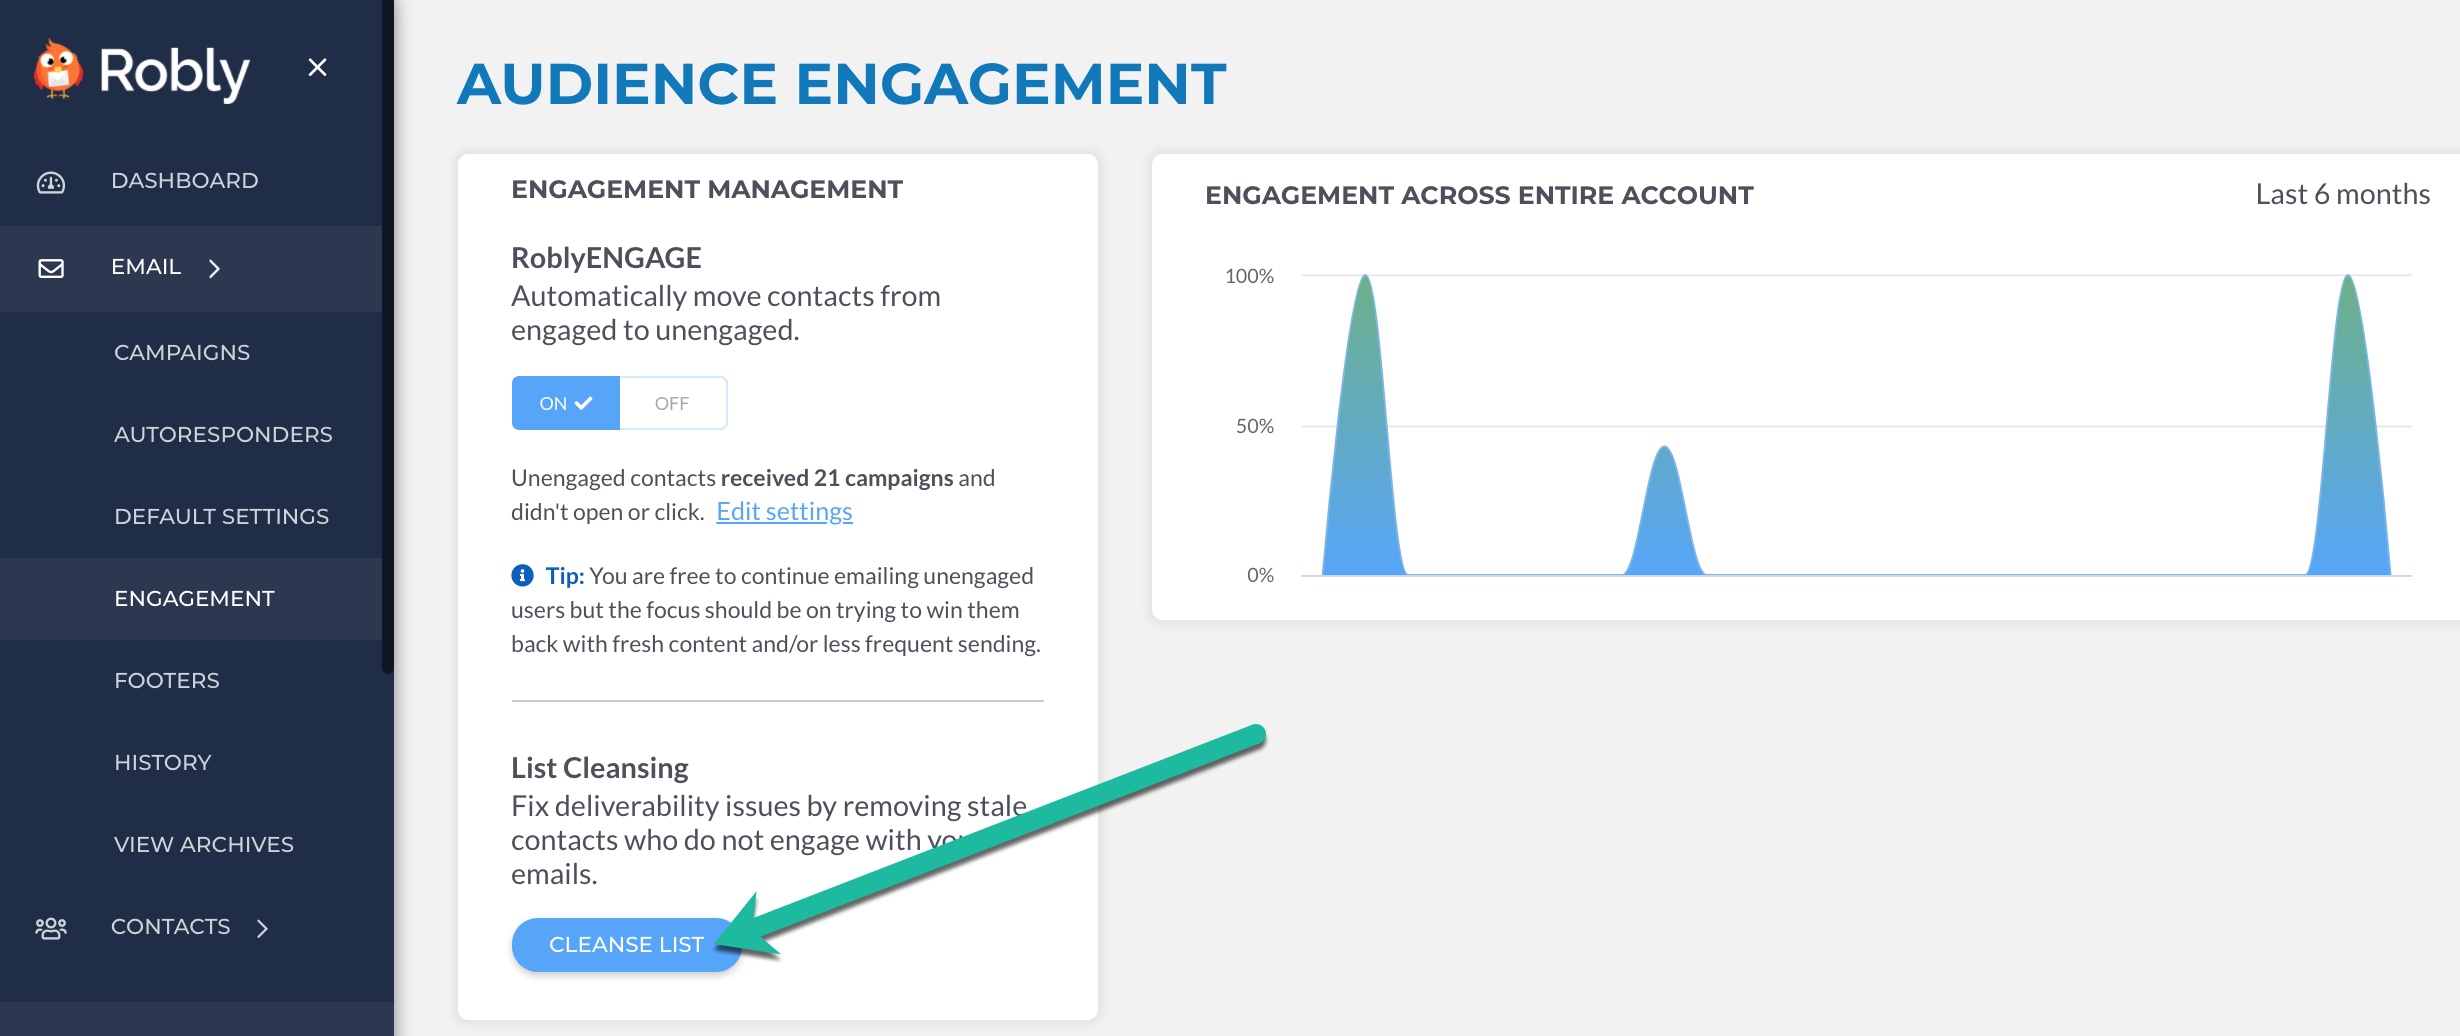
Go to Reports > Engagement.

From here, you have a few options.
Enable RoblyENGAGE
This feature establishes rules about which contacts should be considered unengaged.
If this option is enabled, the system will begin saving data about engaged and unengaged data using the campaign count you set in blank “campaigns” field. The default is 21 campaigns; you can adjust it to any number you choose:

Using 21 campaigns as an example, this will automatically mark users who do not open OR click any campaigns after they have received 21 of them as Unengaged.
After this is enabled, you will be able to see which contacts are engaged or unengaged on your main Contacts page, both per sublist as well as all your subscribed contacts.
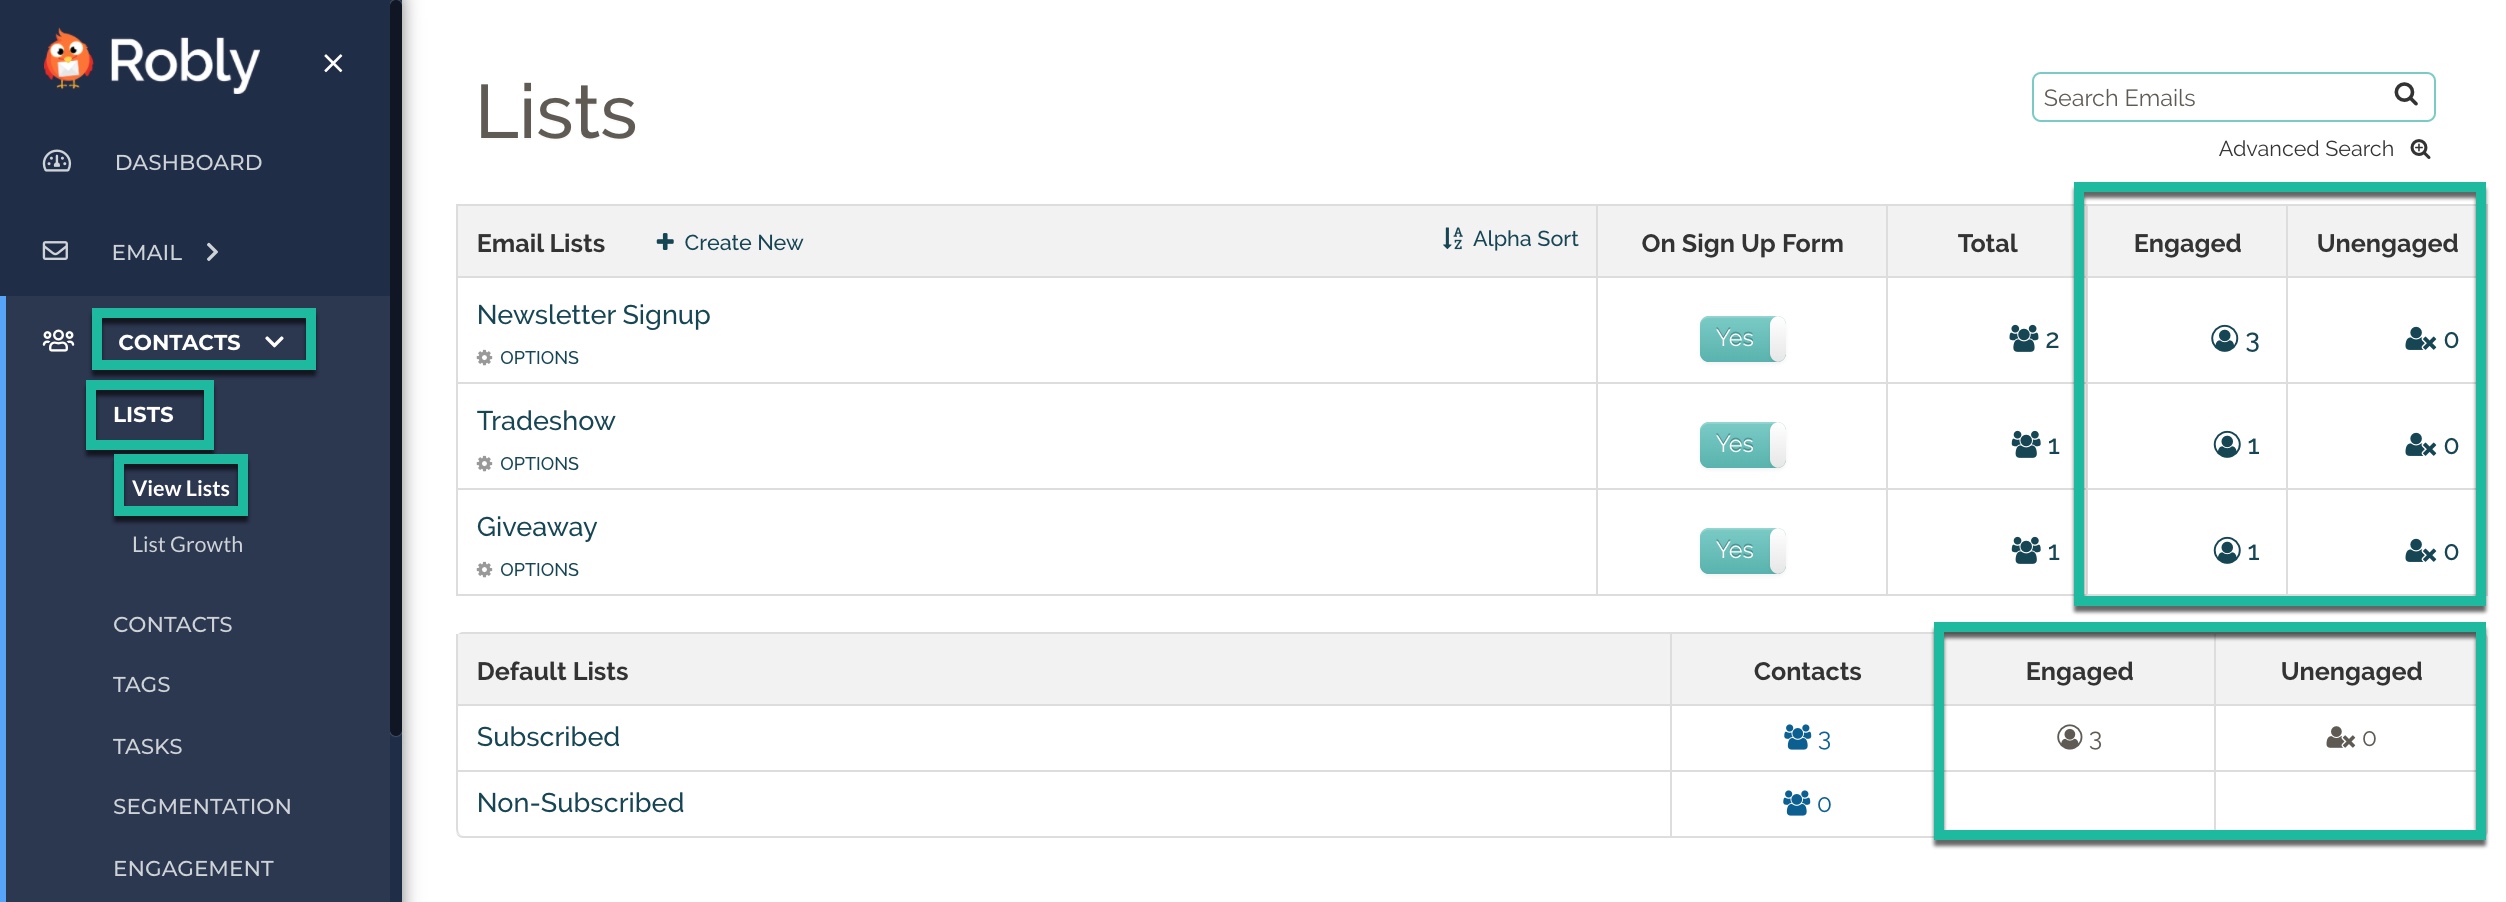
Once you turn this feature on, ALL contacts are considered engaged. So, for example, if you’ve set the number of campaigns to 21, the unengaged status will retroactively apply after your next campaign is sent out after the point the rule was enabled.
The great thing about this feature is that it allows you to see who your unengaged users are before taking any action to remove them, and target those people specifically for re-engagement.
Please note: Once you enable this option, you can send email campaigns out to either your Engaged or Unengaged contacts, but you cannot send to both at the same time.
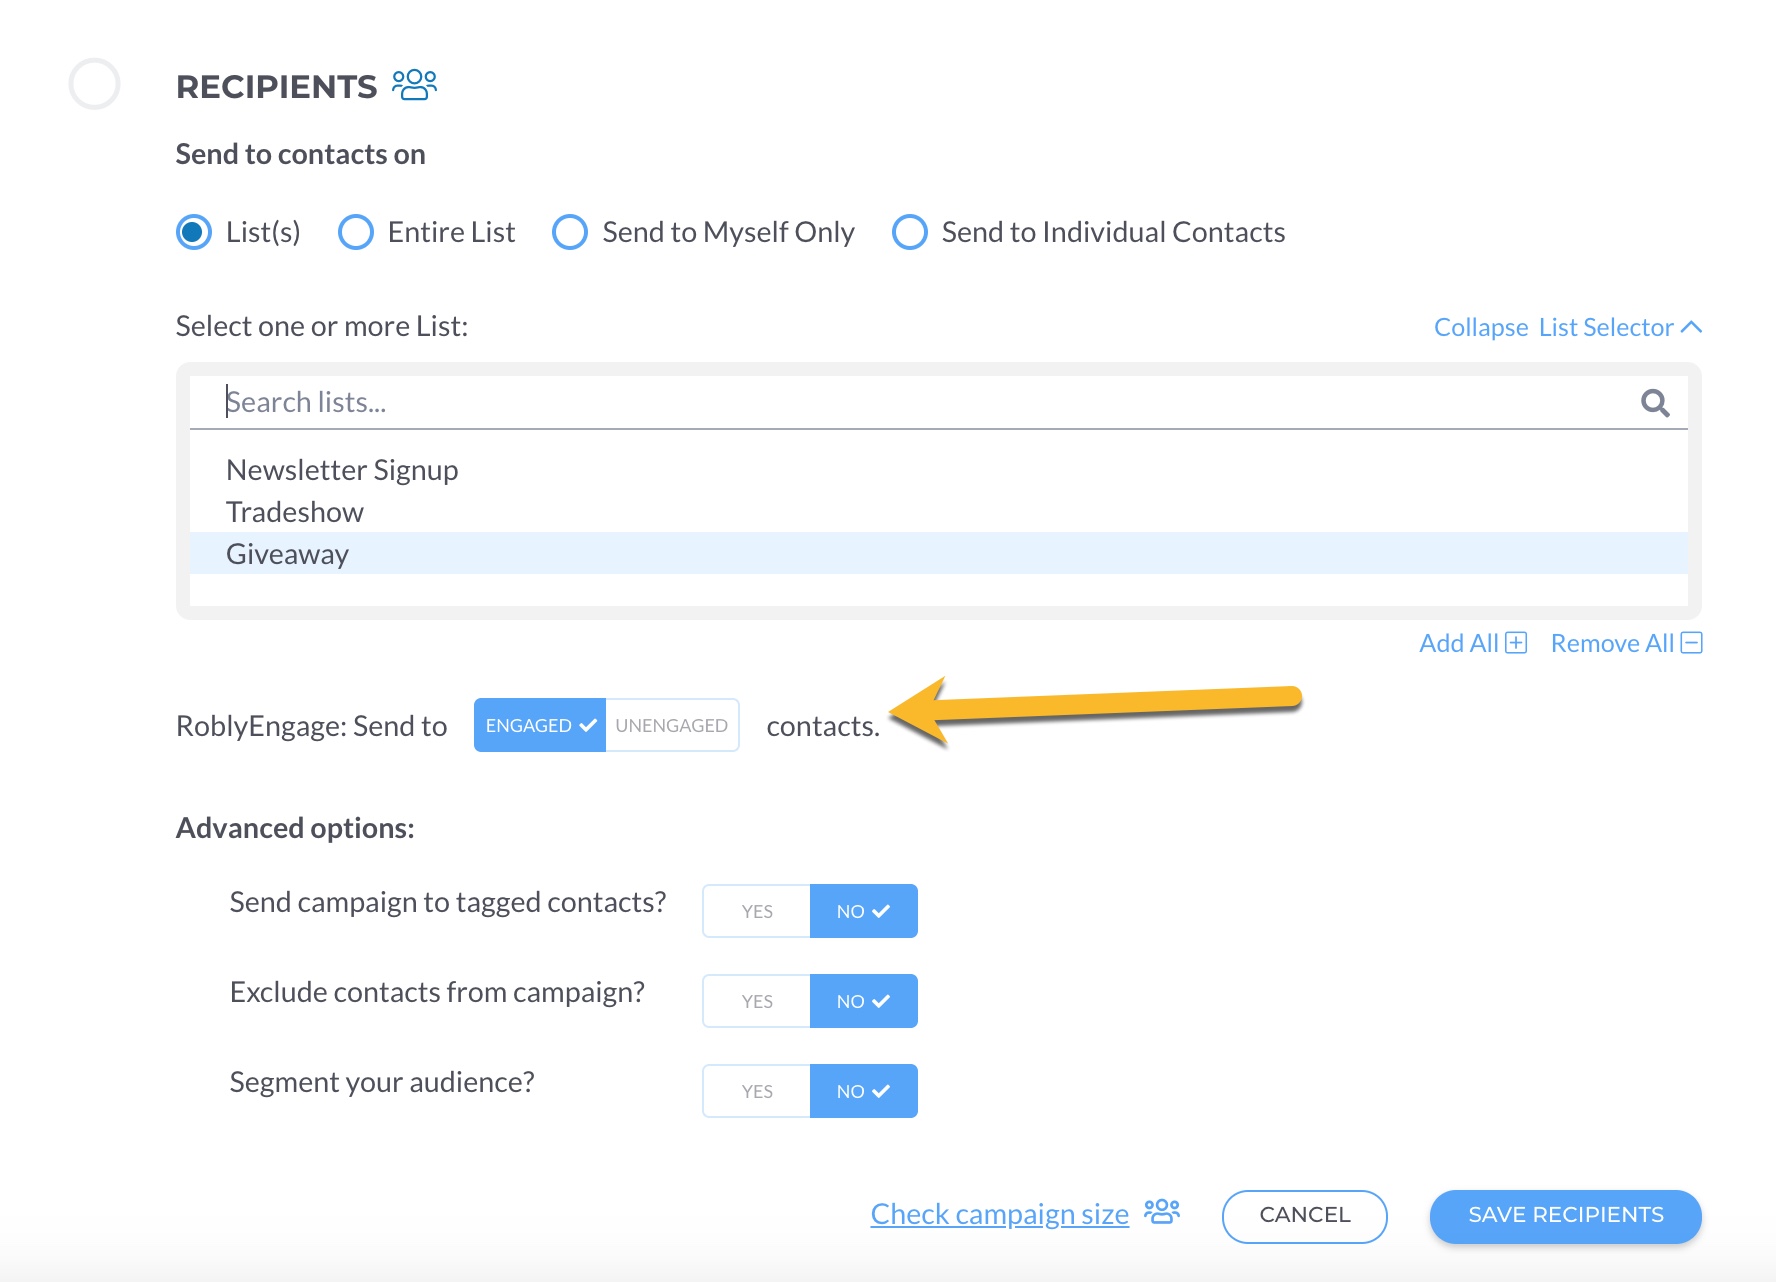
The reason for this is that you should attempt to target just your Unengaged users with a re-engagement campaign to encourage them to stay or go. Once you’ve done this, you can proceed to use the tool below.
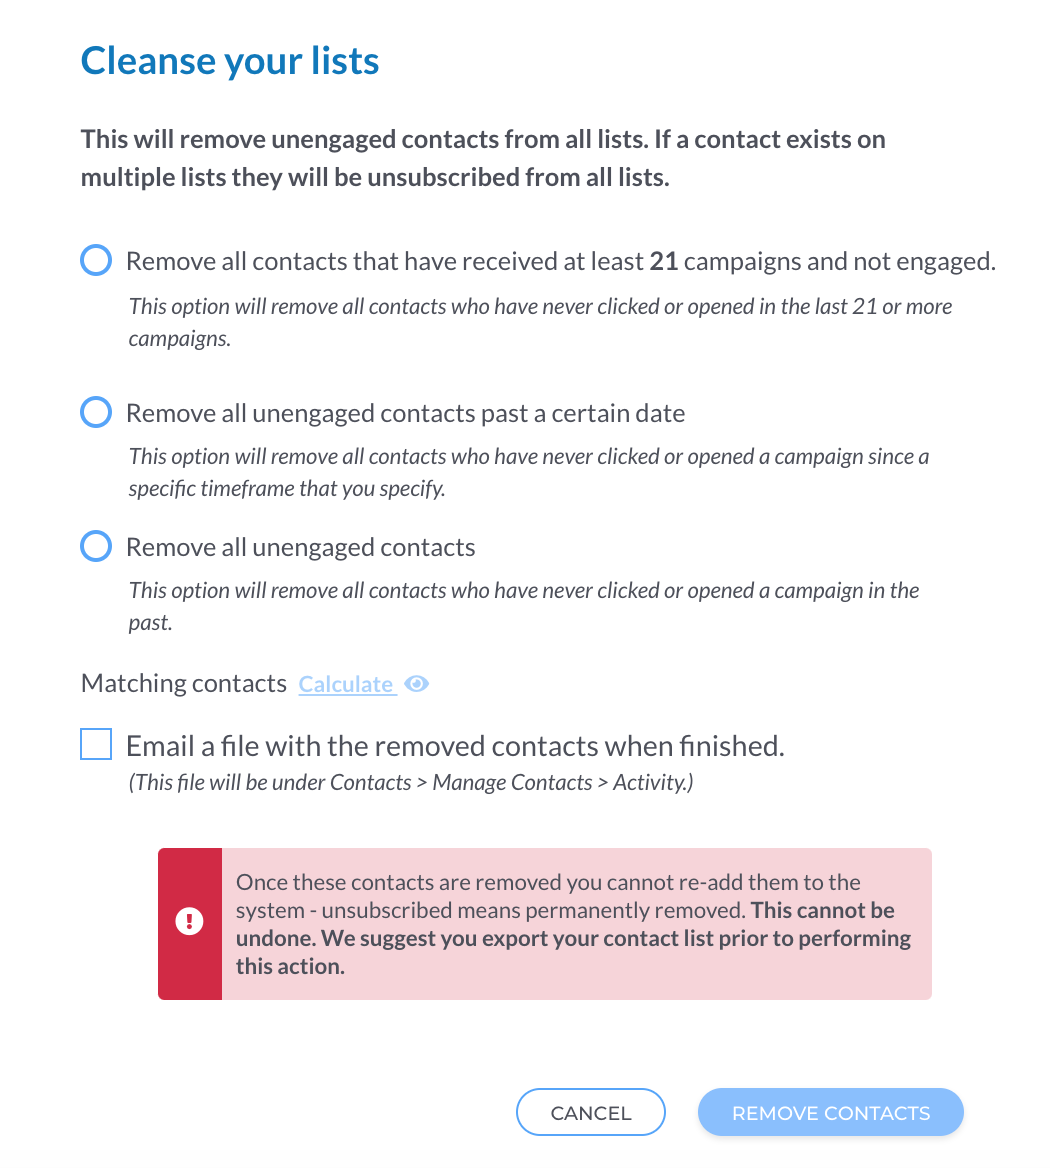
Cleanse List
This feature can apply a list cleansing to all subscribed contacts using either the lifespan of your account, your RoblyENGAGE setting, or a set period of 3, 6, 12, or 24 months.
- RoblyENGAGE: remove all contacts who haven’t engaged with the number of campaigns you’ve specified.
- Choose a time frame. You can opt to remove anyone who hasn’t engaged in the last 3, 6, 12, or 24 months. Use the Get Estimated Removal Total button to see how many contacts will be removed.
- Remove ALL unengaged contacts. This means anyone who has NEVER clicked or opened any email from you sent in Robly.
**Use the Email a File checkbox to get a copy of the contact list that is removed.
To easily see the contacts who aren’t engaging before removing them, Calculate > View Contacts next to Matching contacts.

This will automatically build a segment for the time frame you’ve chosen and you can then add those contacts to their own list using the +Add to List option seen in the segment (see Step 8 in the instructions below).
You can also isolate unengaged contacts manually using Segmentation. Here are those instructions if for some reason you prefer to do it this way.
- Click on Contacts > Segmentation > Create a New Segment.
- Name and Create your segment. For example, if you want to remove anyone who has never opened, you could name it Never Opened. Choose Subscribers Match Any of the Segmentation Criteria.
- Scroll to your newly added segment, which will be at the bottom of the page under any existing segments. Click on the first drop down menu and pick Subscriber Engagement. Using this option you can recreate the options seen above, or eliminate those who have never opened, never clicked, or those whose last open was before or after a certain date.
- Choose Has Not Engaged in _ Months, Has Not Engaged in _ Campaigns, Never Opened, Never Clicked, Last Open Was Before, or Last Open Was After.
- If you chose Has Not Engaged in _ Months, fill in the field with the number of months you want to use, then click Save New Option.
- If you chose Has Not Engaged in _ Campaigns, fill in the field with the number of campaigns received you want to use, then click Save New Option.
- If you chose Never Opened or Never Clicked, you’re done – click Save New Option.
- If you chose Last Open Was Before or Last Open Was After, pick a date using the third calendar column, then click Save New Option.
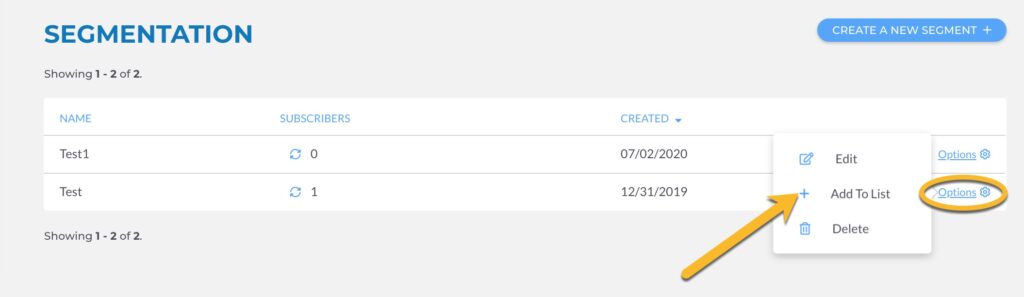
- You will now see the total count of subscribers. Use the refresh icon to update the count over time. Click Options and then +Add to List to add these contacts to a new list.
- We recommend that if you remove these contacts manually that you unsubscribe them. Under Contacts, click on the list name, then Select All, then Unsubscribe.

If any contact who is unengaged and removed from your list wants to be re-added, they can simply re-opt in using your Sign Up Form.