Robly Branding lets you send using your own domain instead of Robly’s.
What does that mean?
For example, let’s say a company called Narwhal Party is using Robly to send out marketing emails (P.S. this domain is still available, someone buy it quick!). Without Branding, all links contained in their email will look something like this: https://email.robly.com/wf/click?23482p21013.
With Branding, that same link in Narwhal Party’s email will appear as something like: https://links.narwhalparty.com/wf/click?23482p21013.
Okay, cool. Why does this matter?
DKIM and SPF authentication is how Internet Service Providers (ISPs) like Google, Yahoo, and Microsoft, scan incoming emails for spam or spoofed addresses.
An email that fails this authentication process is likely to land in spam or junk folders.
Spam filters and ISPs look at links within emails (among other things) to determine whether the email looks trustworthy enough to deliver. They use the reputation of the root domain (so, in our example above, is robly.com without Branding or narwhalparty.com with Branding) to determine whether the links can be trusted.
Implementing a link subdomain (that’s the links.narwhalparty.com part of the URL in the above example) helps in email deliverability because you are no longer relying on click tracking going through a domain that you do not control.
To make sure your emails line up with ISP delivery standards and are landing in inboxes, you should add Robly to your SPF record and set up custom DKIM authentication for your domain.
First Things First
- Updating SPF and DKIM is optional, but highly recommended
- You will need to make the changes outlined here in the settings section of your DNS (Domain Name System) provider’s website/interface. If you’re not sure who your DNS provider is, contact your website/domain host. GoDaddy and Bluehost are two examples of DNS providers.
Set Up Domain Authentication (DKIM)
Step One
To set up DKIM, go to My Account > Settings > Branding > Add New Brand.
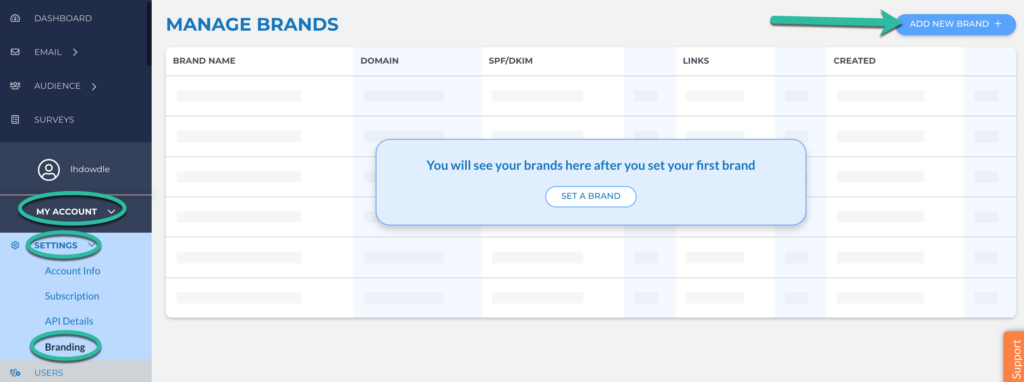
Keep in mind that you must own and have access to the domain you are adding. This means you cannot add any freemail addresses (Gmail, Yahoo, AOL, etc).
Fill in your brand name, from domain, and link subdomain, then click Save:
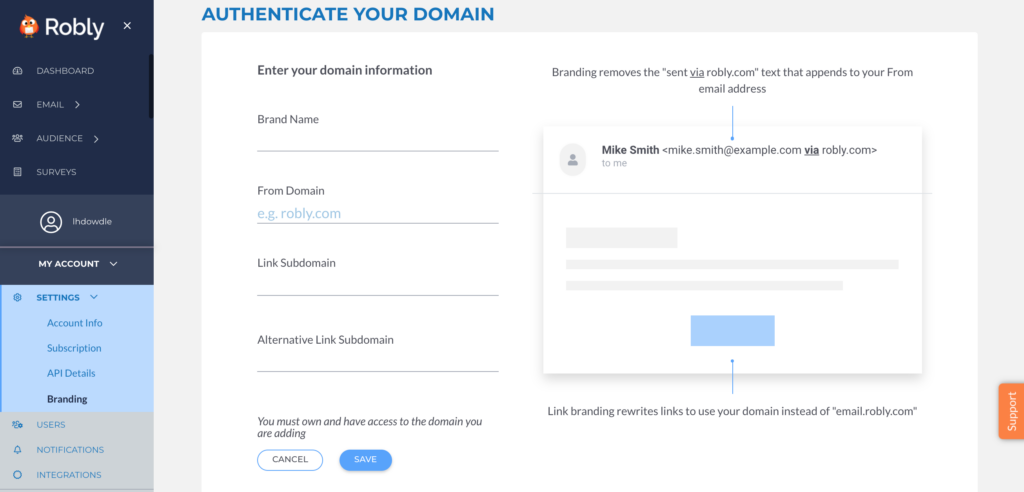
Brand Name: the name of your brand. For example: “Robly”.
From domain: this should be your domain and the gTLD. For example: “robly.com”.
Link Subdomain: The subdomain is what appears before your domain. For example using “links” would result in the subdomain “links.robly.com.” This is the encoded domain that will be used for all links in an email campaign. We auto-suggest “links” but really this could be any word you wanted to use, because if you own your domain, then you have control over what subdomains you create within that domain. It follows, then, that if you’re setting up Branding for a domain, you should make sure you have access to the domain host like GoDaddy or Bluehost.
In case you missed our Narwhal Party example that explains what a link subdomain looks like at the beginning of this post, here it is again:
For example, let’s say a company called Narwhal Party is using Robly to send out marketing emails (P.S. this domain is still available, someone buy it quick!). Without Branding, all the encoded links contained in their email will look something like this: https://email.robly.com/wf/click?23482p21013. The link subdomain in this example is email.robly.com.
With Branding, that same encoded link in Narwhal Party’s email will appear as something like: https://links.narwhalparty.com/wf/click?23482p21013. The subdomain in this example is links.narwhalparty.com. It could be anything they choose though, so perhaps they’d prefer unicorns.narwhalparty.com. That would be okay, too.
Step Two
After you enter your brand information and click Save, you’ll see a chart generate with four DNS records (3 CNAME and 1 TXT).

Now, you need to copy (using the handy Copy buttons provided) and paste each of the names and values for each record into your DNS provider. If you’re not sure how, scroll down to the “Tutorials for Editing DNS Records in Various Domain Providers” section.
You will need to do this for each brand if you’re saving more than one. This must be completed before we can validate the records and send email on your behalf.
Step Three
After records are entered into your DNS correctly, your domain should authenticate within a few moments. In some cases, it may take a bit longer.
After you’ve added these records to your DNS provider, you can check the “I’ve added these records” box and click Verify to check the Status of each record.

Each record will need a status of Valid before the process can be successful.
Troubleshooting
If your DNS Validation fails, click the Debug Validation and I’ve added these records options. Then, click Debug to get more detailed information on why that particular record failed.

Additional details will show in orange under each record:

How to Edit or Delete a Brand, View DNS Settings, or Assign as Default
To edit a brand name, delete a brand, assign as default, or view the DNS settings, click on Options from the main Branding section:

Assign as Default: Assign a default brand if you have more than one.
DNS Settings: View the DNS records and status for each brand.
Edit: Allows you to edit the brand name (but not domain or sublink domain).
Delete: Deletes the brand.
Using Your Brand in a Campaign Send
Once you’ve successfully added a brand, you can use it in your campaign sends.
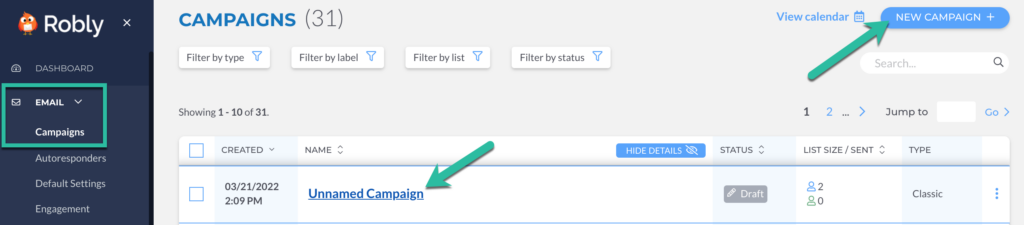
This all happens by clicking Email > Campaigns from the left navigation. Then, click the name of an existing campaign or New Campaign and navigate to the Settings step of the builder.
Click Edit next to From (under Content).
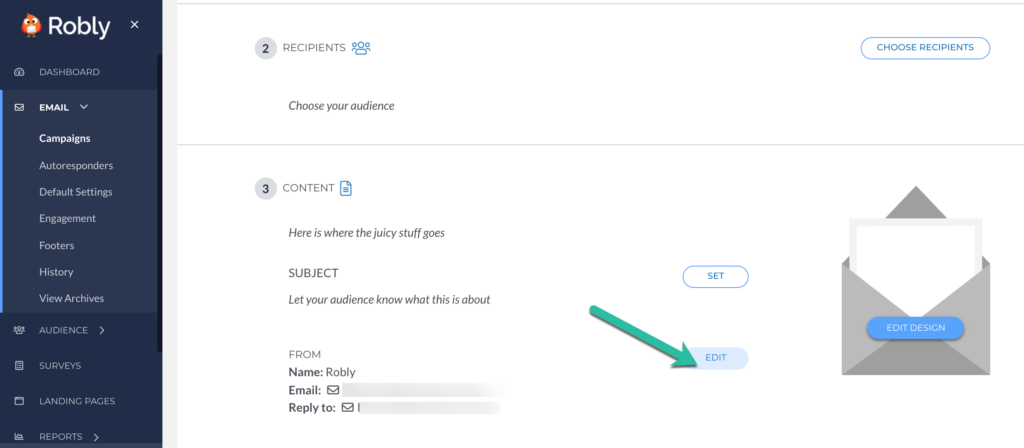
From here, use the Brand drop-down menu to select your brand, and click Save From.

Once a brand is chosen, the From and Reply-to email address fields will either pre-populate any verified email address you already have in your account with this domain or become blank.
You can use any email associated with the brand domain you’ve chosen, but they must match up.
For example, if you choose your mybusiness.com brand, your from and reply-to emails must be name@mybusiness.com.
If you choose “No branding,” the system will default to your original settings for from and reply-to email, as well as links.
Tutorials for Editing DNS Records in Various Domain Providers
We’ve rounded up instructions for how to edit DNS records in some of the more common domain providers. If you don’t see your own provider listed here, contact their support team.
Amazon Web Services: Configuring DNS, Resource Record Types
Dreamhost: DNS Overview
GoDaddy: Add a CNAME Record
Google Domains: DNS Basics
Hostgator: Manage DNS records
Hover: Edit DNS Record
Namecheap: SPF & DKIM
Squarespace: Advanced DNS Settings
Stablehost: How do I get to cPanel?
1&1: Domain Guidelines
After records are entered into your DNS correctly, your domain should authenticate within a few moments. In some cases, it may take a bit longer.
Update SPF Records
To learn to how update your SPF record, click here.