This feature is available to all Pro and Ultimate subscribers. To upgrade to Pro, click on My Account > Upgrade Details.
**Make sure you click Save Changes every time you make changes to your popup form!**
Create a New Popup
1. To create a new exit intent popup form, click Forms > Popup Forms > Create New Opt-In Form.

2. Next, choose which data fields you’d like to include on the popup. You can choose Email only, Name & email, or custom fields selection. Once you’ve chosen the type of field, click Next.

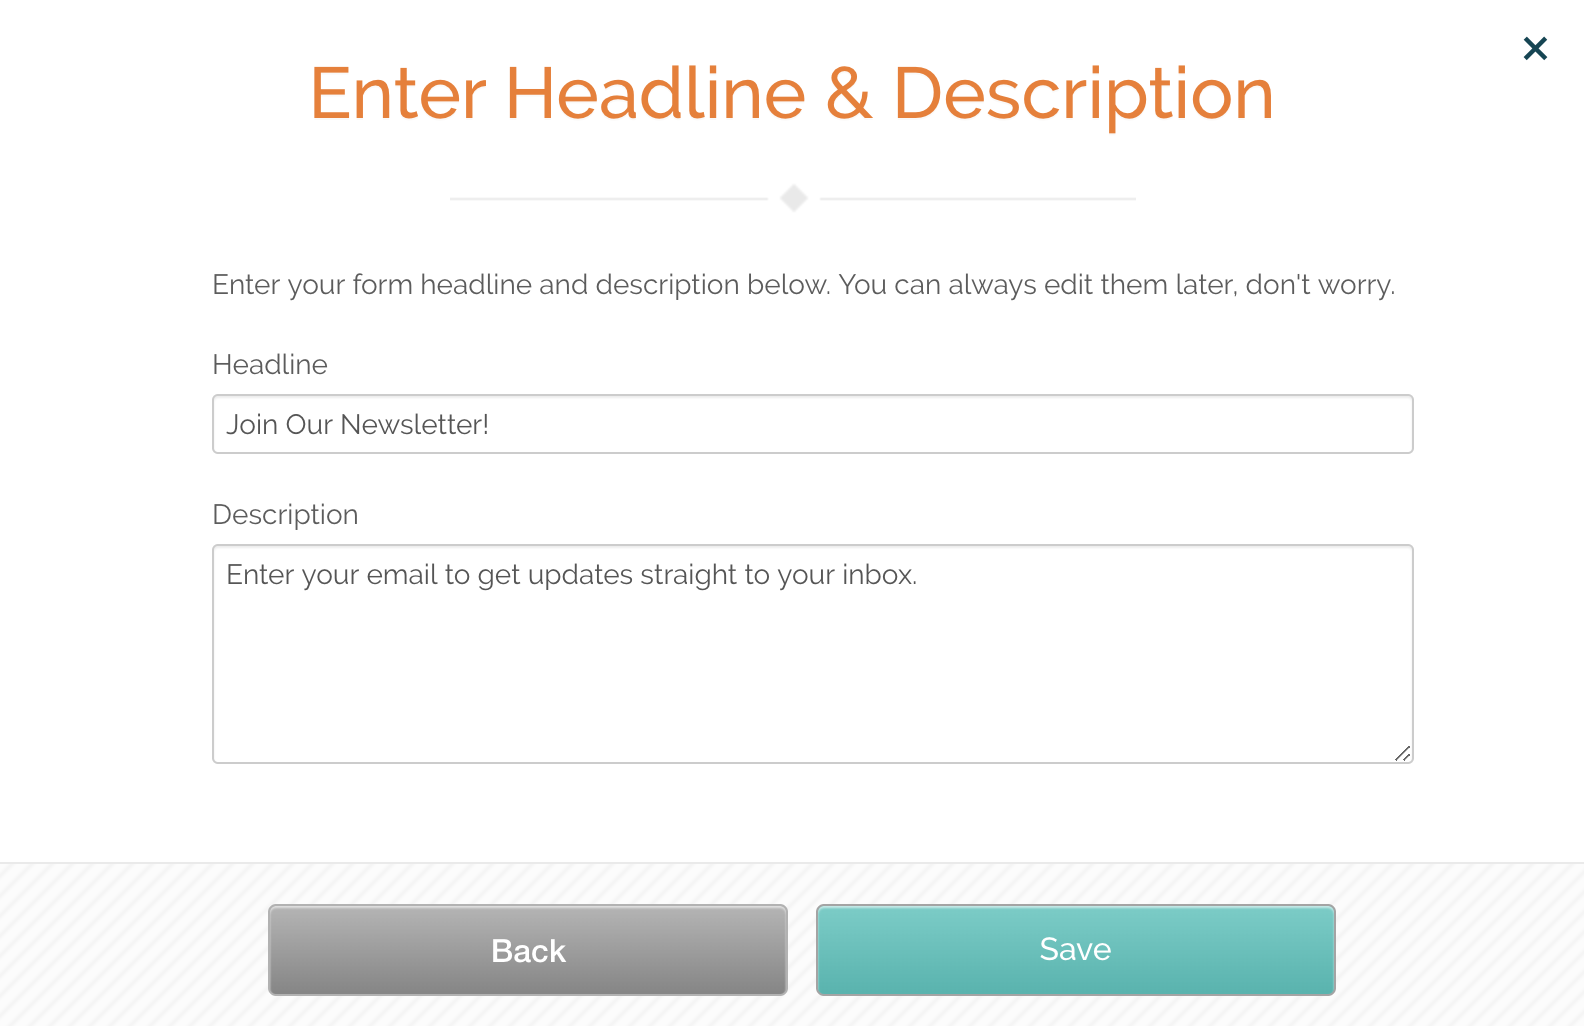
3. Next, choose a Headline and Description for the form. Then, click Save. You can always edit these later!
On this next screen, you can edit all aspects of the form itself. Let’s start with Popup Design. But first…
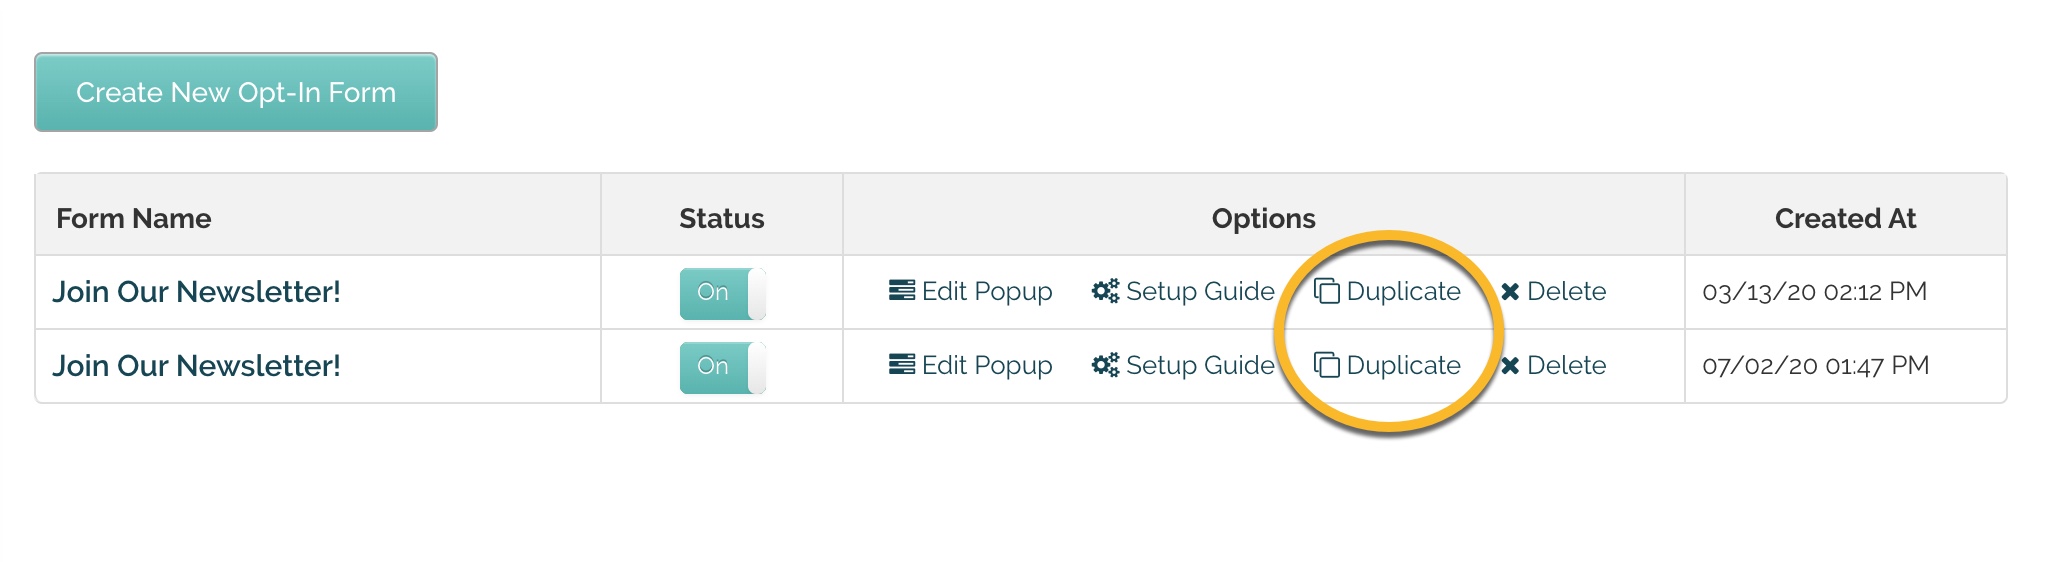
Copy An Existing Popup
To copy an existing popup, simply click Duplicate next to the name of the popup you want to copy.
DESIGN YOUR FORM
Popup Design
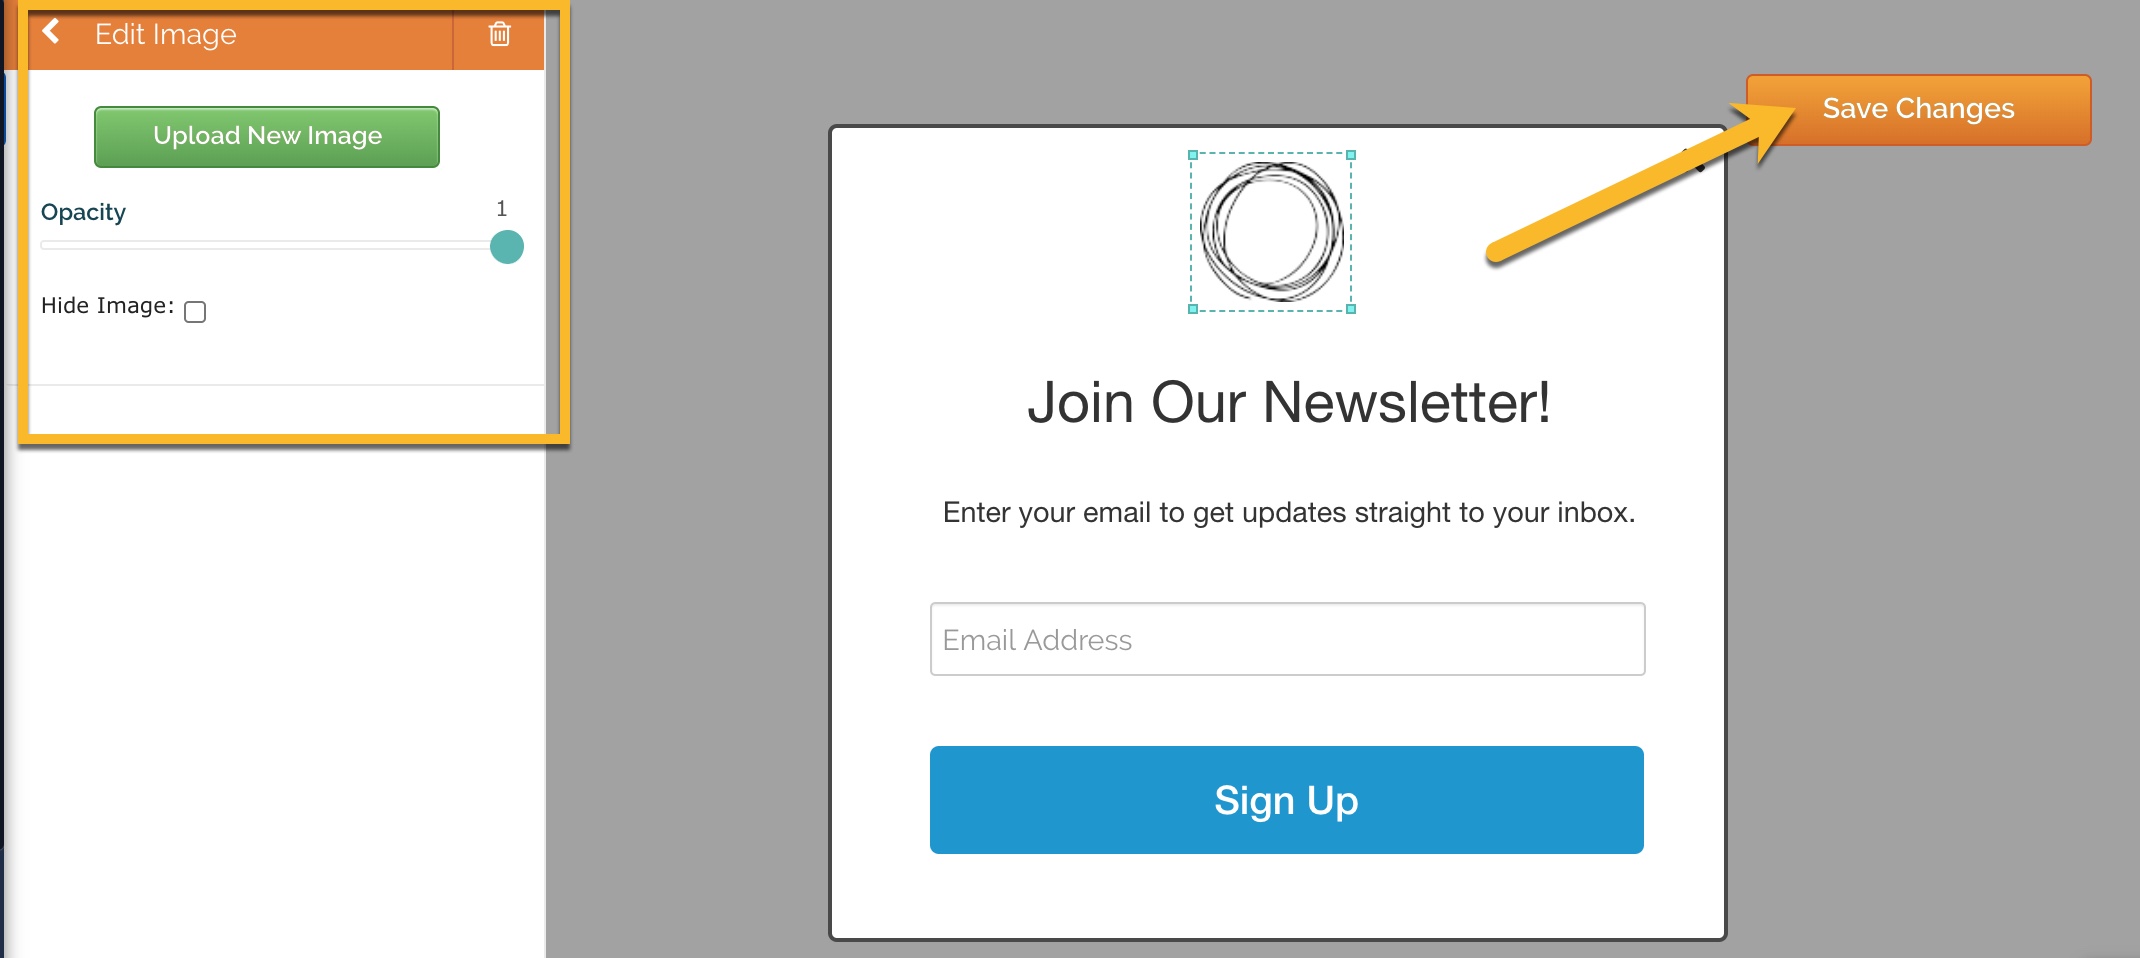
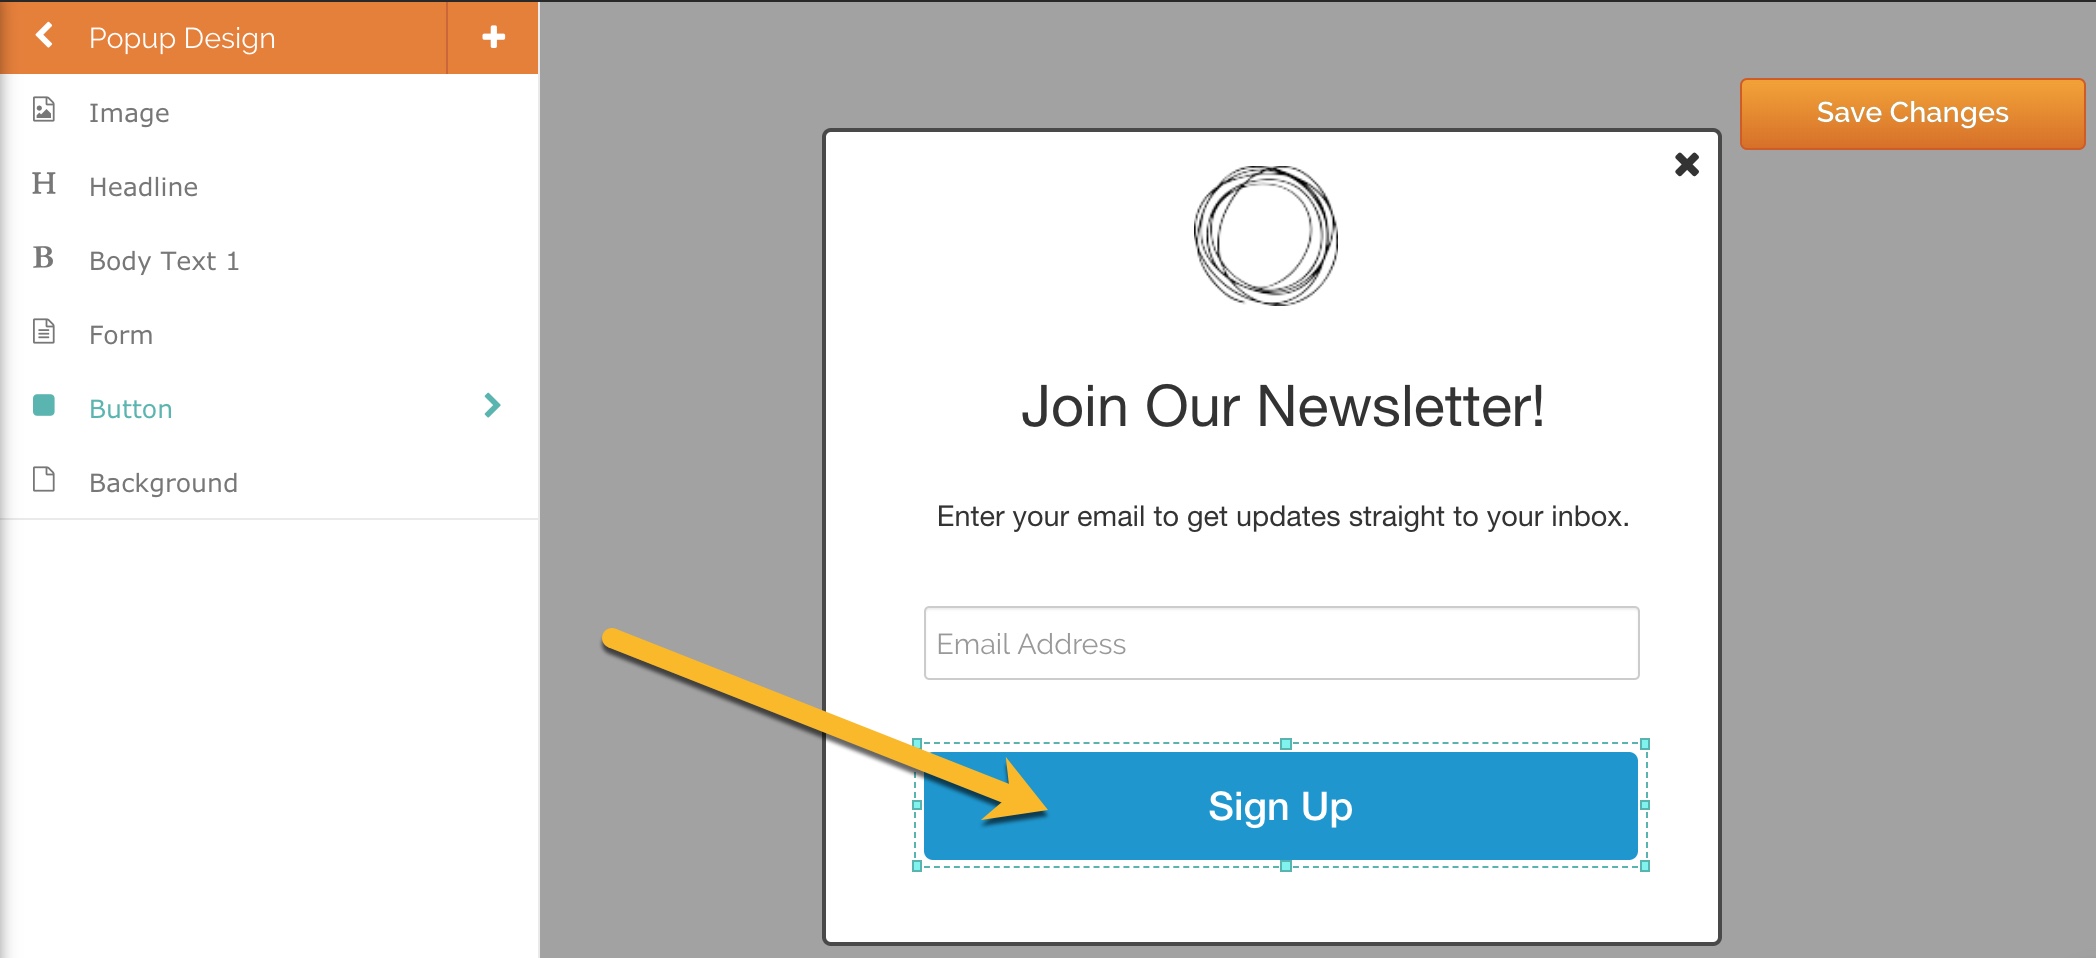
Then, to edit any individual component, such as Image, Headline, Body Text, Form, Button, or Background, click that item, then click the turquoise arrow on the right to load that particular set of editing options.

You will then see your options for that particular component. For image, you’ll see the option to upload a new image, hide the image, or change the opacity. Don’t forget to save your changes! Use the back arrow to return to the original menu.
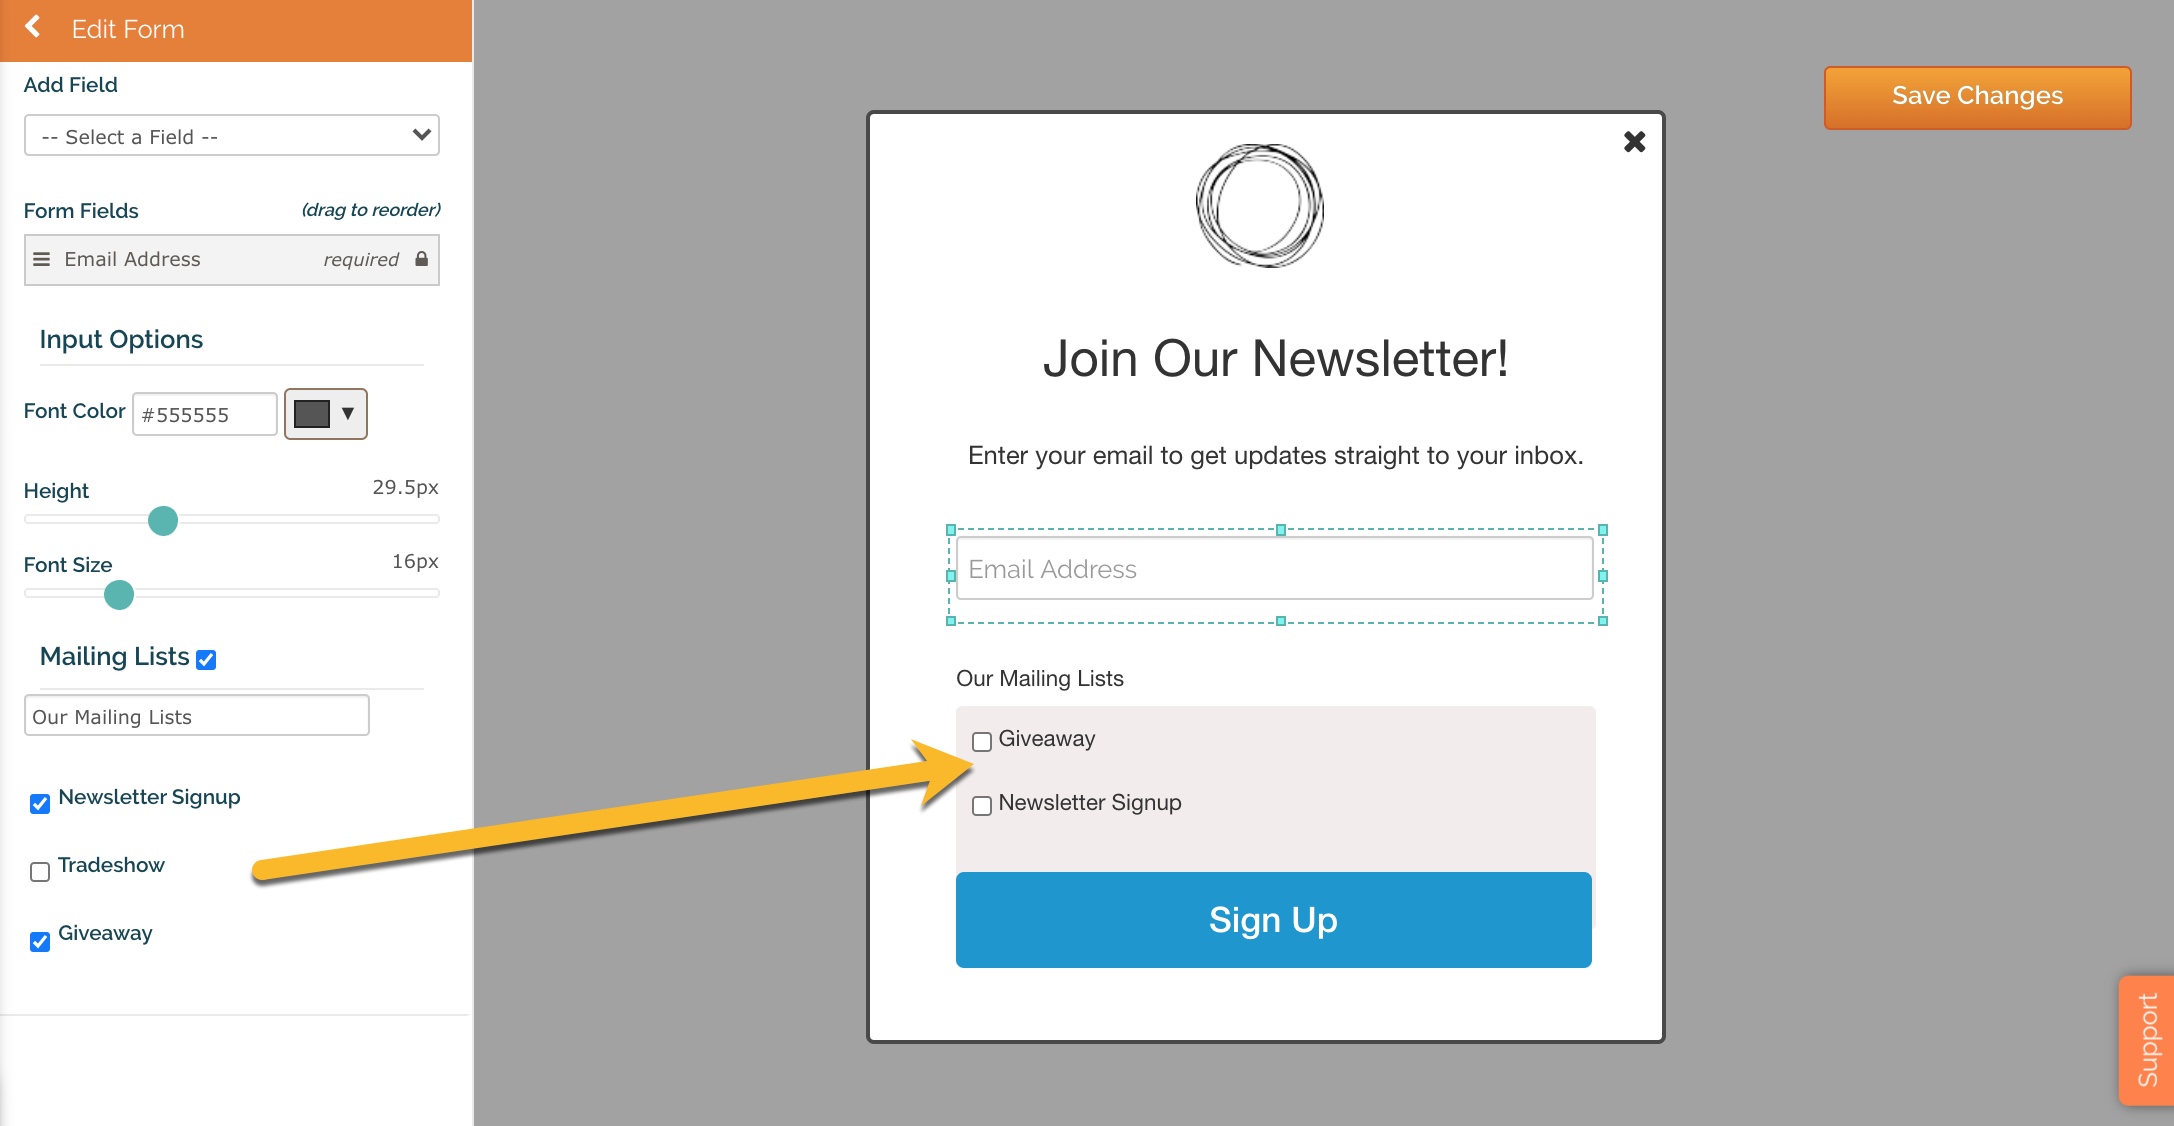
You can also give them the option to sign up for different lists. To add your list(s) to the form, click Popup Design > Form. Then, check the box next to Mailing Lists. Choose which list(s) you want to be included on the popup by clicking the box(es) next to them. They will then show up on the form.
To drag individual items around the form, click any individual portion of the form and move it to where you want it to go.
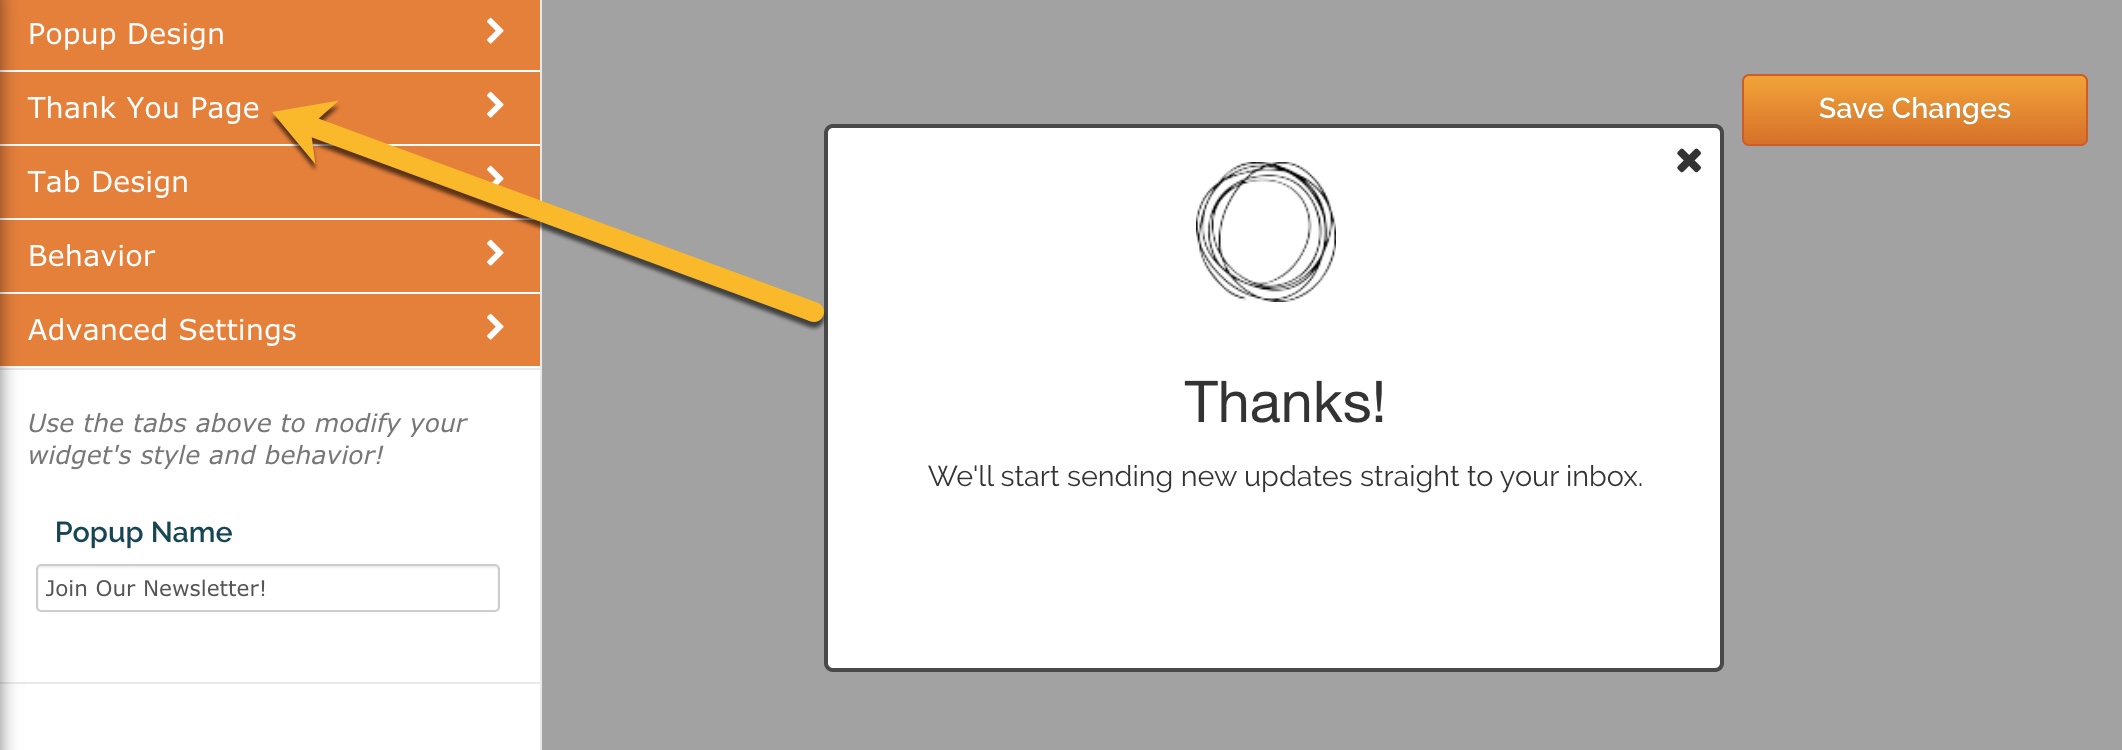
Thank You Page
Click Thank You Page to edit the look and text for your form. From here, you can edit the Image, Headline, Body Text, add a Button, and adjust the background:
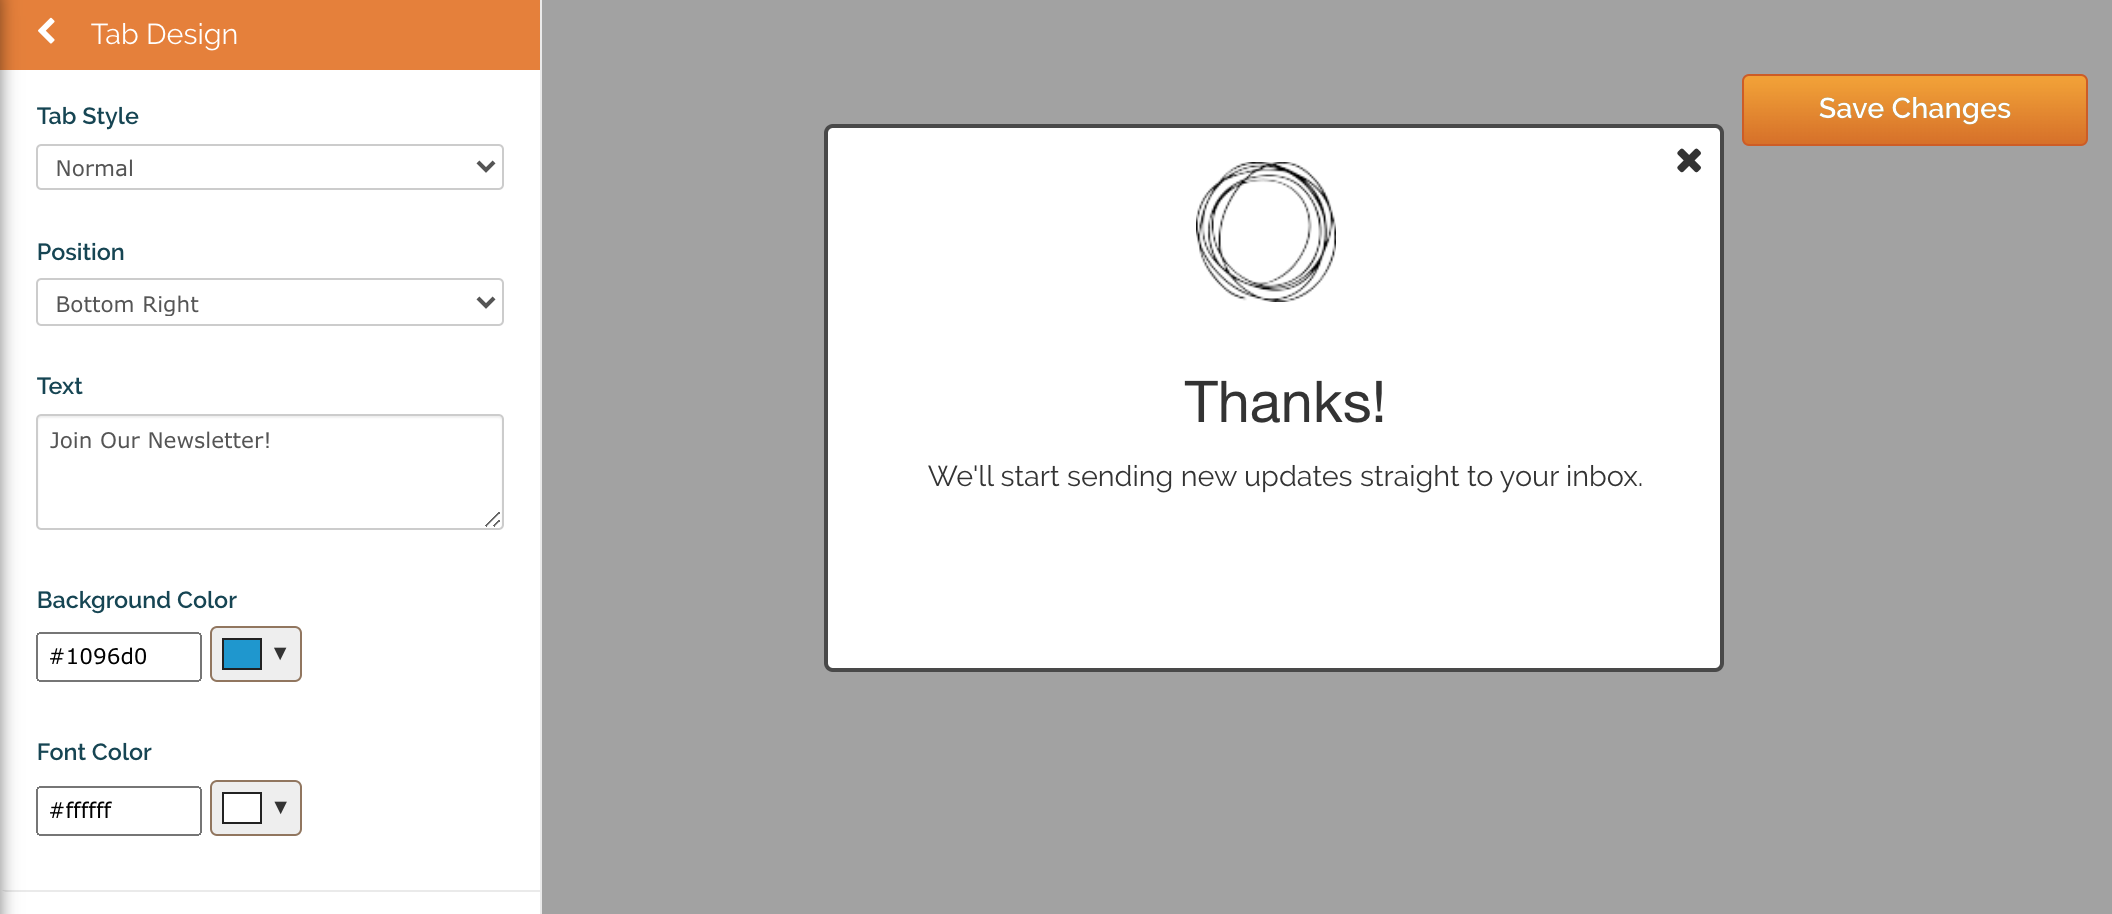
Tab Design
Use the Tab Design option to adjust the tab style, position, text, background color, and font color. This is the tab people will see on your website. By default, it says Join Our Newsletter, but you can change it to whatever you like. Pro tip: Keep it short!
Behavior
From this tab, you can control how your popup form behaves on your website.
POPUP FEATURES
Show on Exit-Intent: This means someone will see the popup when the click to navigate away from your website.
Timed Popup: The form will pop up after the set amount of time that you choose.
Frequency Limit: This will set how often the popup will show. The trigger is EITHER a click to your popup tab OR a click to navigate away from your website – whichever happens first.
Desktop & Tablet: Choose whether or not you want the form to show on desktop computers and tablet devices.
Mobile Devices: Choose whether or not you want the form to show on mobile devices.
OPT-IN FEATURES
Captcha Enabled: You can choose to have someone complete a captcha rather than Double Opt-In.
Double Opt-In: This will send a confirmation email to the recipient that they must click on to confirm their email subscription.
Advanced Settings
Auto Assign Contacts to a List: To automatically assign contacts to a list, check the boxes next to the list name(s) you want your new email addresses to go into. Remember to Save Changes!
IMPLEMENT YOUR POPUP
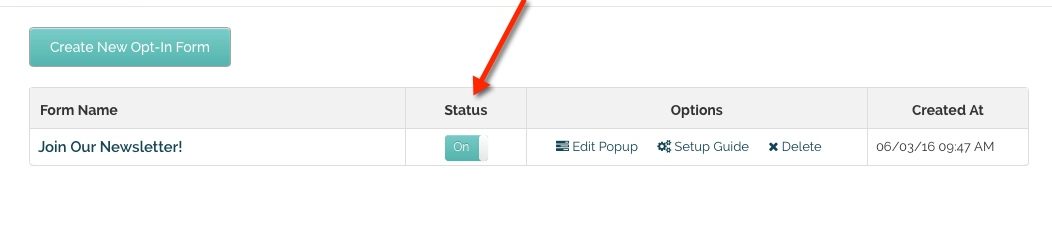
To add the popup form to your website, click Forms > Popup Forms.
Then, toggle your form’s Status to On.
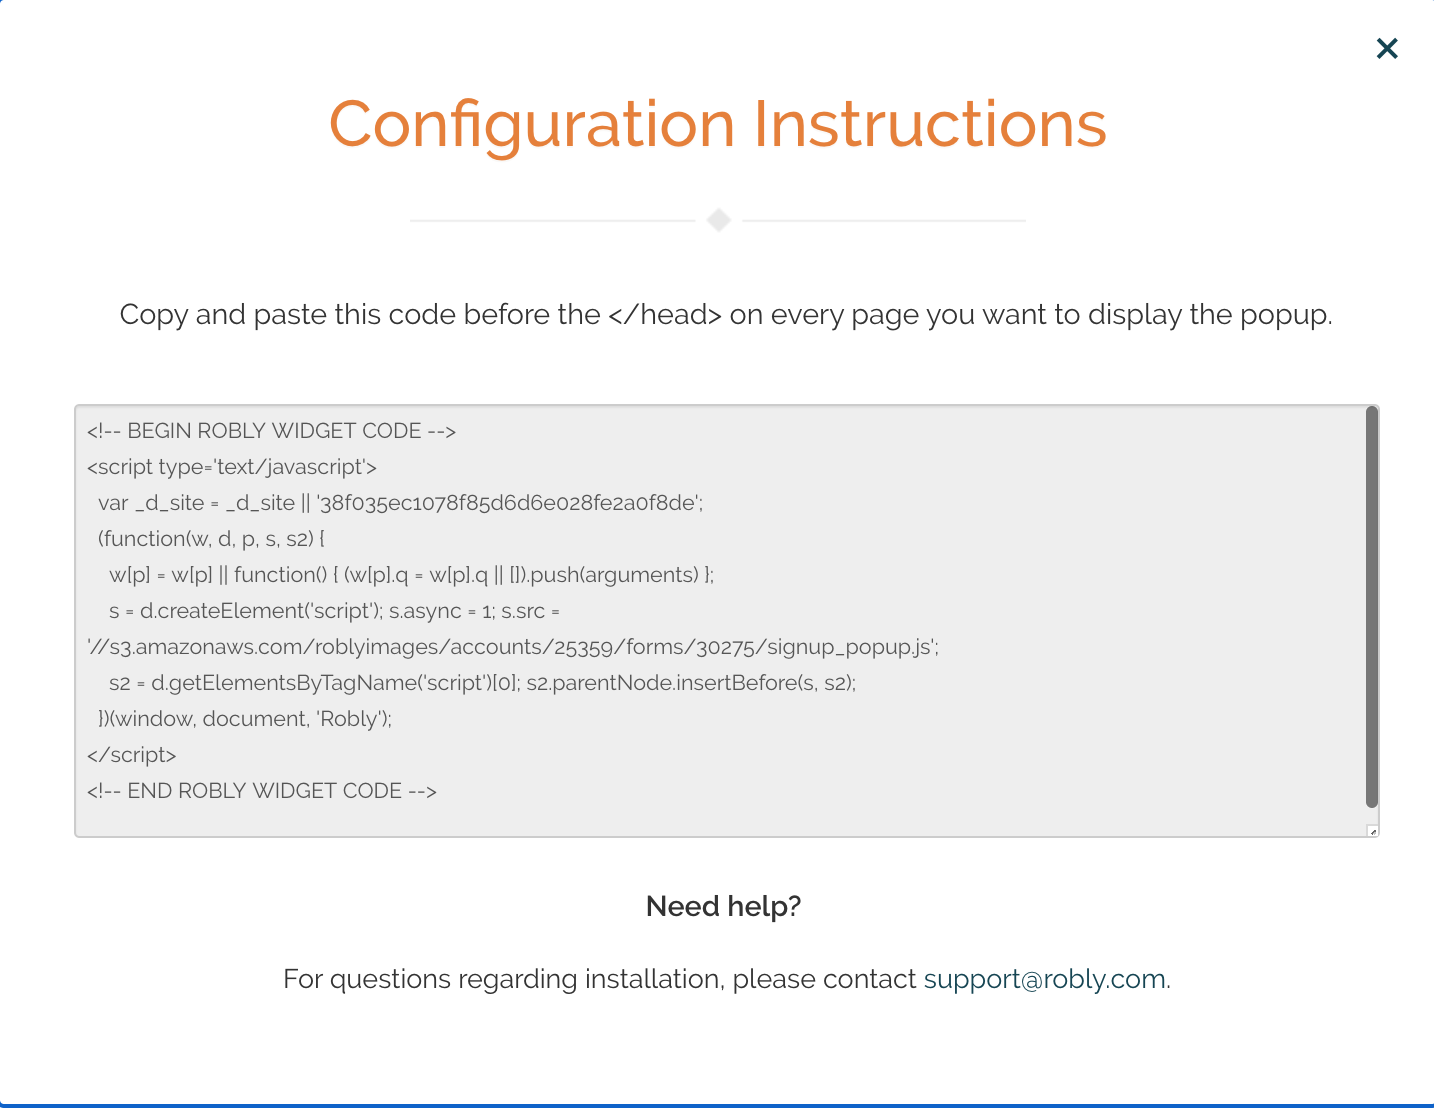
Click Setup Guide.
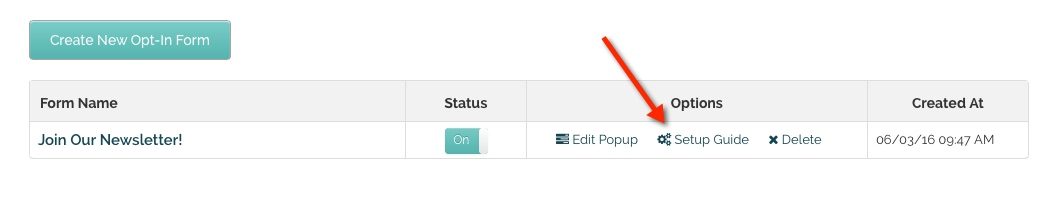
Copy and paste the HTML code in the box before the </head> tag on every web page you want the popup to show on.