What are Autoresponders?
Autoresponders let you create and send campaigns to new subscribers automatically. You can create one or a series of welcome or promotional emails and control when the new subscriber receives them. For example, you could build a welcome email that is triggered to send to a new subscriber 1 hour after they sign up. Autoresponders will work for both new contacts that you import, adding a single subscriber, or any new contacts who sign up via your sign up form.
How do I set up an Autoresponder?
1. It’s easy! Just click on Email > Autoresponders in your Robly account and then click New Autoresponder+.
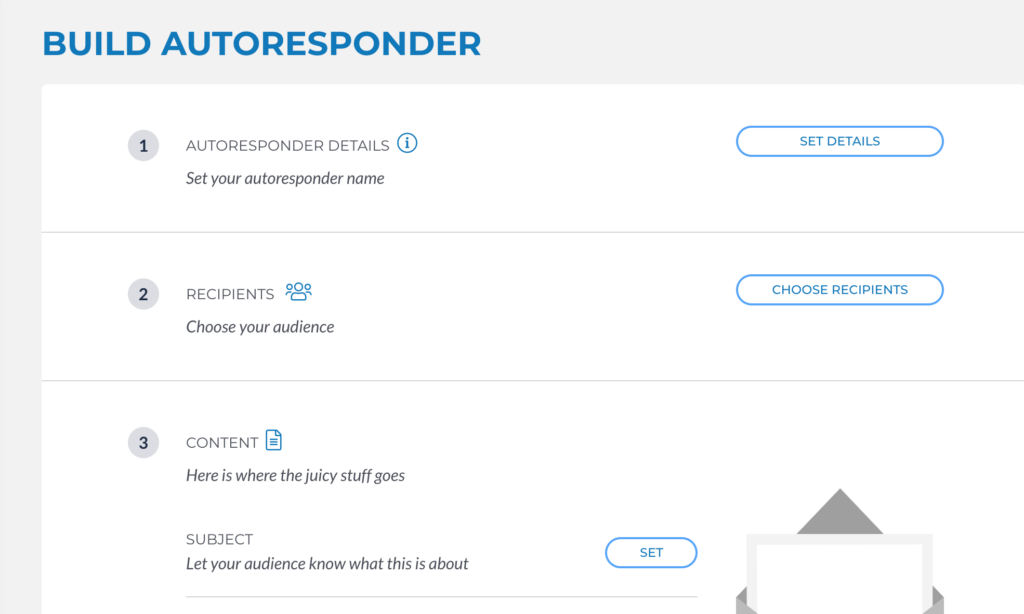
2. You will go through the regular campaign build process for your Autoresponder campaign.
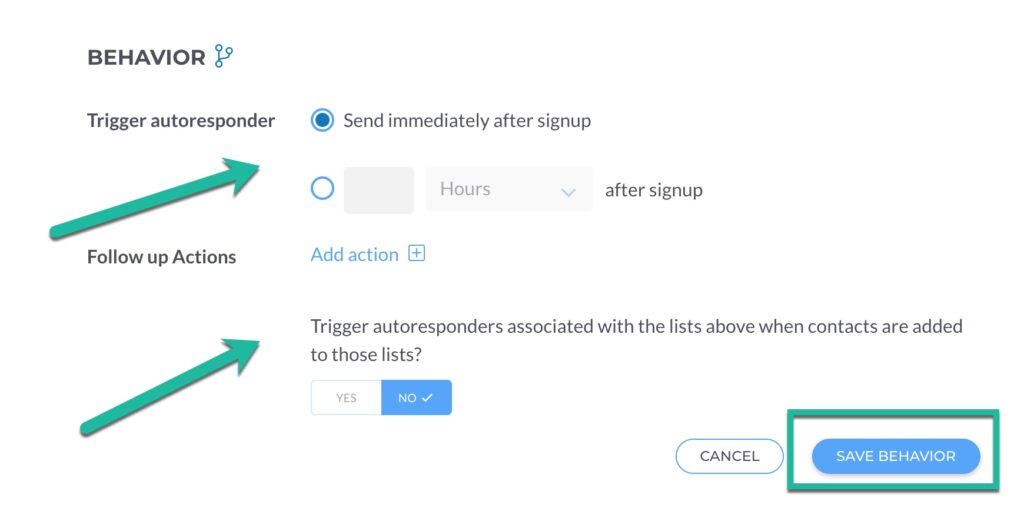
3. Now, you are going to set your Autoresponder trigger. Find that by clicking Set Behavior next to Behavior.
4. Choose the amount of time after signup that you want the recipients to get the email, or choose to send immediately after signup. You can also set Follow-up Actions and trigger autoresponders associated with the lists you chose as your recipients above. Click Save Behavior when you’re finished.
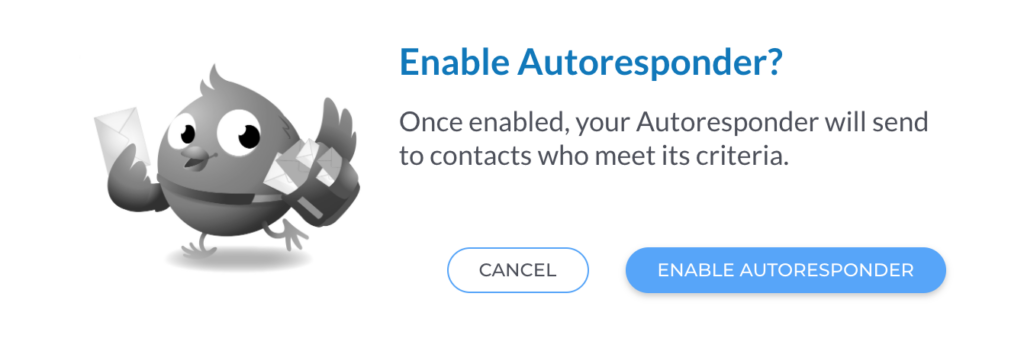
5. After you’re finished, click Enable Autoresponder.
6. On the pop-up, click Enable Autoresponder.
7. Your scheduled Autoresponders will display under Email > Autoresponders. From there, you can toggle any Autoresponder ON or OFF under Status. You can Edit, Report, Duplicate, or Delete the autoresponder by clicking the three dots on the right side. You can also view it by clicking the name.
How do I use an existing campaign as an Autoresponder?
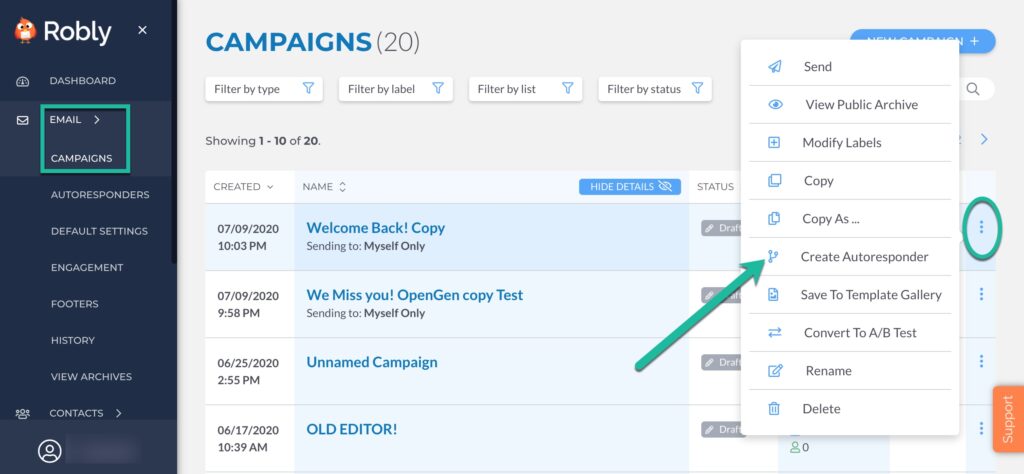
So easy! Just find the campaign you want to use under Email > Campaigns. Then, click the three dots on the right of the campaign, and choose Create Autoresponder.
This will create a new Autoresponder under your Autoresponder tab that you can now edit and set up.
How do I connect my Popup Form to my Autoresponder?
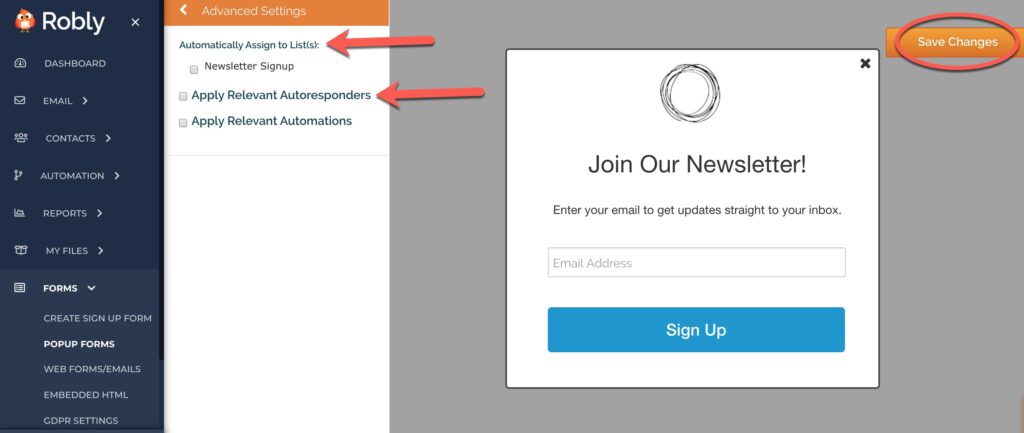
1. Go to Forms > Popup Forms. Then, click Edit Popup:
2. Go to Advanced Settings, choose the same list that your Autoresponder is set to, and click Apply Relevant Autoresponders. Don’t forget to click Save Changes!
Importing Contacts and Enabling Autoresponders
You can choose whether or not to enable your existing Autoresponders during a contact import for both Add a Single Subscriber and a bulk import.
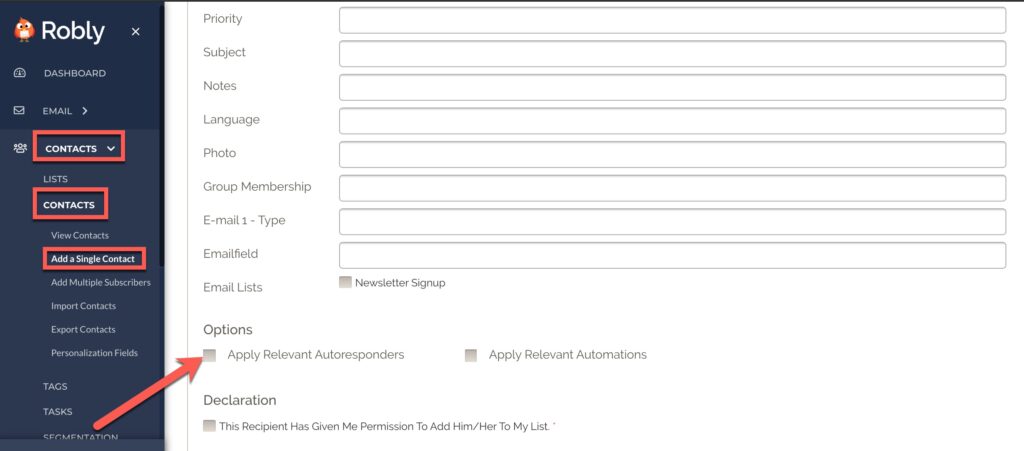
For Adding a Single Subscriber:
Click Contacts > Contacts > Add a Single Contact and then click Apply Relevant Autoresponders under Options. Click Add Person in the bottom right when you’re finished.
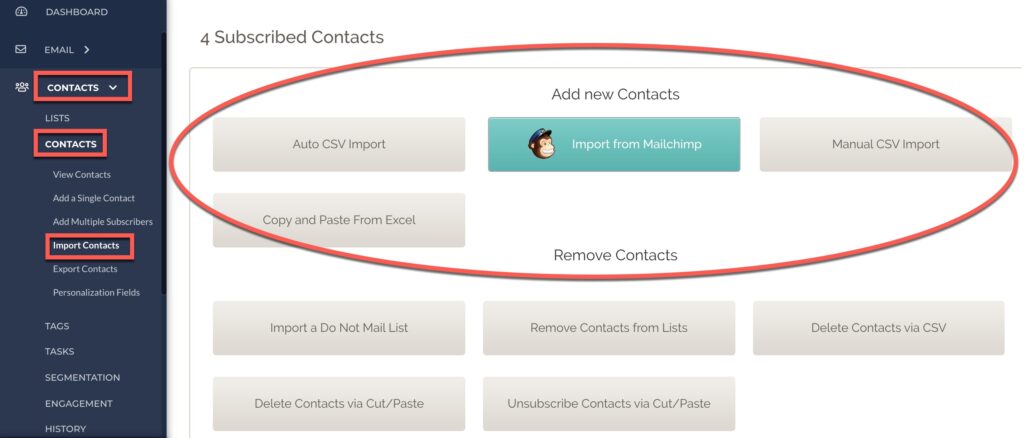
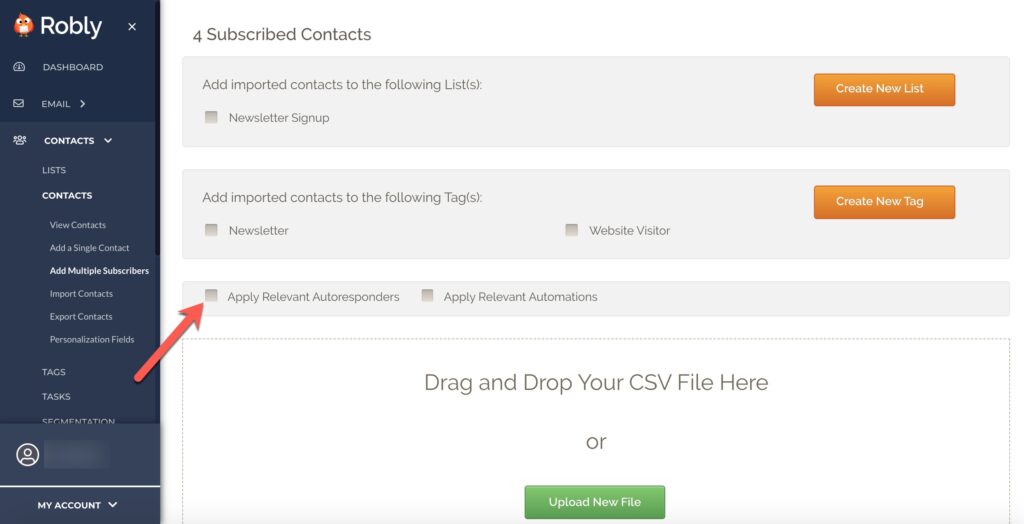
For Importing Multiple Contacts or Bulk Import:
Click Contacts > Contacts > Import Contacts and choose how you want to import them.
Then, check the box to Apply Relevant Autoresponders.
Reporting
Your reporting stats work the same as a regular campaign. You will see the stats for any given Autoresponder in the columns to the right of the Autoresponder name. Click into any section by clicking on the different color numbers to see more detailed information.
*In Queue refers to Autoresponders that are queued to be sent out with the next batch of outgoing Autoresponders.
How Do I Stop or Turn Off an Autoresponder?
Turn any Autoresponder off or on using the toggle buttons seen above in the Status column.
A few things to note:
- If you turn an autoresponder off, change the time, then turn it on: all new autoresponder “events,” or sends, will be for the new time. Any contact that was imported/added/signed up prior to this action would be set for the old time.
- If you turn an autoresponder off, edit your template, and turn it on: same as above.

